Once you have installed and configured your IDERA Dashboard, you can log in to the web console by doing either of the following:
1. Access the IDERA Dashboard through the Start Menu.
- Click 'Start', then All programs>Idera>Idera Dashboard.
- Click 'Idera Dashboard' application and it automatically opens your default browser with an HTTP connection.
- When the IDERA Dashboard web console launches on your browser, use your Windows user account<domain\user> with the respective password to log in to the product.
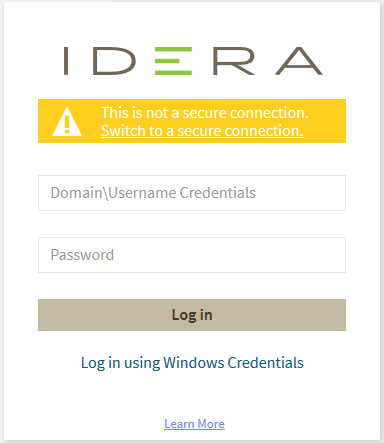
The IDERA Dashboard allows you to change to a secure connection. Click the 'Switch to a secure connection' option and it will automatically redirect you to a connection with HTTPS.
In order to establish a secure connection, you need a CA-signed certificate. Self-signed certificates are no longer supported by Chrome, Firefox and Internet Explorer browsers.
2. The second option to log in to the IDERA Dashboard is as follows.
- Open your selected Browser. Make sure it is compatible with the IDERA Dashboard browser requirements.
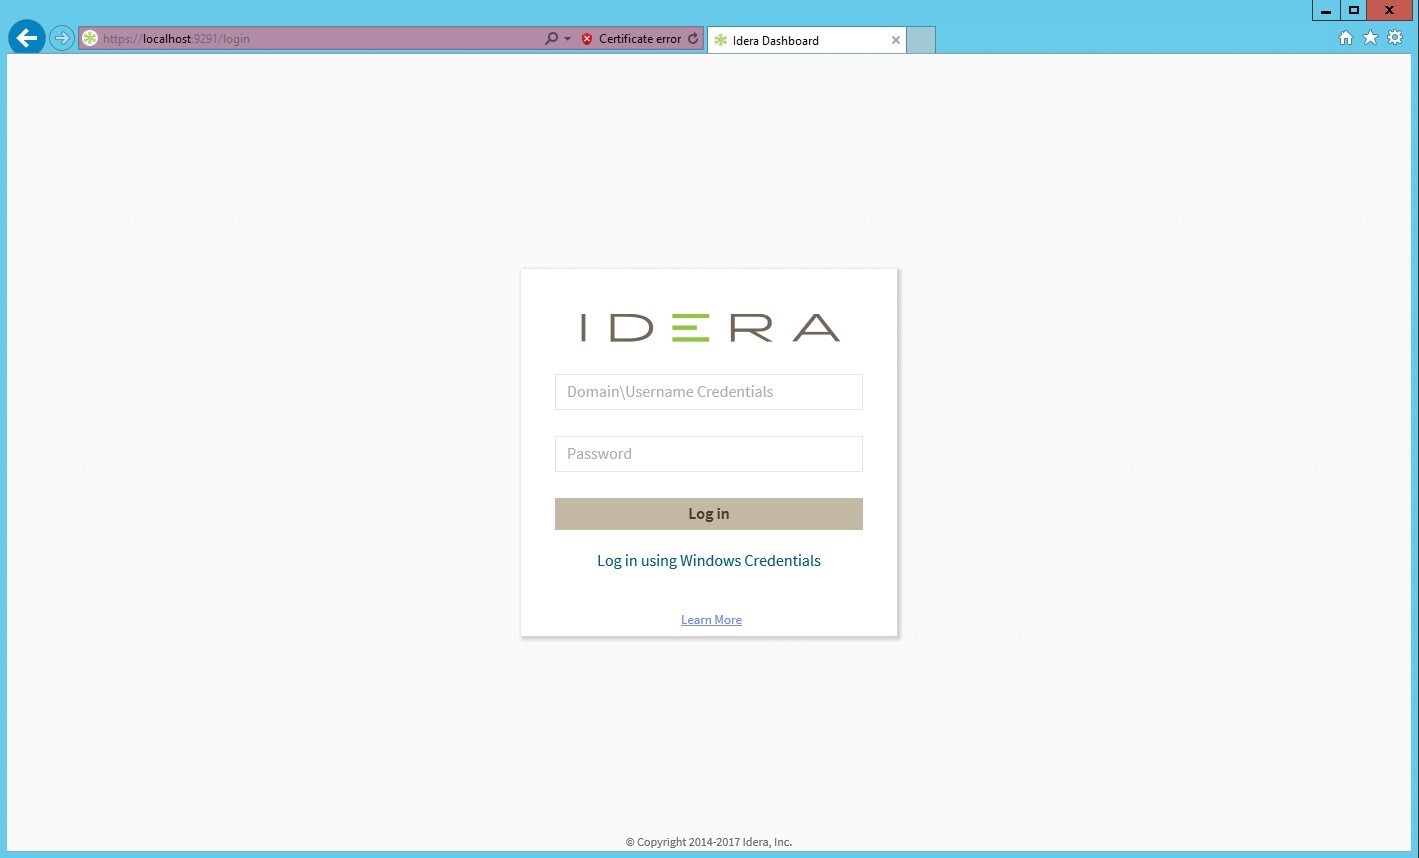
- Type the IDERA Dashboard product URL: https://<machinename>:<port> where <machinename> is the name of your host or machine, and <port> is the port specified during installation. The default URL is https://<localhost>:9291 or https://<machinename>:9291.
- When the IDERA Dashboard web console launches on your browser, use your Windows user account <domain\user> with the respective password to log in to the product.
Internet Explorer Compatibility Mode
Internet Explorer 11 displays any local connection in compatibility mode by default. It displays the IDERA Dashboard also in this mode.
Follow the next steps to change this:
- Go to the browser settings.
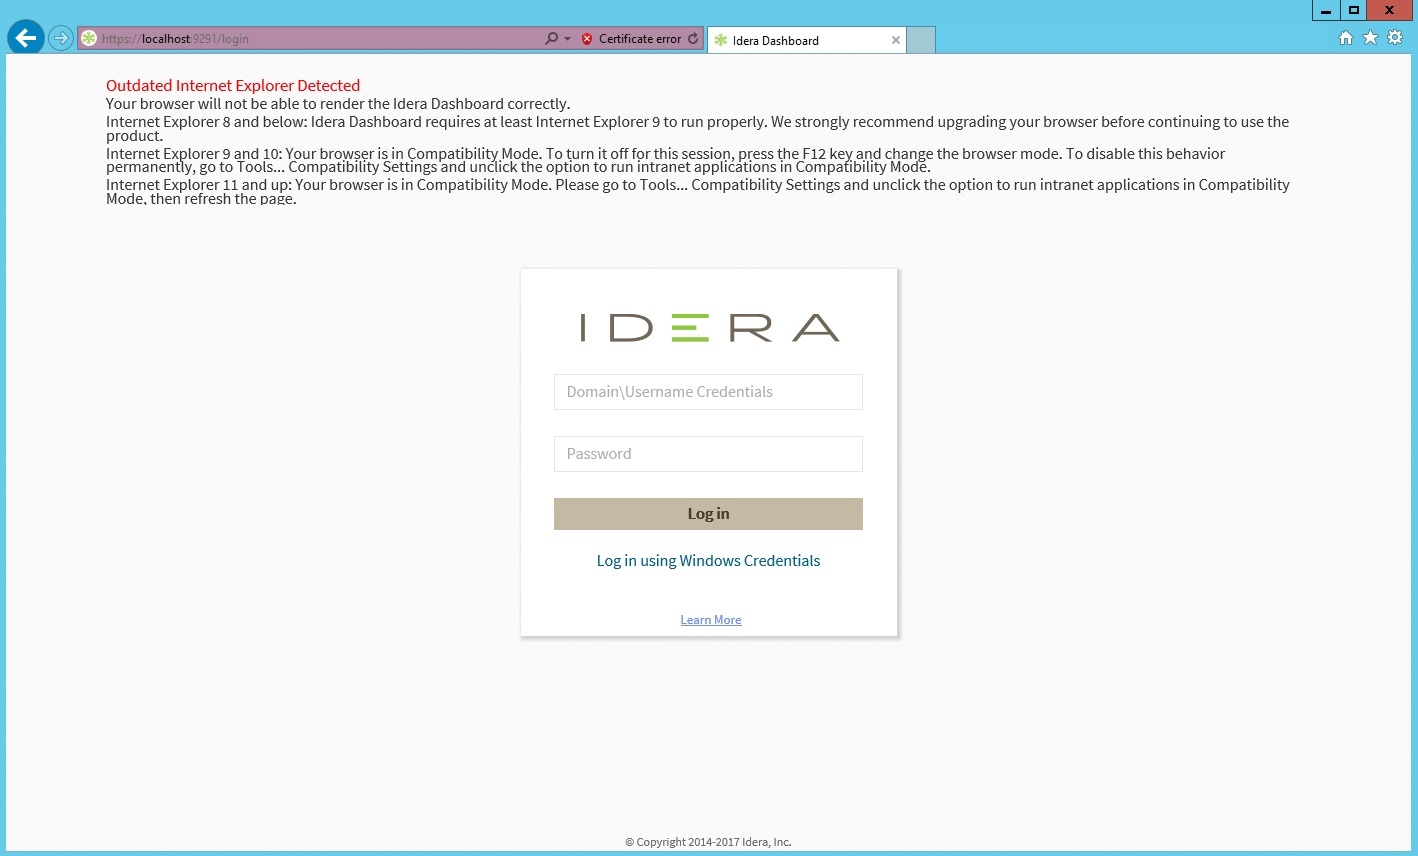
- Choose Compatibility View Settings.
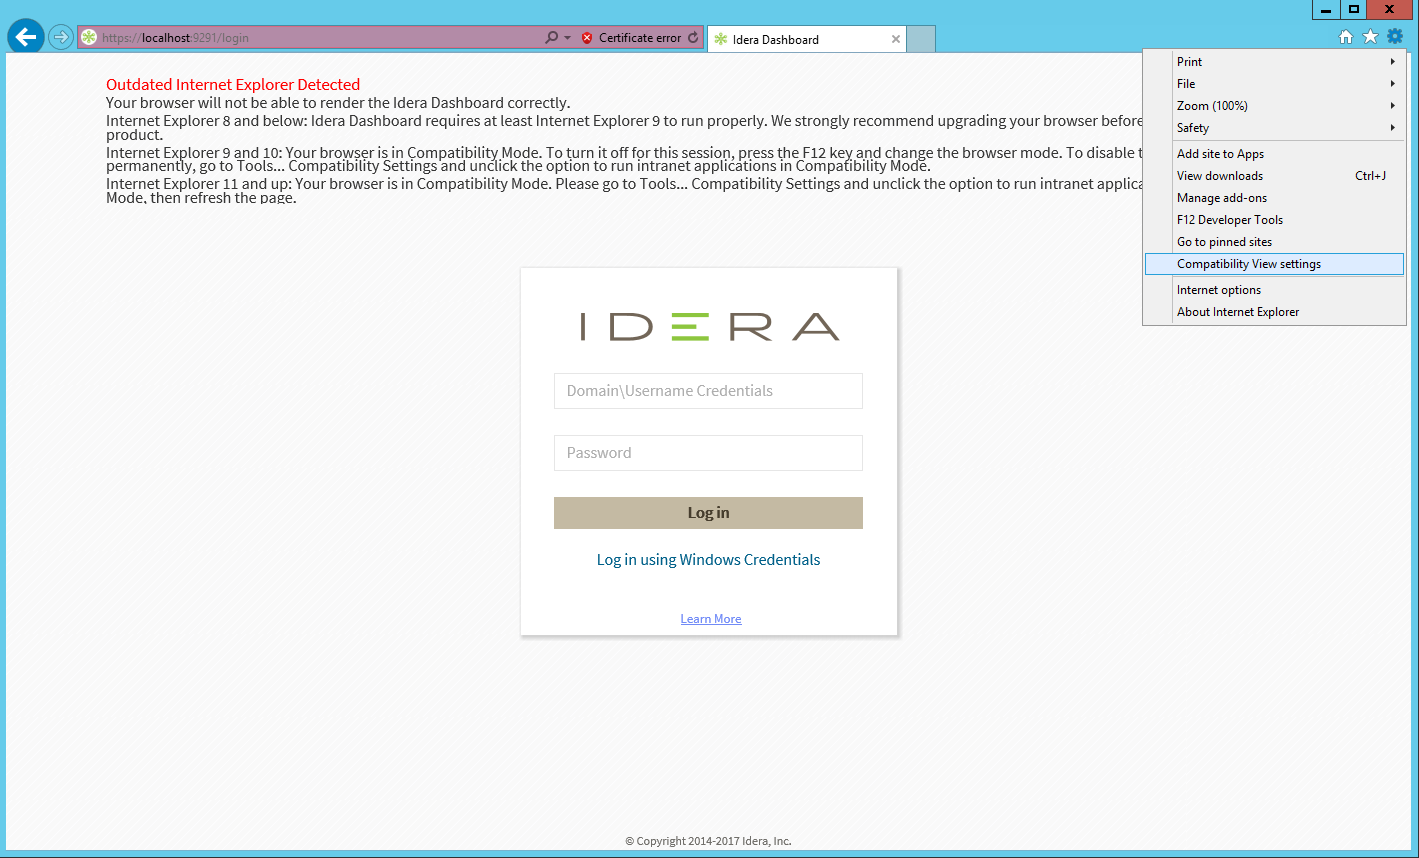
- Clear the "Display intranet site in compatibility view" check box.
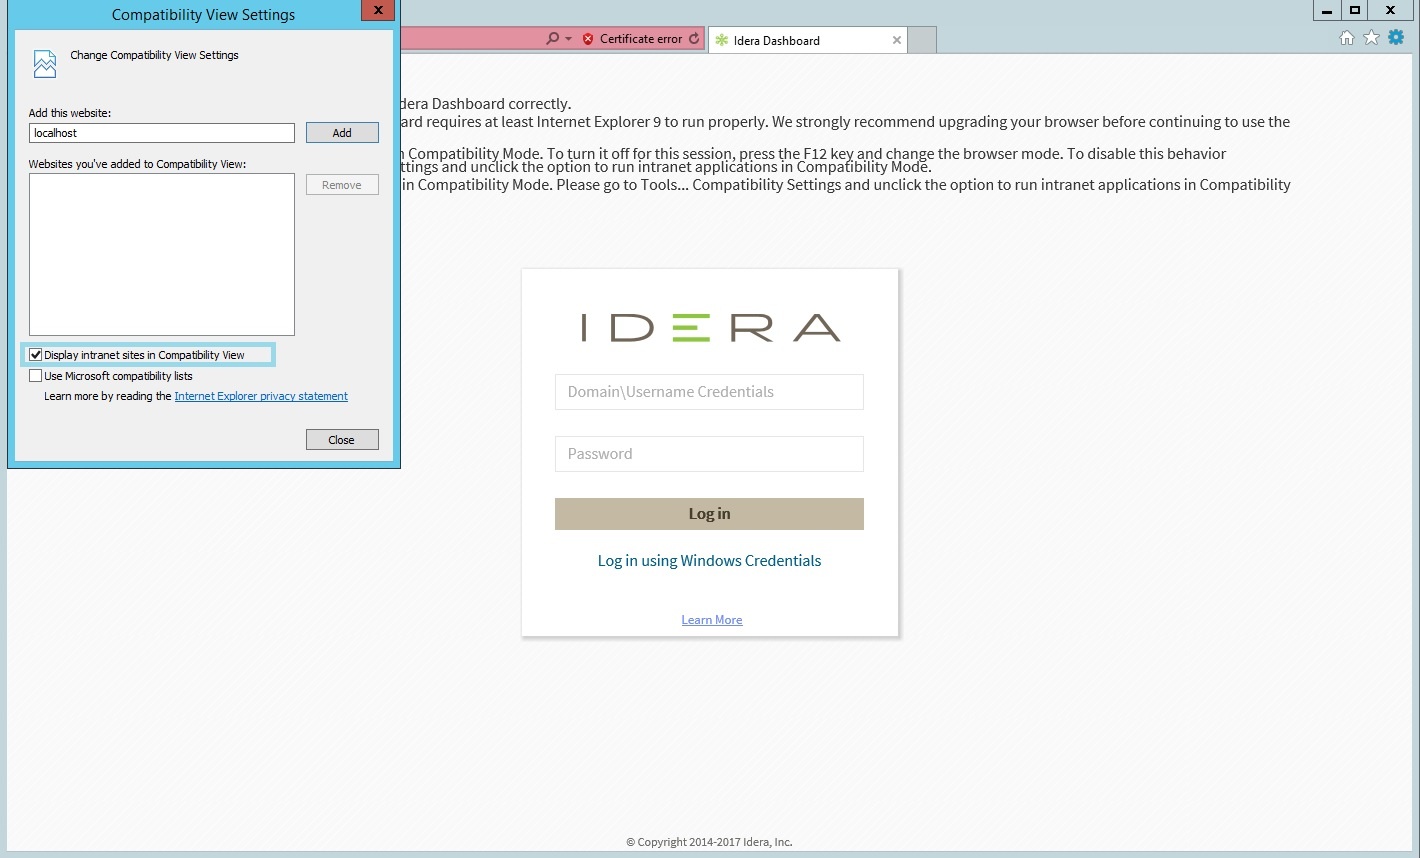
Refresh the page and log in with your credentials.