The Administration tab gives you easy access to manage SQL BI Manager options such as SQL BI Service instances, Email alerts, and alerts threshold configuration.
In the Administration tab you can:
- Enable or disable alerts and thresholds
- Configure alerts thresholds
- Add SQL BI Service Instances for monitoring
- Configure SMTP settings for alerting
- Configure Email alerts
- Manage Monitored Instances
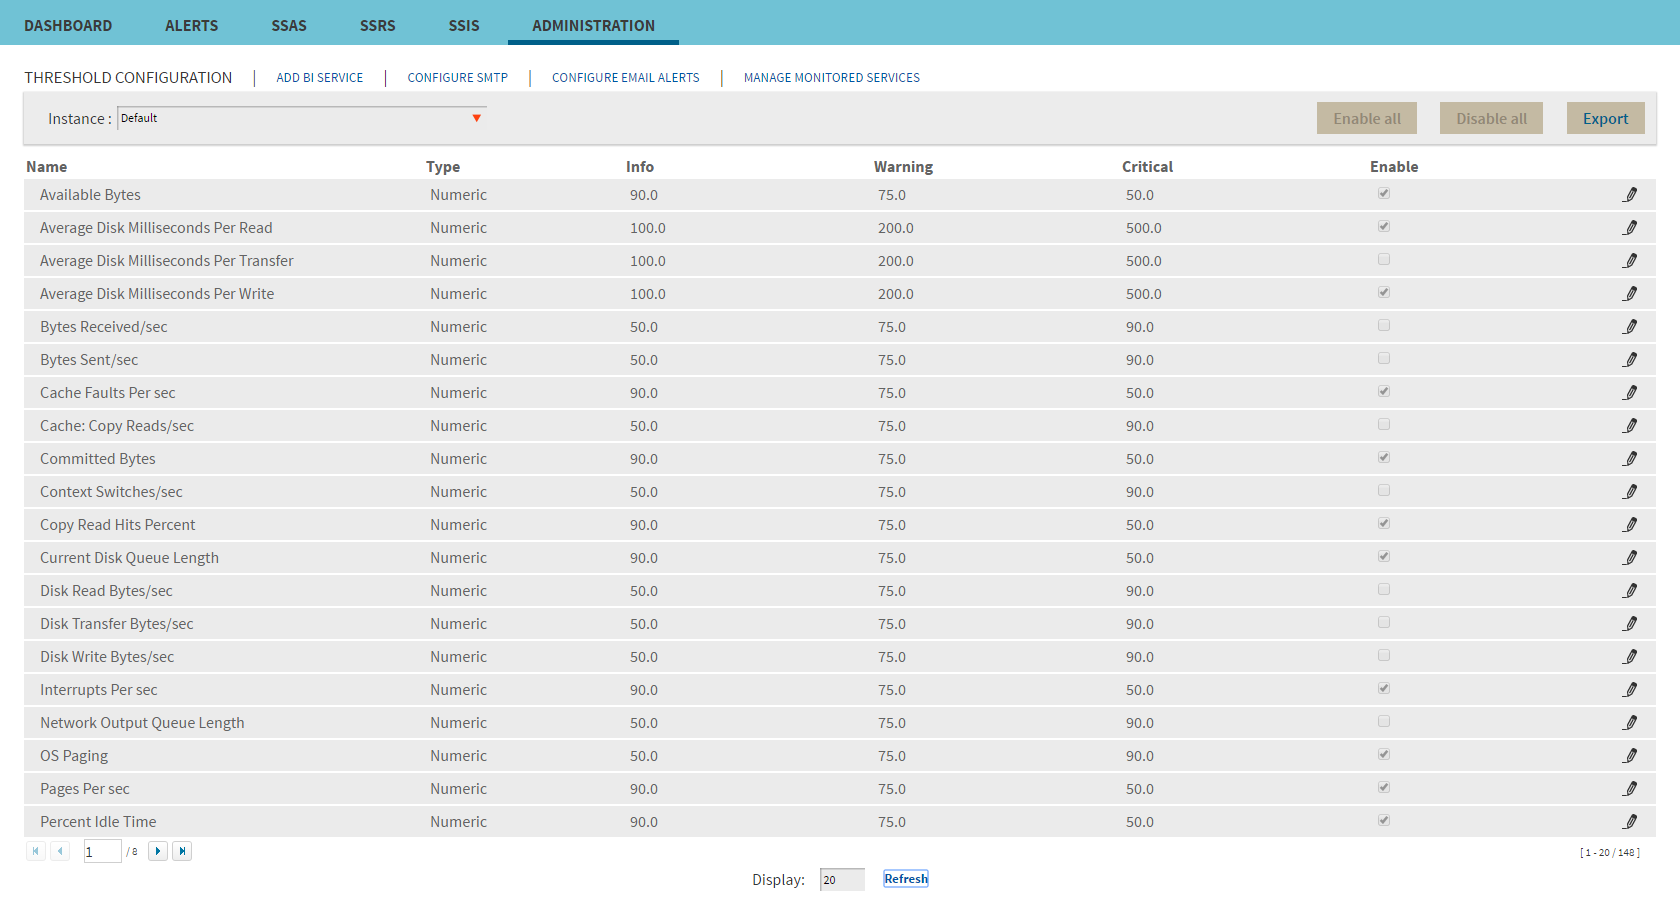
Enable or disable alerts and thresholds
SQL BI Manager allows you to enable or disable the generation of alerts and collection of some performance metrics. You can disable alerts when not necessary, to save system resources, or perform maintenance.
To enable or disable specific alerts and thresholds, start by selecting the BI Instance and the type of alert (Server, SSAS, SSRS, SSIS) from the drop-downs above the list. Then, under the Enable column, select the alert you want to enable or deselect to disable it.
You can also click the Enable All button to quickly enable all alerts on a specified BI Instance, or click the Disable All button to disable all alerts for the selected BI Instance.
Configure alert thresholds
In SQL BI Manager you can set alert thresholds to keep you informed of only relevant information about your SQL Server BI environment.
To edit an alert threshold, start by selecting the BI instance and the type of alert (Server, SSAS, SSRS, SSIS) from the drop-downs above the list. Then, you can access the Threshold Configuration window by clicking the pencil icon ![]() at the right end of the alerts list.
at the right end of the alerts list.
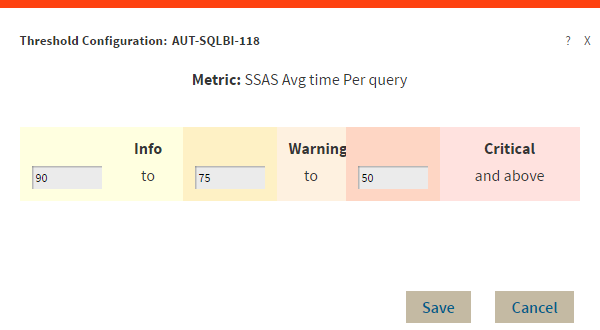
In the Threshold Configuration window, you can specify thresholds for Informational, Warning, and Critical alerts. Once you have configured your alert thresholds you can verify this information in the Administration roll up view.
Add SQL BI Service Instances for monitoring
Use the ADD BI SERVICE option to add SQL BI Service Instances for monitoring. For additional information, refer to Adding Business Intelligence Services for monitoring.
Configure SMTP settings for alerting
Use the CONFIGURE SMTP option to configure Email server settings to be able to send notifications over Email.
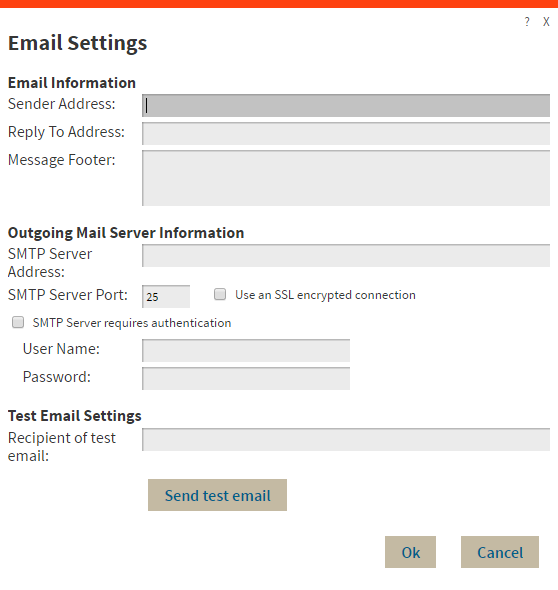
Configure the following settings:
Email Information
Sender Address: Enter the Email address that SQL BI Manager will use as the sender of the Email notifications.
Reply To Address: Specify a reply-to Email address to receive replies from Emails.
Message Footer: Enter the text that you want to appear in the footer of Email notifications.
Outgoing Mail Server Information
In order to send email notifications, you must specify the settings of an email server you want to use. You need to provide the following information:
SMTP Server Address: Enter the name or Internet Protocol (IP) address of your SMTP mail server.
SMTP Server Port: Enter the IP port that the SMTP mail server uses. The default SMTP port is 25.
Use an SSL encrypted connection: Select this check box to use an SSL encrypted connection to connect to the email server.
SMTP Server authentication: Select this check box if your SMTP server requires authentication, specify then a valid user name and password to access the email server.
Test Email Settings
You can use this section to test your email settings. For this purpose, enter the Recipient of the test email and click SEND TEST EMAIL. SQL BI Manager sends a test email to the recipient you specify. You can verify this test email in the respective recipient account.
After you configure your Email settings, you can subscribe to alerts by configuring Email alerts.
Configure Email alerts
Use the CONFIGURE EMAIL ALERTS option to subscribe specific users to receive Email alerts on specific events occurring on specific monitored BI servers. SQL BI Manager sends an Email when the severity changes to Critical or Warning (regardless of the originating severity).
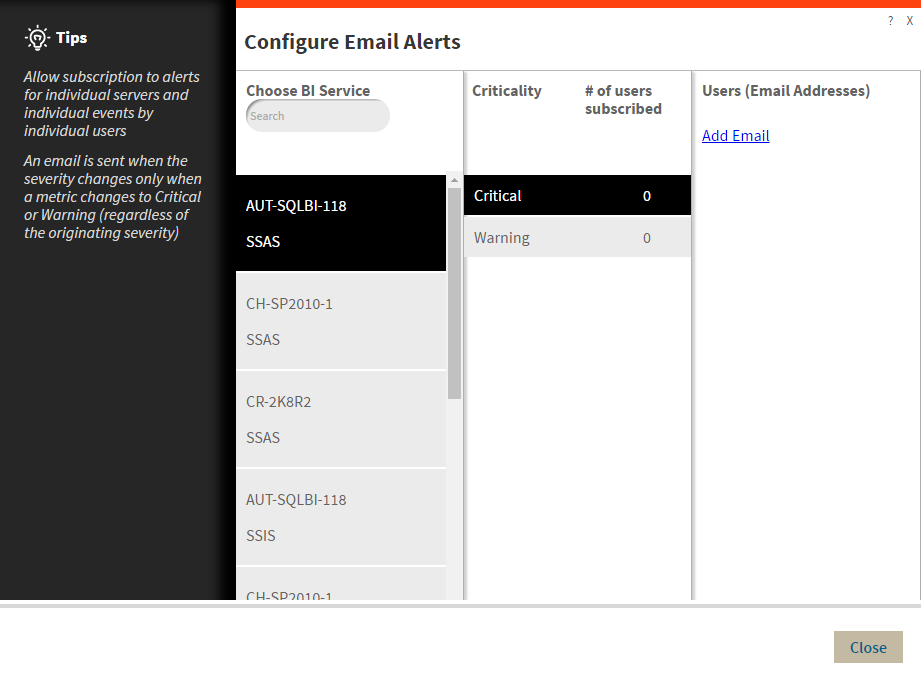
Follow these steps to Configure Email Alerts:
- Select the BI Service you want to receive alerts from.
- Select Critical or Warning to receive alerts only when a metric changes to either status.
- Add Email address of the recipient.
Manage Monitored Services
Use the MANAGE MONITORED SERVICES option to have a general overview of all monitored BI instances. This view displays information such as the Component Type, its Status, the Service and Host Name, the Authentication User Name, the Alert Refresh Time, and the Monitoring status (true or false). You can also Export this information to a PDF, XLS, or XML file.
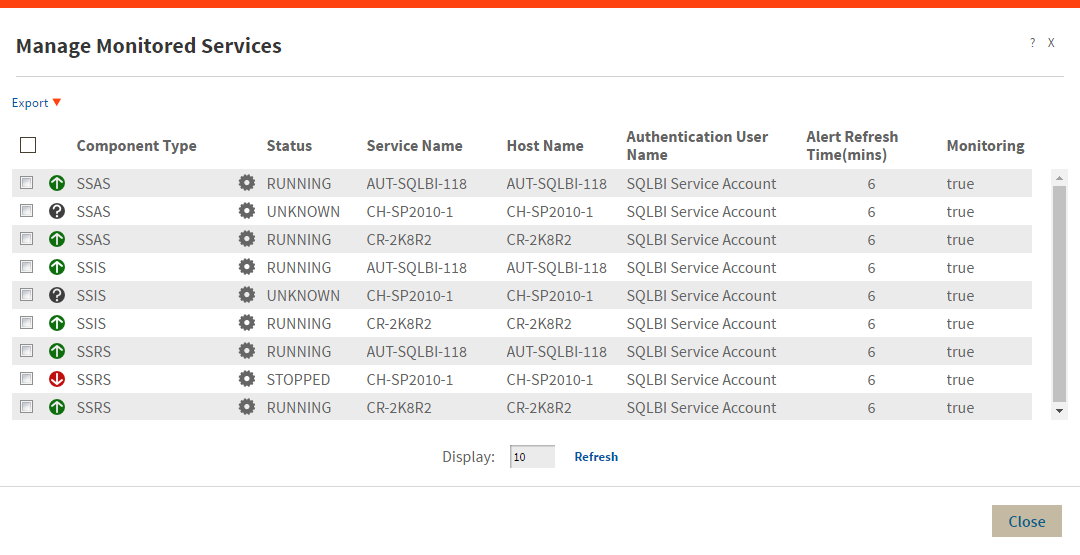
You can also perform actions to either single or several BI instances.
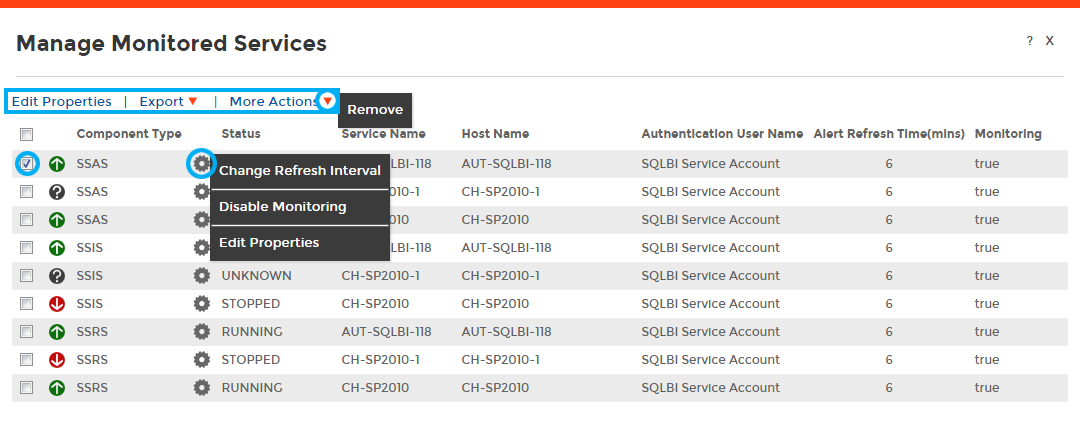
Perform actions on a single BI instance
After you select a SQL Server from the list, you can perform the following actions:
Edit Properties: Allows you to modify the previously established credentials.
Export: Allows you to export the information available to a PDF, XLS, or XML file.
Remove: Allows you to remove instances that you no longer want to monitor.
Additionally, by clicking the gear icon you can also Change Refresh Interval, as well as to Disable Monitoring temporarily (during maintenance operations) and Edit Properties.
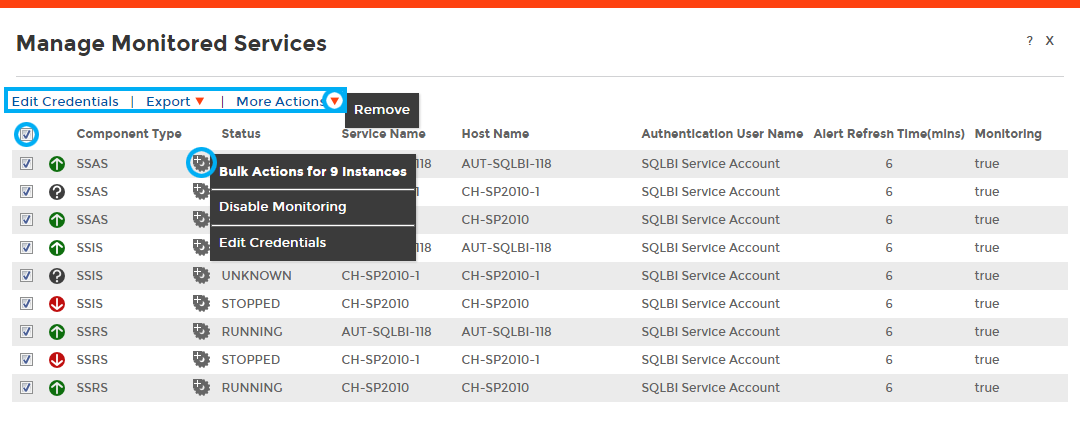
Perform bulk actions on several BI instances
After you select more than one SQL Server from the list, you can perform the following bulk actions:
Edit Credentials: Allows you to modify the previously established credentials.
Export: Allows you to export the information available to a PDF, XLS, or XML file.
Remove: Allows you to remove instances that you no longer want to monitor.
Additionally, you can click the gear icon to access the option to temporarily Disable Monitoring (during maintenance operations), as well as to Edit Credentials.
SQL Business Intelligence Manager identifies issues within the SQL BI environment to help optimize BI service performance. Learn more >>