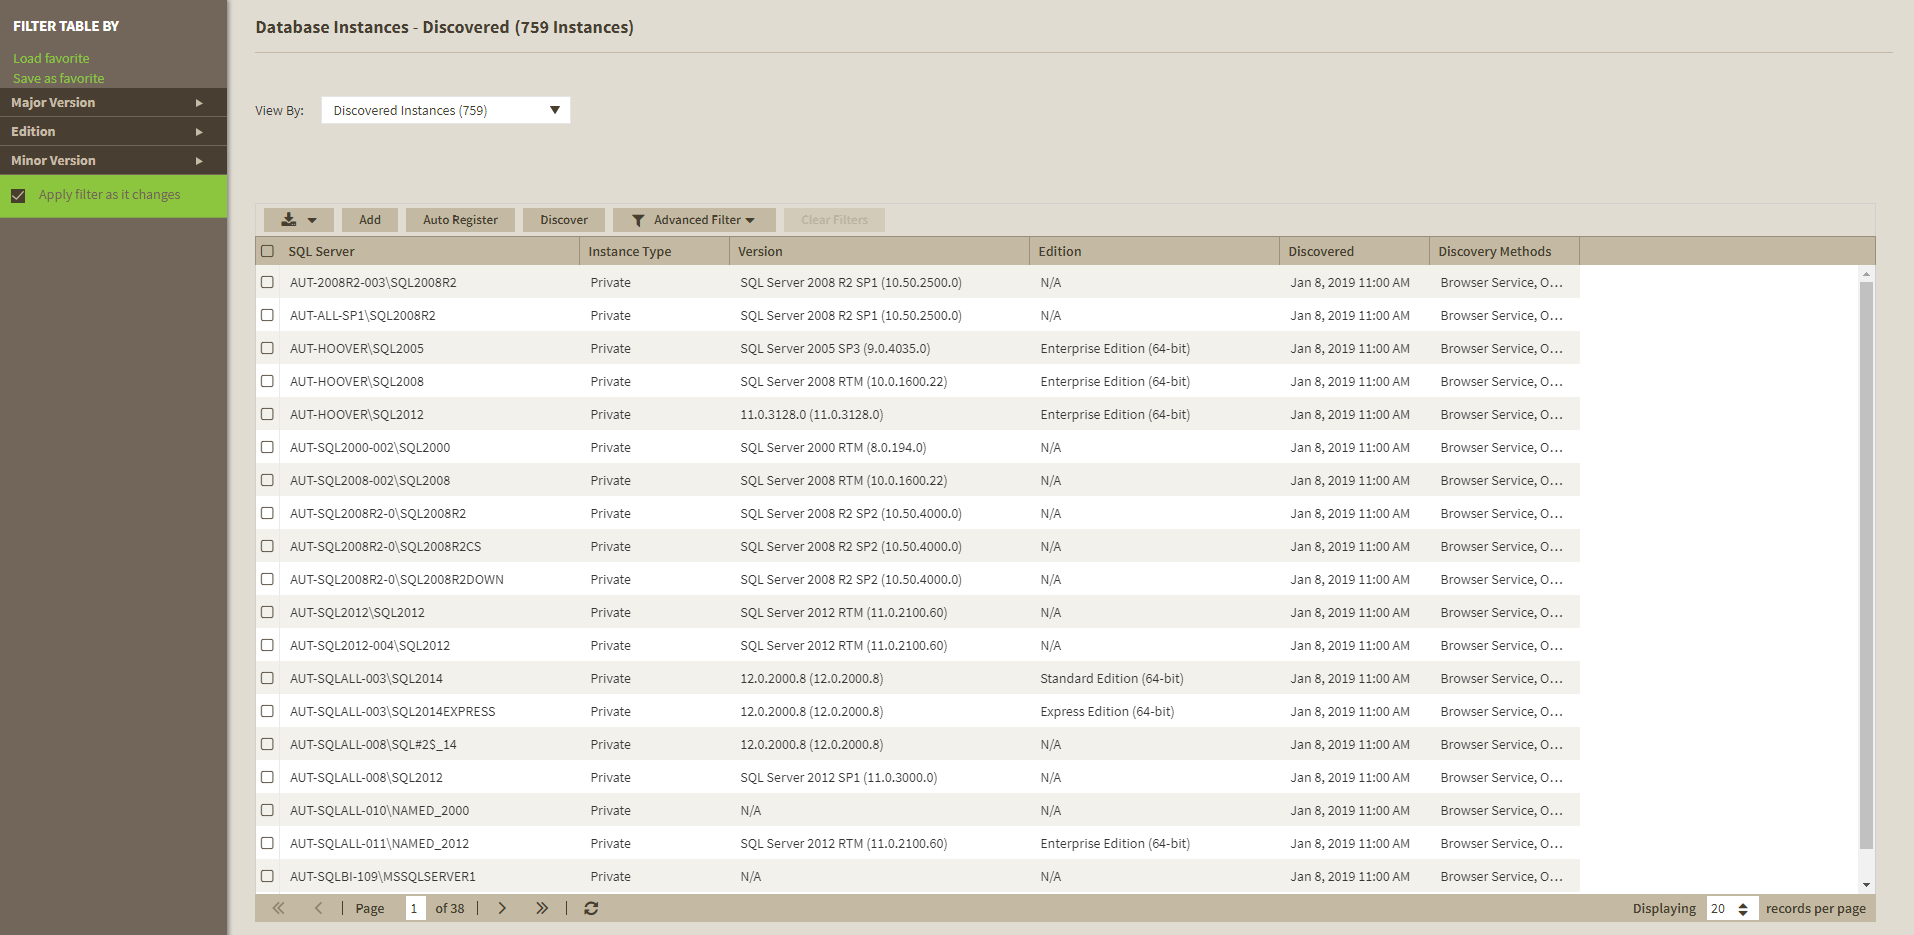
IDERA SQL Inventory Manager continuously searches your network to find new SQL Server instances. To see newly discovered instances, go to the Discovered view on the Instances tab. IDERA SQL Inventory Manager shows you a list of those instances not yet monitored in your environment. The Discovered view shows you the instances as well as their aliases in separate rows. From this view you can add or ignore instances. Once you register an instance it is removed from the Discovered Instances tab and it is visible in the Managed Instances tab, and the aliases display in parenthesis.
Note
If you have the auto-registration option enabled, newly discovered instances will be automatically registered according to your settings in the Auto registration options. Those instances that were discovered before this option was enabled will remain on the Discovered view.
The Discovered Instances tab shows the instances and their aliases in separate rows. This may result in an instances count mismatch.
Actions available on the Discovered instances view
Ignoring instances
You can choose to ignore any of these discovered instances. For this purpose, mark the checkbox next to the instance you want to ignore, and click Ignore on the action items bar.
IDERA SQL Inventory Manager no longer shows the ignored instances on the Discovered view but adds them to the Ignored view.
Auto registration options
Use these options to automatically register SQL Server instances as they are discovered. On this dialog window you can choose which SQL Server editions you want to exclude from auto registration.
Discover instances
Use this option to start a job to discover instances. Take into account that this process may take some time to complete. When you select to discover instances, IDERA SQL Inventory Manager displays three options:
- Discover Instances Browser Service - Lets you discover instances by using "System.Data.Sql.SqlDataSourceEnumerator" which enumerates all available SQL Server instances within the local network.
- Discover Instances Odbc - Lets you discover instances using "odbc32.dll" which gets the instances list from the system's registry data.
- Discover Cloud Instances/Databases - Lets you discover instances/databases hosted on Amazon or Azure.
Adding instances
If you want to register some of these instances, select the respective checkboxes of the instances you want to add, and then click Add SQL Server Instance on the action items bar.
IDERA SQL Inventory Manager opens the wizard for adding new SQL Server instances, and automatically adds the names of the instances you selected before. For more information on how to register SQL Server instances, go to Adding SQL Server instances.
Tip
On the Discovered view, you can find the Microsoft SQL version and edition next to the instances status to help you decide which instances you want to add or ignore.
Login to SQL Instance
Log into SQL Instances to collect additional information such as version and edition. For this, mark the checkbox next to the instance you want to log into and click Log Into Instances on the action items bar. In the Log in Dialog enter a valid User Name and Password for the selected SQL Instance.
Export reports
If you want to export the information displayed on the Discovered Instances view, click the Export button ![]() , located on the action items bar, and select your preferred format (PDF, XLS, or XML) for exporting.
, located on the action items bar, and select your preferred format (PDF, XLS, or XML) for exporting.
Advanced Filter
Apply advanced filters to your instances view, for more information refer to Filtering and Sorting.
Clear Filters
Clears any applied advanced filters.
Filtering and Sorting
SQL Inventory Manager offers different ways of sorting and filtering the listed instances/servers, for further information refer to Filtering and Sorting
Tip
IDERA SQL Inventory Manager displays the filters you select on the top section of your Discovered instances view under Filtered by. You can remove filters from this section too.
Tip
You can set the number of instances you want IDERA SQL Inventory Manager to show per page, go to the Display option at the bottom of this view, type the number you want, and click Refresh.
Manage your discovery options
If you want to configure the discovery job, go to the Administration tab and click Manage Discovery Options on the Discovery section. On this dialog window you can specify not only those IP address ranges and domains where you want IDERA SQL Inventory Manager to perform the discovery job, but also you can choose which methods you want to use to search in each computer. You can schedule your discovery jobs, add IP address ranges and those domains that IDERA SQL Inventory Manager will use in discovery.
For more information on how to configure your manage discovery options, click here.
Access from the Dashboard
You can also access the Discovered instances section by clicking New Instances on the right sidebar of the overview. For more information, go to Viewing information on the SQL Inventory Manager Overview.