Page History
...
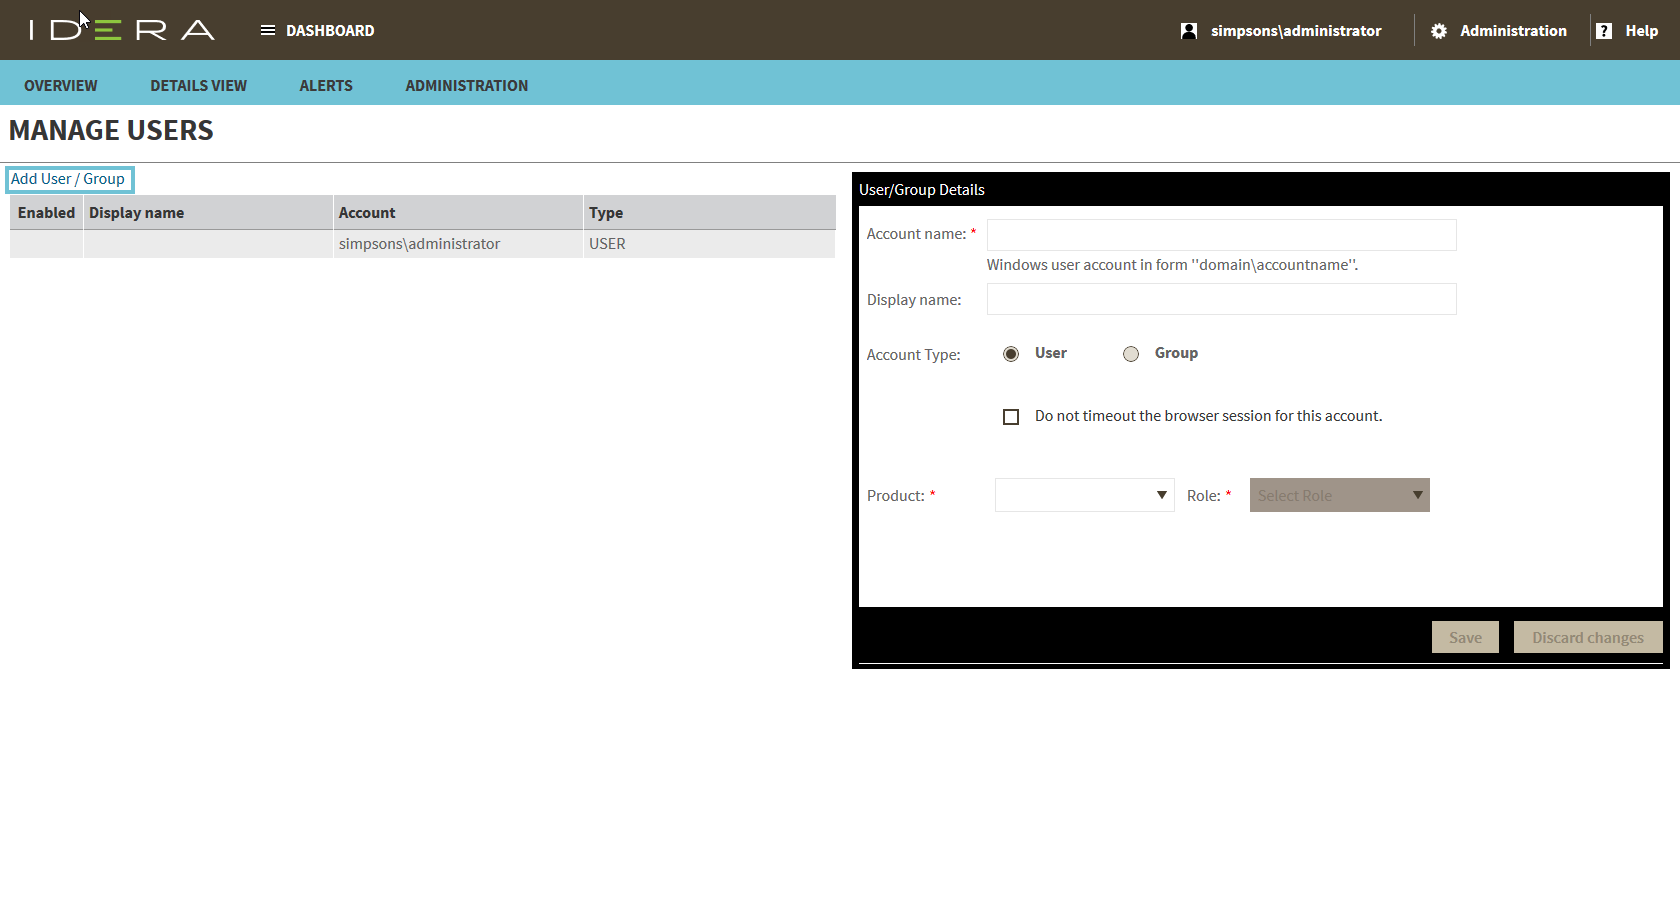
- Click the Add User / Group option and the 'Add User/Group' dialog is displayed.
- Type the account name of the user you want to grant access to. You should enter a Windows username in the following format: domain\accountname.
- Type a Display name.
- Select User or Group from the Account Type options.
- Select the Do not timeout the browser session for this account checkbox if you want the user account to never log out.
- In the Product field, you can select to add a user to the IDERA Dashboard or to an specific Product.
If you select the first option (IDERA Dashboard), in the Role field you can assign the Dashboard Administrator or Dashboard Guest roles.
If you select the second option (Respective product), in the Role field you can assign the Administrator, User, or Guest roles.
Click Add More to assign more user roles to the different available products.
Click Save.
...
| Scroll pdf ignore | |||||||||||||
|---|---|---|---|---|---|---|---|---|---|---|---|---|---|
| IDERA Website | Products | Purchase | Support | Community | About Us | Resources | Legal

