Page History
...
- Right-click the Managed Data Sources node in Data Source Explorer, and then select New > Data Source Group. The Create Data Source Group dialog appears.
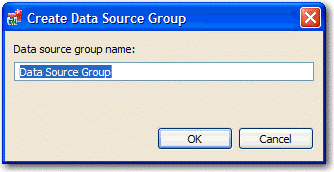
- Enter a meaningful name for the new group in the Name field, and then choose a parent folder, if any.
- Click Finish. The Data Source Group folder is added to Data Source Explorer. You can drag and drop data sources in the folder or add new data sources to the folder.
Data Source Properties
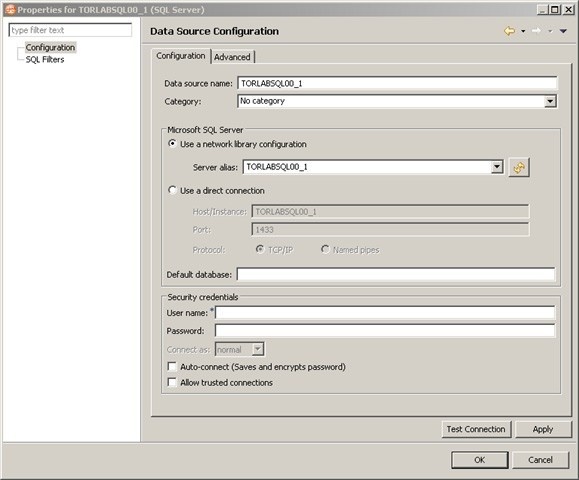
After you import a data source, you can view and change its properties.
Basic Data Source Configuration
The name and connection properties you specified when you set up the data source are available in the Configuration pane.
To change data source properties
- In the Data Source Explorer, right-click on the data source, and then select Properties. The properties pane displays the Data Source Configuration tab.
...
- In the Data Source Configuration pane, you can review and update important details about:
- The name
- The type of database and its network connections
- The default database
- The user name and password for the connection, and whether it is encrypted and trusted
...
- Click Apply to save the configuration.
- Click Test Connection to validate the configuration.
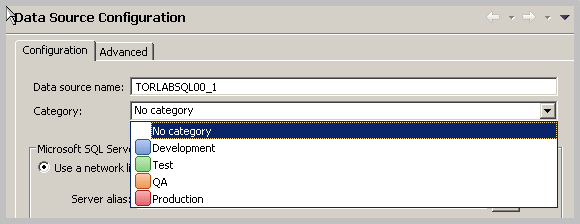
Lifecycle Categories for Organizing Data Sources
You can categorize data sources into the phases of the database lifecycle: Development, Test, QA, and Production. Use the Category dropdown menu to assign a category to a data source.
...
The color coding of the category, if set, is displayed in the Data Source Explorer so you can easily differentiate the usage of multiple databases.
 ...
...
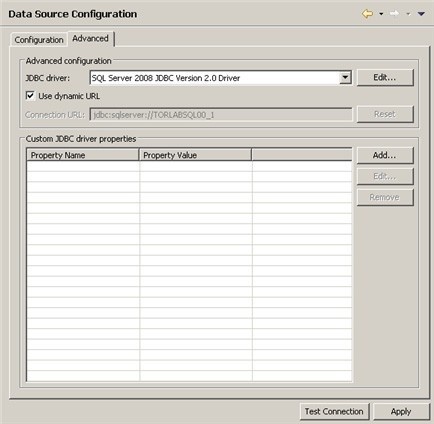
Drivers for Data Source Connections
The Advanced tab of the Data Source Configuration properties lets you specify the JDBC or other driver properties.
Project Explorer
Project Explorer provides a list that organizes jobs, standards, and synchronization scripts into project folders.
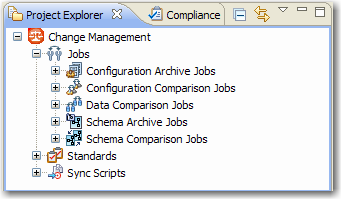
The list is organized by Jobs, Standards, and Sync Scripts. Double-click on the objects to open them in their editors.
A group of administrators can share a set of project files by connecting it to a source code control system and using the Navigator.
You can use the File > New > Project command to create project folders to organize and manage your jobs. When you create a new project, a folder is added to the Project Explorer with the name that you specified. You can add or delete files under this folder by dragging and dropping them from the Change Management branch.
To create a new project
- Select File > New > Project. The New Project wizard appears.
Project Explorer
...
- Expand the General Node, and then select Project.
- Click Next.
- Type a project name into the field provided. The Location field indicates where the project files are stored on your machine. By default, all project data is stored in the location where you installed DB Change Manager. If you want to change this location, deselect the Use Default Location check box and define a new directory location.
- Click Finish. The new project folder appears in Project Explorer.
| Anchor | ||||
|---|---|---|---|---|
|
...