Page History
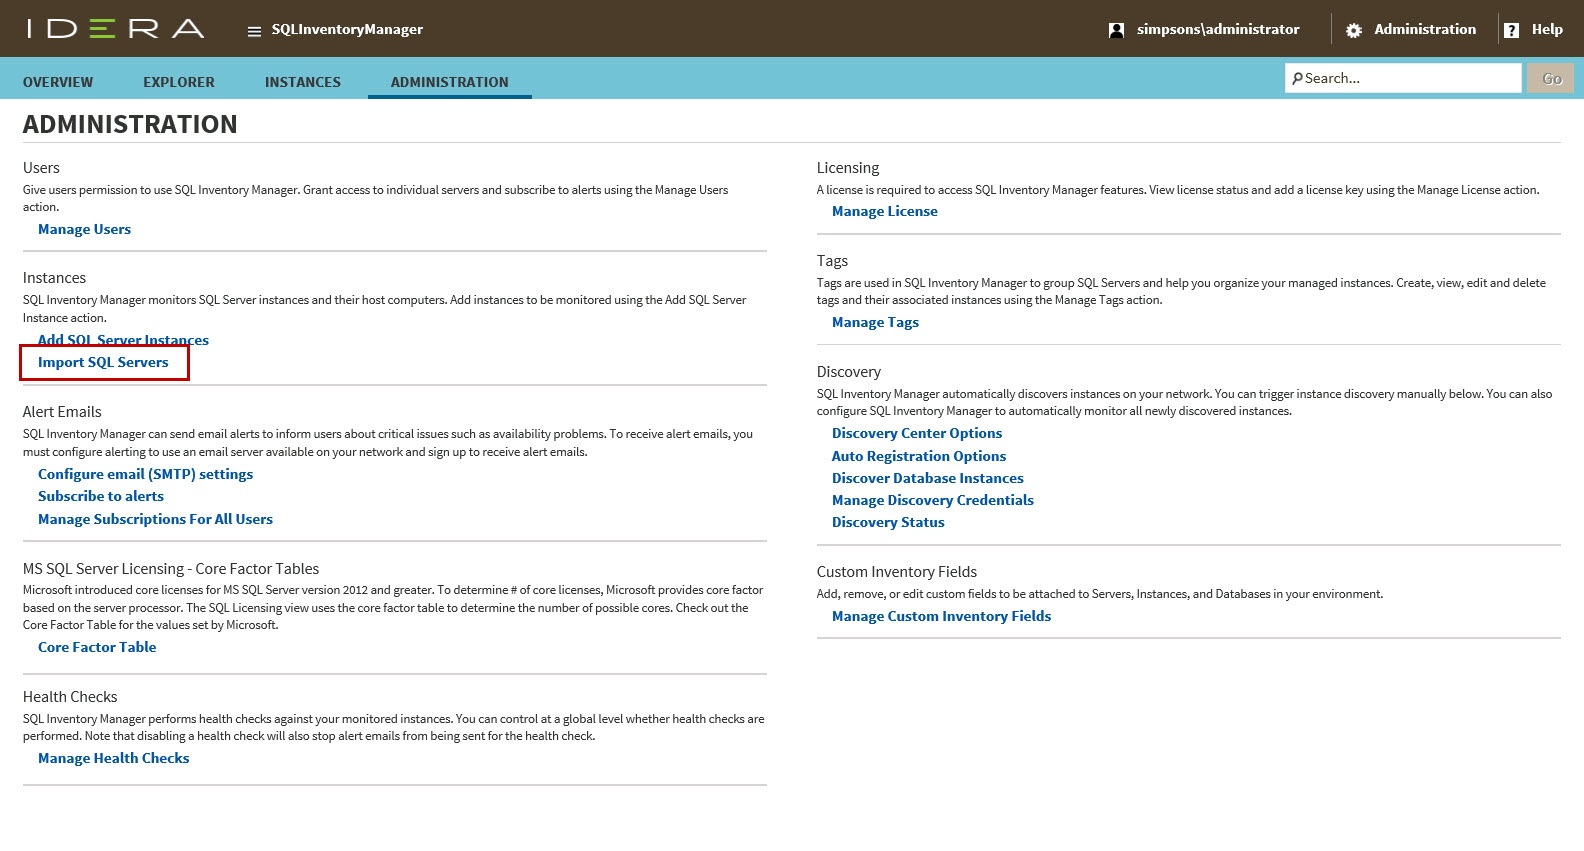
IDERA SQL Inventory Manager constantly discovers SQL Server instances so you can select those ones that you want to monitor. When you open the Add SQL Server Instance wizard, you can choose those ones you want to register with IDERA SQL Inventory Manager; however, you can also import a list of instances from your computer. Go to the Administration tab, on the Instances section you can find the option Import SQL Servers. Use this option to import a .csv file from your computer.
Acceptable .csv format
You must use a properly-formatted .csv to successfully import a list of SQL Server instances. There are no limits on the number of rows included in the file, but note that if a row is incorrectly formatted, IDERA SQL Inventory Manager imports all rows above the incorrect row but does not import the incorrect row or any of the rows below that row.
| Info |
|---|
For users who must use a fully qualified domain name (FQDN) instead of the Windows Internet Naming Service (WINS), IDERA SQL Inventory Manager accepts the FQDN name for import and will collect information for that SQL Server instance. However, if you also add this instance as WINS, then realize that you have two records pointing to the same instance. IDERA SQL Inventory Manager does allow you to connect to the same instance using FQDN or WINS. If you don't want to have WINS instances, set the instances to Ignore. You can view ignored instances on the Instances > Ignored tab. |
For a successful import of SQL Server instances, please use the following general rules and .csv file format.
...
| Note | ||
|---|---|---|
| ||
Keep in mind that the .csv files you use to import must have only the names of the instances. |
Making bulk changes after importing instances
After
...
importing the instances, you can use the bulk options available on the Managed Instances view to set the credentials for monitoring them, as well as editing their owners, locations, comments, and tags.
| Info |
|---|
In the .csv file format, there is no separate column for credentials. However, after importing, you can update these instances using a bulk action to edit the credentials for all affected instances. For example:
|
| Excerpt |
|---|
IDERA SQL Inventory Manager lets you discover and visualize your SQL Server environment. Learn more > > |