Page History
- To add a source mapping to an entity, right-click on the header part of the entity displayed in the diagram and then choose Properties.

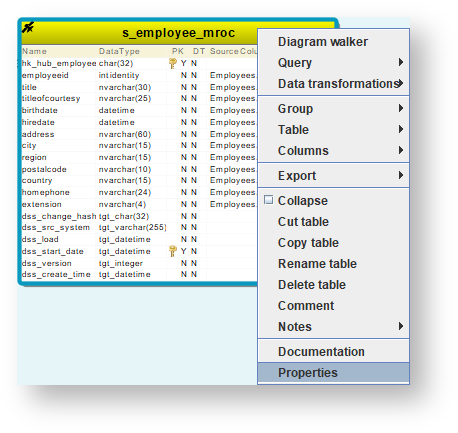
- On the Properties window, click the Source mappings tab.
- In the Source mapping sets pane, click
 to add a source mapping set. The source mapping sets enables you to map Multi Source objects in WhereScape RED.
- Enter a Name for the source mapping set in the Add source mapping set dialog.
- Click OK.
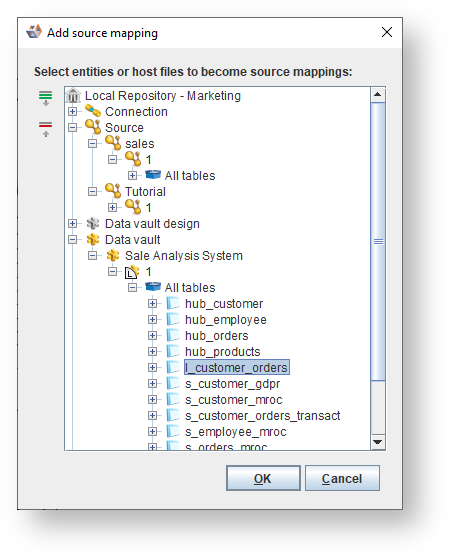
- Click the Add source entities button from the toolbar to open the Add source mapping dialog.

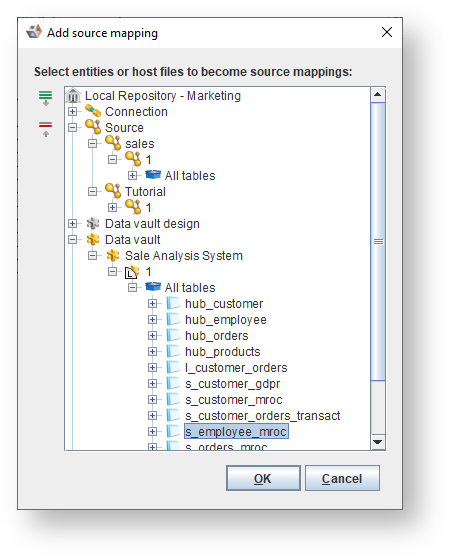
- Select the source entities or host files that you want to map to the selected target entity and then click OK.
Note title Note You can use the keyboard Ctrl or Shift key to select multiple items from the source tree.

- The selected source entities are displayed in the Source mappings tab. The columns from the source entities that exists in the target entity are automatically mapped.


- You can view the source mapping details of a source table by clicking the line that connects it to the target table from the diagram. The details are displayed in the right pane.


- In the same manner, you can view the source mapping details of a source column by clicking the line that connects it to the target column.


- To map the additional source columns that does not exist in target entity, click the source column you want to map and drag the line that appears to the Add attribute row in the target entity.

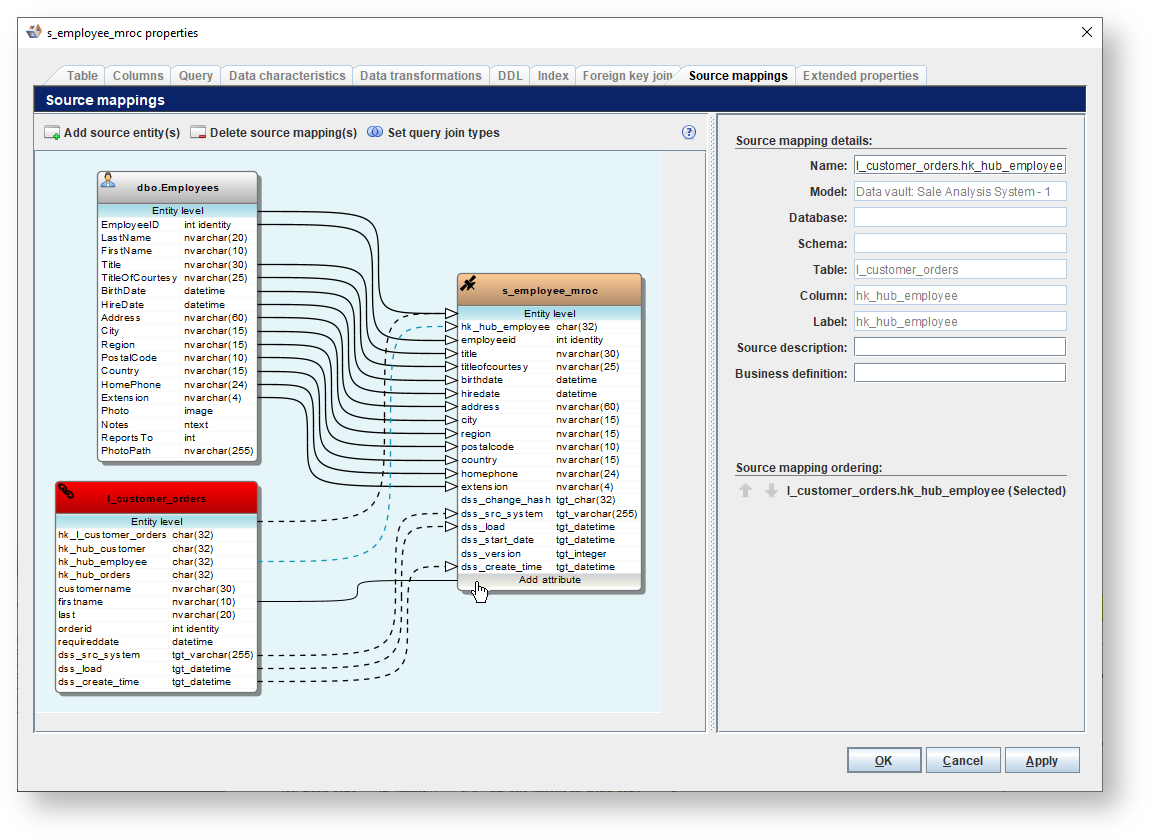
- The new source column is added and mapped to the target entity.


- Click OK.