Page History
...
The following list is an example of the results:
Table 1-1 List of Siebel servers
SBLSRVR_NAME | HOST_NAME |
|---|---|
AsDev1 | POOL-SIEBEL1 |
AsDev2 | POOL-SIEBEL2 |
Each returned row represents a Siebel server. The row information can be split into two columns:
...
The following list is an example of the results:
Table 1- 2 Machine name list
MACHINE |
|---|
PRECISE\POOL-SIEBEL1 |
PRECISE\POOL-SIEBEL2 |
If there is no entry in V$SESSION with the physical machine name, use the results from the HOST_NAME column. After inserting the previous results into the siebel_machines.txt file, the contents is as follows:
...
- From the File menu, choose New Object. The New Object Wizard opens.
- On the General tab, select Table.
- Click OK. The General dialog box opens.
Figure 1-1 General Dialog Box
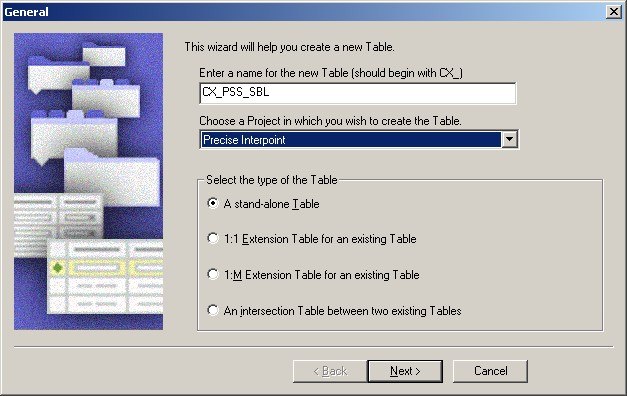
- In the Enter a name for the new Table field, type CX_PSS_SBL.
- From the Choose a Project in which you wish to create the Table drop-down list, select Precise Interpoint.
- Under Select the type of the Table, select A stand-alone Table.
- Click Next.
- Click Finish to close the dialog box.
- For versions prior to version 8.0, in the Tables workspace, click Apply. For version 8.0 and higher, in the Tables workspace, click Apply/DDL. In the displayed dialog box, click Apply.
- The Apply Schema dialog box is displayed.
Figure 1- 2 Apply Schema dialog box
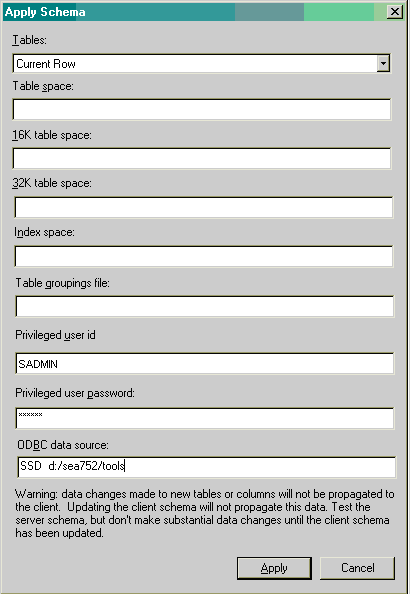
- If needed, type a valid privileged user ID and privileged user password into the relevant text boxes.
- Click Apply. The dialog box closes and the table is created.
- In the Tables panel, click Activate to activate the new table.
- In Siebel Tools, on the Types tab in the Object Explorer, select Table. The Tables panel opens.
- Select table CX_PSS_SBL.
- On the Types tab in the Object Explorer, Expand Tables and select Column. The Columns panel opens.
- From the Edit menu, choose New Record. A new record is added to the table in the Columns panel.
Add two new columns to the table as follows:
Table 1- 3 Table with new columnsName User Name Physical Type Length CLIENT_INFOClient Info Varchar 64 ACTIONAction Varchar 32 - For versions prior to version 8.0, in the Tables workspace, click Apply. For version 8.0 and higher, in the Tables workspace, click Apply/DDL. In the displayed dialog box, click Apply. The Apply Schema dialog box is displayed (see Figure 1-2).
- If needed, type a valid privileged user ID and privileged user password into the relevant text boxes.
- Click Apply. The dialog box closes and the records are created.
- In the Tables panel, click Activate to activate the table with the new columns.
Figure 1- 3 Siebel Repository - Column List Dialog Box

...
- In Siebel Tools, from the File menu, choose New Object. The New Object Wizard opens.
- On the General tab, select BusComp.
- Click OK. The New Business Component dialog box opens.
Figure 1- 4 New Business Component Dialog Box
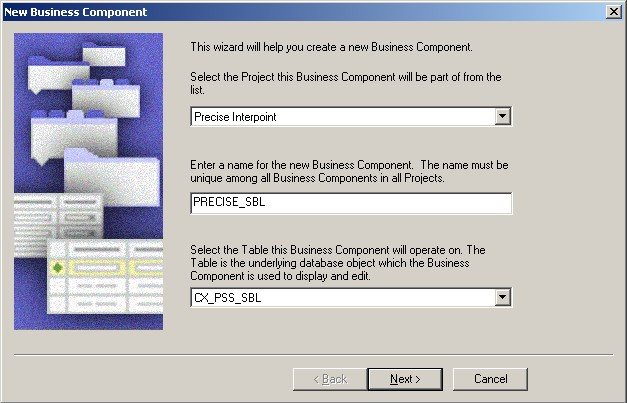
- In the Enter a name for the new Business Component field, type PRECISE_SBL.
- From the Select the Project this Business Component will be part of drop-down list, select Precise Interpoint.
- From the Select the Table this Business Component will operate on drop-down list, select CX_PSS_SBL.
- Click Next. The Single Value Fields dialog box opens.
Figure 1- 5 Single Value Fields Dialog Box
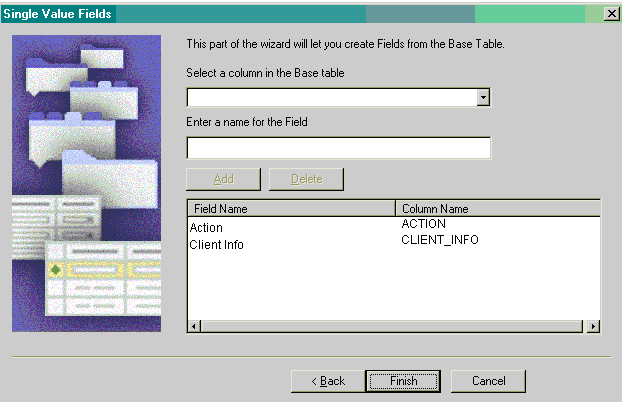
- From the Select a column in the Base table drop-down list, select ACTION. A default field name automatically appears in the Enter a name for the Field text box.
- Click Add to move the selected row to the table.
- From the Select a column in the Base table drop-down list, select CLIENT_INFO. A default field name automatically appears in the Enter a name for the Field text box.
- Click Add to move the selected row to the table.
- Click Finish to create the Business Component.
...
- In Siebel Tools, on the Types tab in the Object Explorer, select Business Object. The Business Objects panel opens.
- From the Edit menu, choose New Record. A new record is added to the table in the Business Objects panel.
- In the Name column, type PRECISE_SBL.
- In the Project column, assign the new record to the Precise Interpoint project.
- On the Types tab in the Object Explorer, select Business Object > Business Object Component.
Figure 1- 6 Siebel Repository - Business Object Component List Dialog Box
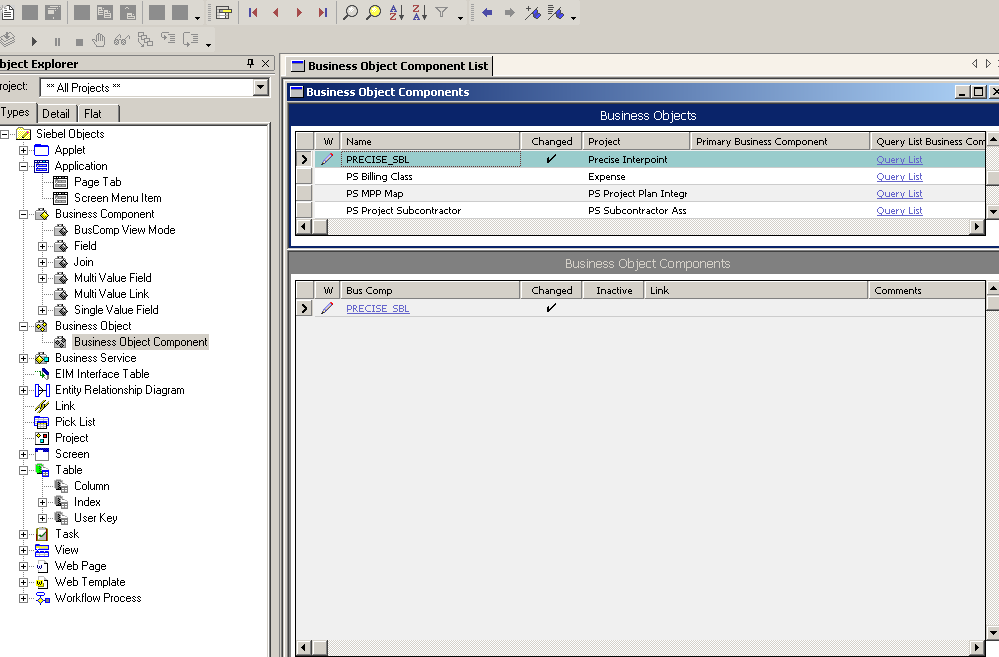
- From the Edit menu, choose New Record. A new record is added to the table in the Business Object Components Panel.
- In the Bus Comp column, type PRECISE_SBL.
- From the Tools menu, choose Compile Project.
...
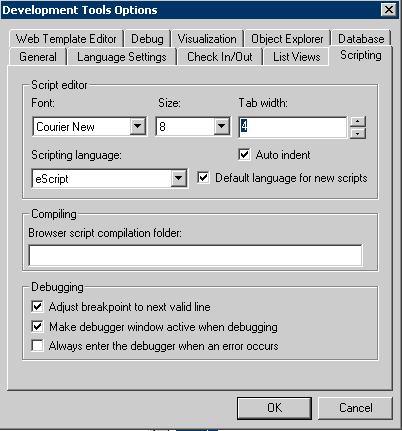
- In Siebel Tools, from the View menu, select Options. On the Scripting tab, note the value of the Scripting Language list. If no language is selected, select the eScript option.
Figure 1- 7 Development Tools Options Dialog Box
For versions prior to version 8.0:
For version 8.0 and higher:
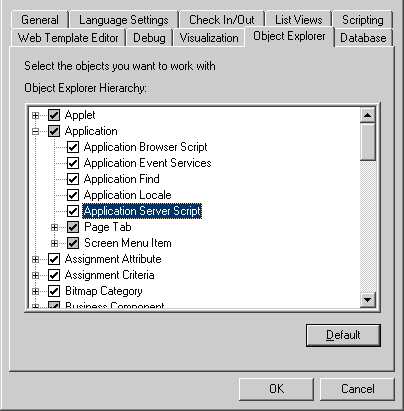
- In the Object Explorer, on the Types tab, expand Application.
- Right-click on the application to be modified and select Lock Object.
- Right-click on the application to be modified and select Edit Server Scripts.
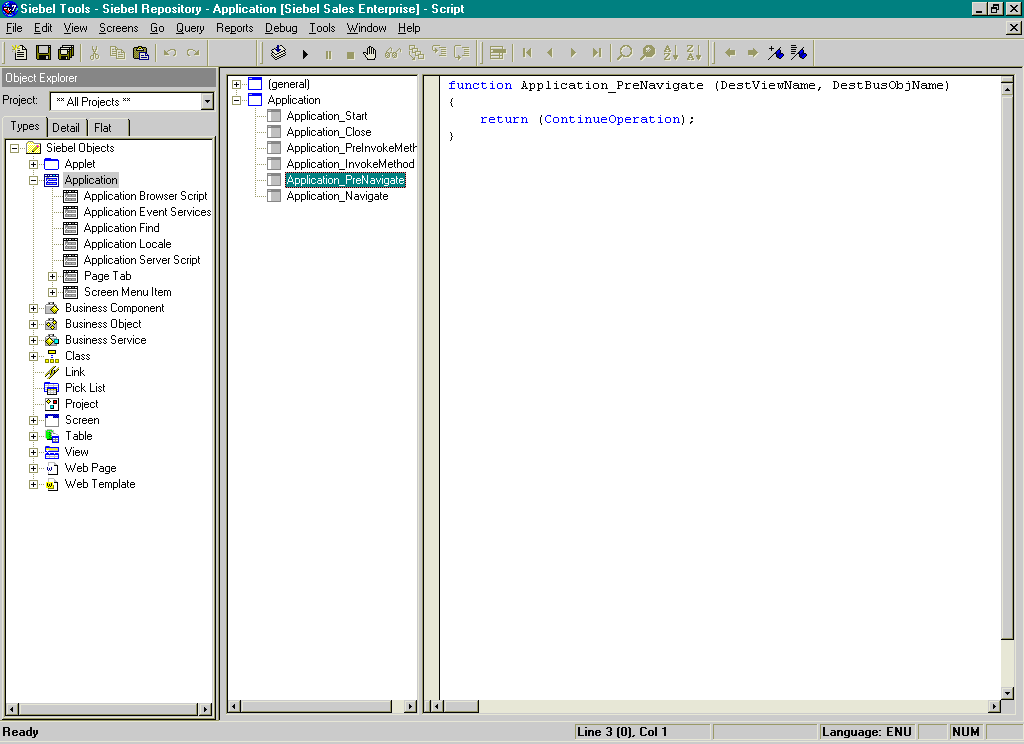
In the Server Script Editor, select the Application_PreNavigate function. The function's default script appears in the text panel.
Figure 1- 8 Siebel Repository - Application [Siebel Sales Enterprise] - Script Dialog Box
Info If this function already contains a custom script, do not continue. Contact Precise Technical Support for alternative instructions.
If the used Scripting Language is eScript, use the following script:
Info Modify the appName variable to match the name of the Siebel application.
Function Application_PreNavigate (DestViewName, DestBusObjName)
{
     try
     {
          var    oActionBO;
          var    pssBC;
          var    appName = "Siebel Sales Enterprise";
          var    action; //(32)
          var    client_info; //(64)

     oActionBO =
          TheApplication().GetBusObject("PRECISE_SBL");
               pssBC = oActionBO.GetBusComp("PRECISE_SBL");

               action = DestViewName.substring(0,32);
          client_info="S," +
          TheApplication().LoginName().substring(0,14) + "," +
               DestBusObjName.substring(0,31) + "," +
               appName.substring(0,17);

               pssBC.NewRecord(1);
          pssBC.SetFieldValue("Action", action);
               pssBC.SetFieldValue("Client Info", client_info);
               pssBC.WriteRecord();

               pssBC = null;
               oActionBO = null;
     }
     catch (obj)
     {
          pssBC = null;
          oActionBO = null;
          var sText = obj.errText;
          var nCode = obj.errCode;
     }
     finally
     {
          return (ContinueOperation);
     }
}
If the used Scripting Language is Visual Basic, use the following script:
Info Modify the appName variable to match the name of the Siebel application.
Function Application_PreNavigate (DestViewName As String, DestBusObjName As String) As Integer
     Dim    oActionBO As BusObject
     Dim    pssBC As BusComp
     Dim    action As String
     Dim    client_info As String
     Const appName = "Siebel Field Service"

     On Error Resume Next
     Set oActionBO = TheApplication.GetBusObject("PRECISE_SBL")
     Set pssBC = oActionBO.GetBusComp("PRECISE_SBL")

     action = Left(DestViewName,32)
     client_info="S," + Left(LoginName,14) + "," + Left(DestBusObjName,31) + "," + Left(appName,17)

     pssBC.NewRecord 1
     pssBC.SetFieldValue "Action", action
     pssBC.SetFieldValue "Client Info", client_info
     pssBC.WriteRecord
     Set oActionBO = Nothing
     Set pssBC = Nothing

     Application_PreNavigate = ContinueOperation
End Function
Compile the project.
...
- Before attempting to debug, select Options from the View menu.
- Click the Debug file tab.
- Note the file specified in the CFG file field and open it in a text editor.
- Make sure the RepositoryFile and ApplicationName options are set correctly.
- Make sure the EnableScripting option is set to TRUE.
Precise. Performance intelligence from click to storage. Learn more > >
...