Page History
...
1. From the Project Solutions node select the New Solution menu item.
...
2. Select the SOAP Agent Wizard tool and enter or select the Group folder to receive the project file and WSDL document.
...
3. Enter the project File name. The extension '.soap.prj' is added automatically.
...

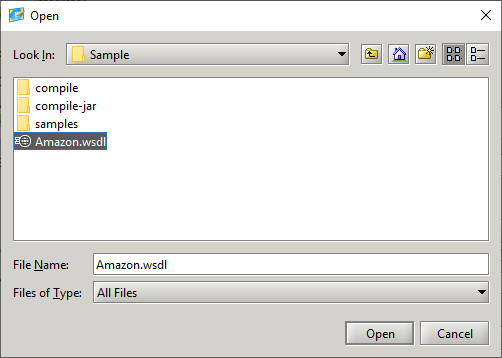
4. Press the OK button to select the WSDL file to be used.
...

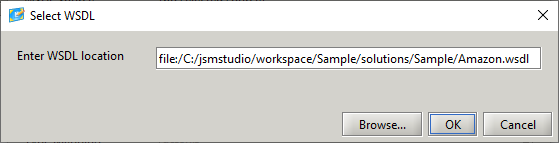
5. Press the browse button to enter the URL to the WSDL file. If the WSDL file resides on the local file system press the next browse button to access the file system dialog box.
...

...
If the required URL is on the clipboard, then use CNTRL-V to paste it into the text field.
...
...
6. Press the OK button to return to the main dialog box. The Project Source field contains the file name that will be used to store the WSDL when it is retrieved using the URL. This file name can be changed.
The Wrapped Support check box is used to enable/disable "wrapped" document/literal style support.
...
The Namespace Map is used to map all namespaces in the WSDL document to the same Java package name.
...
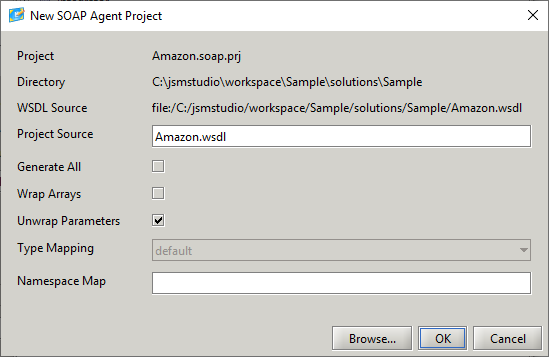
7. Press the OK button to create the project.
...

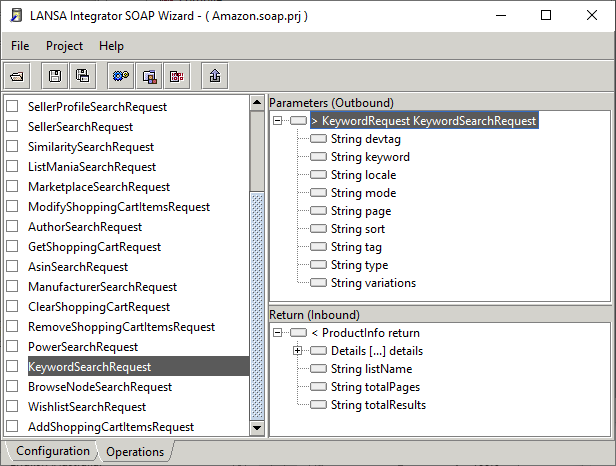
- The project name is used in the creation of the JAR file name and the service class name.
- The JAR file contains the Axis generated classes that handle the SOAP transaction and the generated service class.
- SOAP operations that are available are displayed in the left scroll panel.
- When an operation is selected the parameters and return parameter are displayed in right scroll panels.
...
The parameter nodes can be marked to accept and handle data in different ways.
Different icons indicate the node types:
...
| Node is ignored. |
...
| Node is a field. |
...
| Node is a fixed value. |
...
| Node is a list. |
...
| Node is a list field. |
...
| Node is a fragment. |
...
| Node is stream file. |
In the following diagram the parameter has been marked as a fragment and a SET FRAGMENT command will be required to set the field values.
...
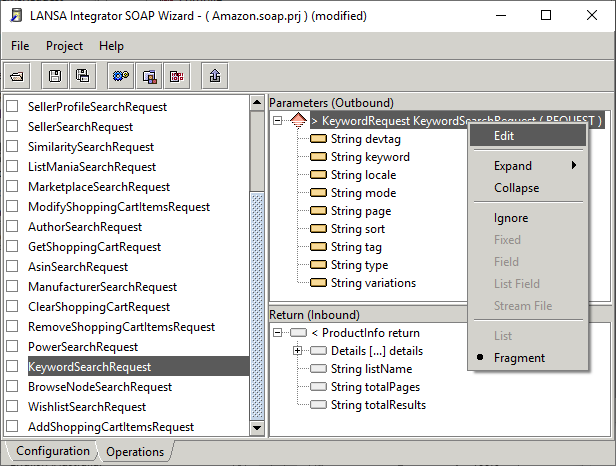
Also, it is possible to leave the parameter unmarked and mark the fields. These fields will receive their values when the SET PARAMETER command is executed. The ignore fields will not have their values set and will default to null for Strings and objects and zero for primitive numbers.
...

Fragment, list, list field and field nodes require the program field name for binding to occur between the program field and SOAP transaction. You can also use the 7.21 LANSA Repository Viewer to drag and drop a LANSA field name onto a node.
...
8. Use the pop-up Edit menu or <Enter> key to access the entity attribute dialog.
...
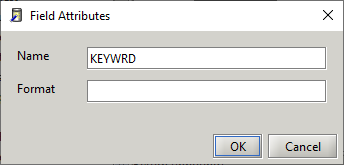
9. Enter the program field name, fragment or list name and press the OK button.
...

10. Press the build button to generate and compile the service, this service class will be added to the jar file.
...
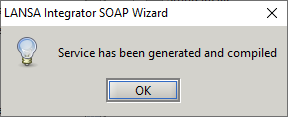
All generated code and compiled classes exist in the compile-agent sub directory.
Files containing service properties are created in the solution directory and samples are created in the samples sub directory.
...
