Page History
IDERA SQL Inventory Manager allows you to manage tags for a specific instance. When you access this option you can choose which tags you want to add or delete for the respective instance.
If you want to edit tags for a single instance, use one of the following options in IDERA SQL Inventory Manager:
- Overview - . In the Instances section, click an instance namethe name of the instance you want to tag. In the Instance Details view, click the pencil icon on the Tags section of the right sidebar.
- Instances > Managed view - . Select your instance, and then click click Edit Tags on on the action items bar OR click the gear icon next to the instance, and then select Edit Tags.
- Instances > SQL Licensing view - view. Select your instance, and then click click Edit Tags on on the action items bar OR click the gear icon next to the instance, and then select Edit Tags.
Below you can see the sections where you can access the option for managing tags for a single instance:
| Gallery | ||||||||
|---|---|---|---|---|---|---|---|---|
|
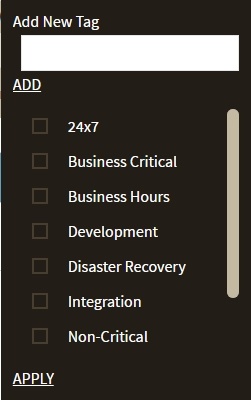
- Type the name of a new tag, and then click click ADD. SQL Inventory Manager adds the new tag to the list. You You can add several tags at once by separating each name with a semicolon ( ; ).
- Check or uncheck those tags you want to add or remove for this instance. Previously-added and newly-added tags are checked by default.
When you finish making your edits, click click APPLY.
| Tip | ||
|---|---|---|
| ||
You can also remove tags by clicking the tag name on the sidebar without opening the Manage Tags window. |
| Warning | ||
|---|---|---|
| ||
|
Need more help? Search the Idera Customer Support Portal.
...