Page History
...
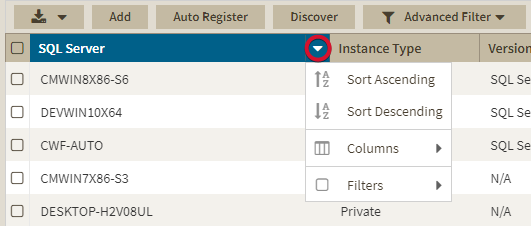
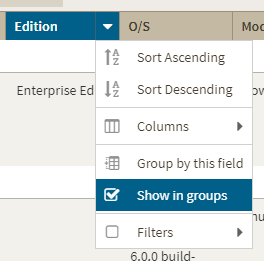
The different instances views in SQL Inventory Manager allow sorting data by one column data. To sort the listed instances, expand the drop down menu next to the column name you want to use as sorting criteria and select either Sort Ascending or Sort Descending.
Alternatively click a column name to sort either in ascending or descending order.
...
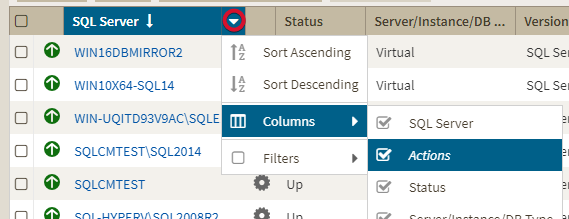
Filtering columns by name
To have a more compact and relevant view you can filter out columns from the instances views. To filter out columns by name follow these instructions.
...
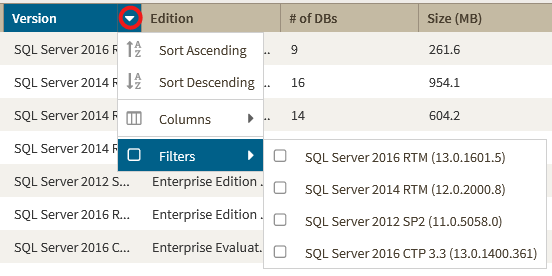
Filtering by column value
You can also filter instances using column values as filtering criteria. To filter out columns by value follow these instructions.
...
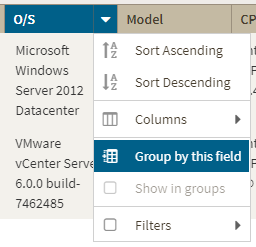
The Managed by Host Server and SQL Licensing by Server views allow you organize instances by grouping them according to column names.
To organize instances by group columns by value group instances by column name follow these instructions.
- Click next to a column name you want to use as group criteria.Go to Filters
- Select Group by this field.
To ungroup instances follow these instructions.
- Click the column value you want to use as filtering criteria. next to a column name.
- Uncheck Group by this field.
Advanced Filtering
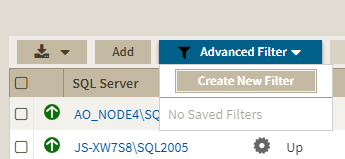
The Advanced Filter option on the actions bar allows you to create, save, and apply advanced filters. The advanced filtering options use both the criteria on the quick filters and all the available data column to create custom filters. To create an advanced filter click Advanced Filter and select Create Filter.
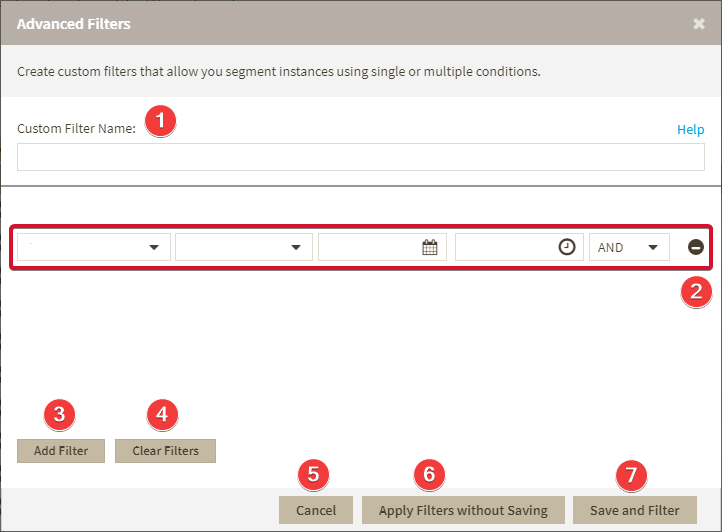
The Advanced Filters dialog in IDERA SQL Inventory Manager has the following structure:
- Custom Filter Name - Enter a name for your custom filter.
- Filters Field - Allow you to setup filtering criteria.
- Add Filter - Allow you to add an additional filter.
- Clear Filters - Clears the value of filter creation fields.
- Cancel - Cancels the creation of the filter.
- Apply Filters without Saving - Applies the current advanced filter without saving it.
- Save and Filter - Saves and applies the filter.
The Filters Field contains the following elements:
Column Name - The column name used as filtering criteria, like Instance or SQLServer Version.
...
- Go to the instance view where you want to create a filter.
- Click Advanced Filter and select Create New Filter.
- On the Advanced Filters dialog enter a name for your filter.
- Use the drop down menus to select your desired criteria on the filter creation field.
- Click Save and Filter
You can also use conditions to further refine your advanced filters
You can also use further conditions to refine your advanced filters. To add more filtering fields click Add Filter and choose an operator.
To remove a filter field click .
...
- Click Advanced Filter.
- Go to the filter you want to edit.
- Click on the edit option
Deleting Advanced Filters
...
- Click Advanced Filter.
- Go to the filter you want to delete.
- Click on the delete button
| Scroll Ignore | ||||||||||||||||||||||||||||||||||||||||||||||||
|---|---|---|---|---|---|---|---|---|---|---|---|---|---|---|---|---|---|---|---|---|---|---|---|---|---|---|---|---|---|---|---|---|---|---|---|---|---|---|---|---|---|---|---|---|---|---|---|---|
| Newtabfooter | ||||
|---|---|---|---|---|
|
| Newtabfooter | ||||
|---|---|---|---|---|
|
| Newtabfooter | ||||
|---|---|---|---|---|
|
| Newtabfooter | ||||
|---|---|---|---|---|
|
| Newtabfooter | ||||
|---|---|---|---|---|
|
| Newtabfooter | ||||
|---|---|---|---|---|
|
| Newtabfooter | ||||
|---|---|---|---|---|
|
| Newtabfooter | ||||
|---|---|---|---|---|
|
...
