Page History
Even though the web app is only accessible within the company's internal network, it's important that traffic going in and out of the web app is encrypted, since user passwords are passed to the services.
You will now configure the web app that hosts your services to use HTTPS.
The first thing you need to do is to create a self-signed SSL certificate (using IIS).
Launch the IIS Manager.![]()

On the Connections pane, select (click) your computer's root node (labelled with your computer name):![]()

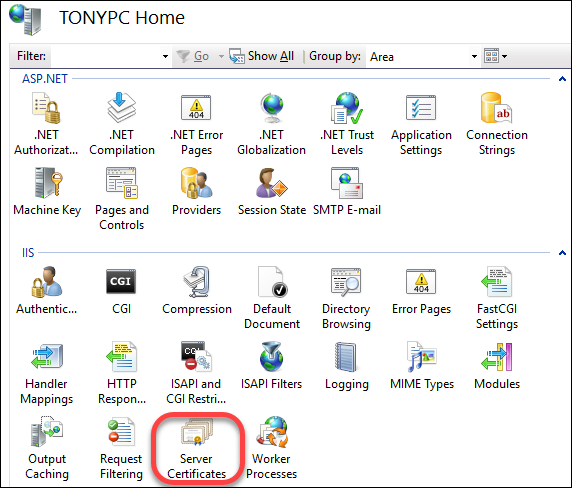
Then on the right side, choose Server Certificates:![]()
From the Actions pane, choose Create Self-Signed Certificate.![]()

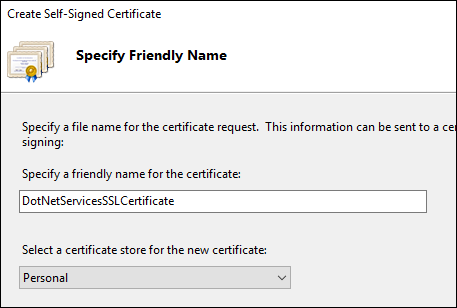
Fill out the certificate friendly name, press the OK button.![]()
Your certificate should now appear in the list:![]()

You will now create an HTTPS binding and (associate the new SSL certificate).
Right click on the DotNetServices node (under Sites), and choose Edit Bindings.![]()

You should see one binding for the web app (http, on port 9001)![]()

Click on the Add button on the right side:![]()

You will be presented with the Add Site Binding dialog box.
Set the Type dropdown to https, port to an unused port (e.g. 9002), and SSL certificate to the one you just created (DotNetServicesSSLCertificate).
Press the OK button.![]()

You should now see the new HTTP binding in the list:![]()
