Page History
IDERA SQL Inventory Manager includes a feature that lets you customize add custom inventory fields to your servers, instances, and databases to allow for easier searching and identification of the associated servers, instances, and databases. identification. When applied to an instance, this information appears in the Instance Summary section of the Instance Details view. For more information about changing the value(s) of a custom field, see Information available on Instance Details. When applied to a database, this information appears in the Database Details window.
| Info |
|---|
Users who create or manage these fields must be administrators within IDERA SQL Inventory Manager. Product Users can edit the values of the custom inventory fields for the instances to which they have access. |
The Custom Inventory fields section on the Administration view allows you to manage the complete list of custom fields for all your environment.
Add a new custom inventory field
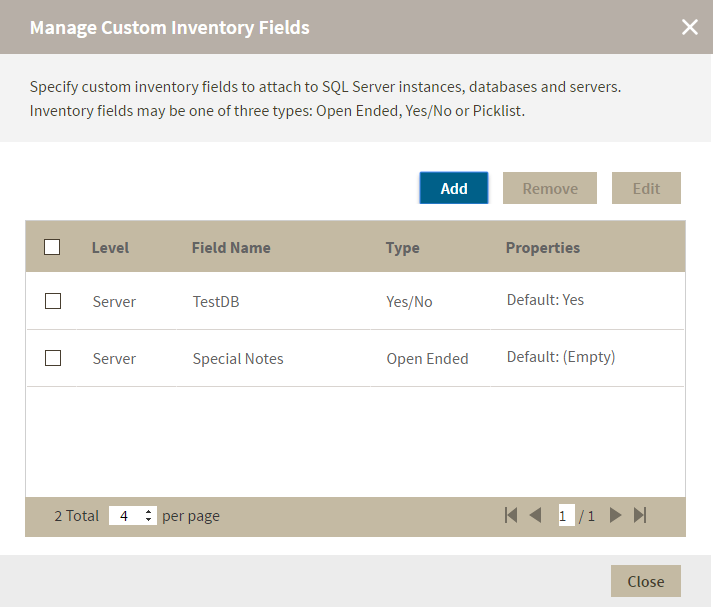
- In IDERA SQL Inventory Manager Administration, click click Manage Custom Inventory Fields. IDERA SQL IM Inventory Manager displays the Manage Custom Inventory Fields window.
- Click Click Add. IDERA SQL IM Inventory Manager displays the Add Inventory field Field dialog box.
- Type the name for the new inventory field. Names must be less than 30 characters and this field cannot be empty.
- Select the element level, whether whether Server, Instance, or or Database.
- Select the data type, whether whether Open Ended, Yes/No, Picklist, or Picklist Date.
- If you select Open Ended, use the the Default Contents field field to type the information that you want to appear when this inventory item is selectedby default on all the instances, servers, or databases until a user changes the value through editing. If the default is a null or blank string, the Properties column of the Manage Custom Inventory Fields window displays displays Default: (empty) once once you save this inventory item. The default value on the field level is empty until a user enters a value. This field is limited to 250 characters.
- If you select Yes/No, select whether you want want Yes or or No to to appear as the default value.
- If you select Picklist, use the the Options field field to list the items you want available to the user when they select this inventory item. Add only one option per line. This field is limited to 100 characters. Note that the first line is the default option which displays displays (Default) next next to the item in the the Properties column column once you save this inventory item. Note that the default value is populated for the field for all servers, instances, or database depending on the field level that was selected.
- If you select Date, use the Date Picker control to choose a date.
- Click Click Save.
Edit a custom inventory field
Editing a custom inventory field lets you rename the field or change the contents or options for the selected data type.
To edit a custom inventory field, select the checkbox next to the field you want to edit, and then click Edit. Note that you can only edit one custom inventory field at a time.
If you attempt to delete an item in the Options field and that item is assigned to a server, instance, or database, you can only change the option name and cannot delete the data. If you still want to delete that option, remove the assignment of that option from the server, instance, or database in use, and then re-attempt to delete that option.
You can edit the inventory field name and value, but cannot change the level and type. If you change the default value, the value is not updated for existing fields unless you cleared the value before making the update. From this point on, the default content is populated with the new value for new instances, servers, or databases depending on what field level is selected.
Make the appropriate changes, and then click click SAVE.
Remove a custom inventory field
To remove one or more custom inventory fields:
- In the Manage Custom Inventory Fields window, select the checkbox next to the field(s) you want to delete, and then click click Remove. IDERA SQL Inventory Manager displays a warning message that requires a confirmation whether you want to remove the selection.
Click Click Yes. IDERA SQL Inventory Manager deletes the field(s) and users can no longer use those fields. If you did not mean to delete the selected fields , click click No.
Need more help? Search the Idera Customer Support Portal.
Change a custom inventory field value on an instance
Your custom inventory fields are applied to the servers, instances, and databases automatically.
...