Page History
...
You can add, rename, or remove queries using the buttons located to the right of the Query Selection box, in the customized report data selection page.
Table 3- 1 Query selection icons
| Icon | Description |
|---|---|
 | Click to add a new query. |
 | Click to rename an existing query. |
 | Click to remove an existing query. |
...
The following figure shows how to set the filter conditions in your customized report.
Figure 3- 1 Customized report data selection page - filtering conditions example
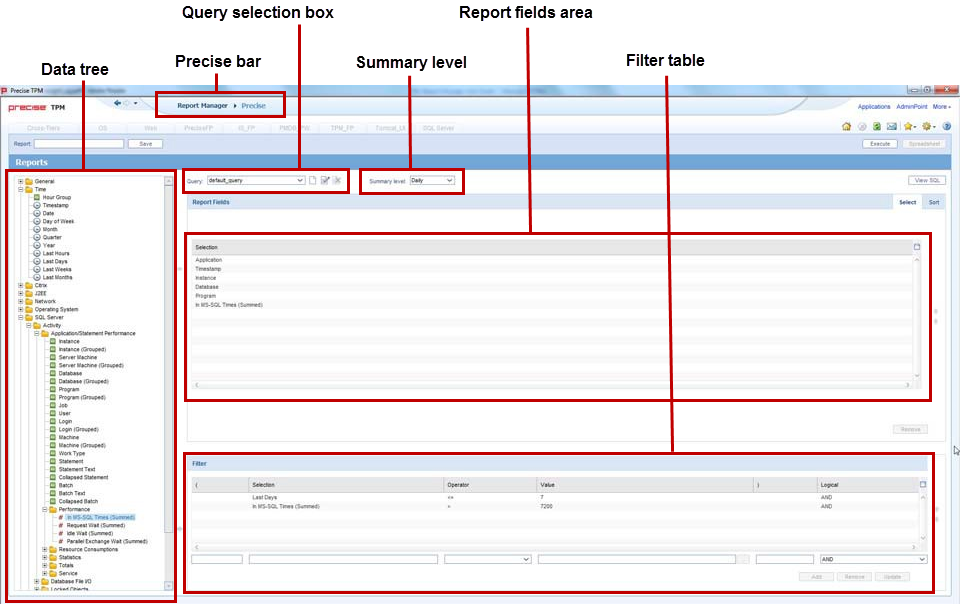
To set filtering conditions
- From the Data Tree, select the field for which you want to create the condition, and then click (arrow) of the Filter Table. The selected field appears in the Field Selection box.
- From the Operator box, select the required operator, such as Like, =, <, and In.
- In the Value box, do one of the following:
- Type a value by which the data of the field is filtered.
- Click the List icon and choose a data field from the List of Values dialog box.
- To remove a condition from the Selected Instances table, select it and then click Remove.
- To update a condition, select it from the Selected Instances Table, modify the condition parameters, and then click Update.
- To modify the order of the conditions, select the required condition from the Selected Instances Table and click UpArrow or DownArrow (located to the right of the Selected Instances Table).
...
- From the Precise bar, click Settings and from the menu select Multi Settings. The Multi Settings dialog box is displayed.
- From the Tier box, select the Tier (or all Tiers) you want listed in the Multi Settings reports table.
- From the Set box, select the report set (or all sets) you want listed in the Multi Settings reports table.
- To change report parameters and/or scheduling, Press Ctrl+Shift to select a range of reports.
- Click Properties to set report properties. See Setting report properties on page 23.
- Click Schedule to set the time schedule for the reports. See Setting the schedule of a report generation on page 23.
- Click Close to close the Multi Settings dialog box.
...
- From the Precise bar, click Settings and from the menu select Mail Settings. The Mail Settings dialog box is displayed.
- Select Integrate Report Manager with an Email server to enable the mail utility.
- Insert the Email server name and originator of the mail messages.
| Scroll Ignore |
|---|
...