Page History
...
- Log on with an administrator account to the computer on which you want to install SQL Diagnostic Manager.
- Run
Setup.exein the root of the installation kit. - Click Install SQL Diagnostic Manager on the Quick Start window.
- On the Welcome window of the setup program, click Next.

- Review the license agreement. To accept this license agreement, click I accept the terms and conditions of this License Agreement and then click Next.


Choose the components you want to install by selecting the respective check boxes. By default, the setup program installs SQLDM, and SQLDM Repository and Services, allowing you to immediately begin monitoring your SQL Server environment. Select the IDERA Dashboard checkbox if you want a complete installation.
Info By default, the Management Service, Collection Service, Predictive Service, and Rest Service are installed on the local computer where you are running the setup program.

- Click Next.

Select a Windows user account to use for the service account
...
- On the Service Account window, type appropriate credentials in the provided fields under which the services run.
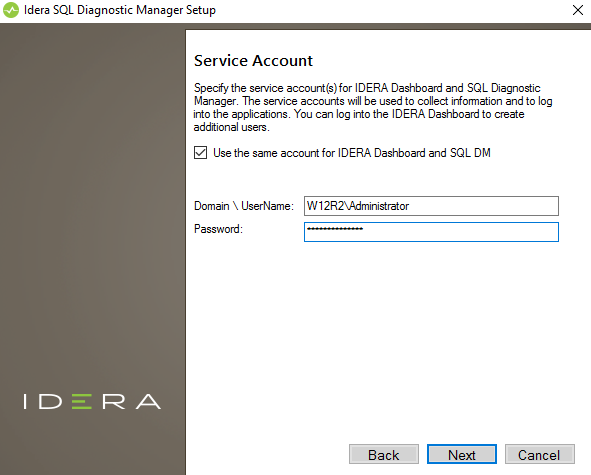
- Click Next. SQL Diagnostic Manager verifies the connection before continuing.

Select service ports to use for the IDERA Dashboard
...
- On the Service Ports window, specify the ports you want the web application and dashboard services to use.

- Click Next.

| Info |
|---|
Verify that the Firewall allows TCP (Transmission Control Protocol) traffic through your specified ports |
...
. |
Select a SQL Server instance to use for the IDERA Dashboard Repository database
...
- On the Repository Database screen, specify the host SQL Server instance you want to use for the IDERA Dashboard Repository database.
- Type the name for the IDERA Dashboard Repository database.


If your SQL Server environment uses SQL Server Authentication, select the respective check box and click Change to enter SQL Server credentials. By default, the IDERA Dashboard uses your Windows credentials when connecting to the Repository database.
Info If you use Microsoft SQL Server Authentication, a new window displays where you can type the respective SQL Server login and password.
- Click Next.
...
- Type the host name and instance in the space provided.

- If your SQL Server environment uses SQL Server Authentication, select the respective check box and click Change to enter SQL Server credentials. By default, SQL Diagnostic Manager uses your Windows credentials when connecting to the Repository.
- If want the SQL Diagnostic Management Service to use SQL Server Authentication , select the respective check box and click Change to enter SQL Server credentials. By default, SQL Diagnostic Manager uses your Windows credentials when connecting to the Repository.

- Click Next.
| Tip |
|---|
SQL Diagnostic Manager 10.3 requires Microsoft SQL Server 2005 or above running on the computer that hosts the SQL Diagnostic Manager Repository database for all installations. |
...
You can use the default install location or specify a different path. For your first install, we recommend using the default location. On the Display Name text box, type a unique name for your SQLDM instance. The display name helps you to distinguish different instances of the same product. Click Next to continue with the installation.

| Warning | ||
|---|---|---|
| ||
Provide a unique display name for the registered SQL Diagnostic Manager instance on the IDERA Dashboard or the installation process does not complete. Use the Check Availability option to verify the Display Name is available. |

Complete the install
The setup will grant the provided accounts access to SQL Diagnostic Manager and the IDERA Dashboard. The user that installs the IDERA Dashboard has access to this application by default as a Dashboard Administrator. You can choose whether you want other users to have access to the IDERA Dashboard in the Administration view.
- Click Install to indicate that you are ready to complete your installation with the configurations you specified. If you want to review or change any of your settings, click Back.


2. Click Finish to exit the IDERA Dashboard Setup Wizard.

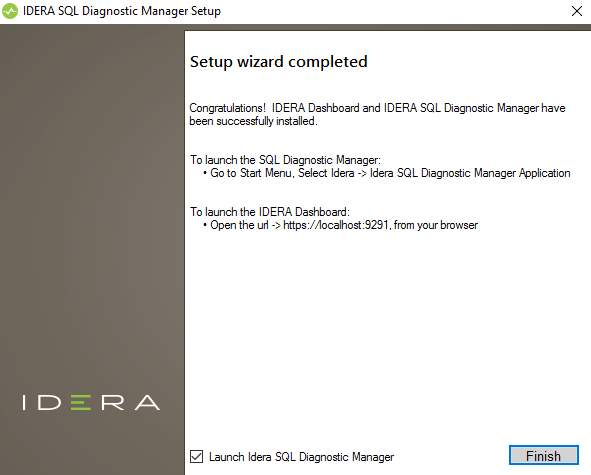
When you finish the installation, the Welcome window opens allowing you to Visit the IDERA Trial Center, Add New Servers (Recommended), Configure Default Alert Thresholds, or Start the Desktop Console.

The SQL Diagnostic Manager Console automatically launches. To access the IDERA Dashboard and the SQL Diagnostic Manager web console, see Log in the IDERA Dashboard and web console.
...