Page History
IDERA SQL Inventory Manager gathers information that allows you to determine your SQL Server licensing requirements. The Licensing view shows information like the instance version, edition, host computer´s name, CPU name, number of logical and physical processors, and if servers are virtual or not. To access this view, go to the Instances tab, and click SQL Licensing.
To find more information on how to determine Microsoft SQL Server licenses, refer to
| Newtablink | ||||
|---|---|---|---|---|
|
Available options
users can mark instances and databases as "decommissioned" within the product, thereby preventing erroneous alerting yet retaining the data for historical purposes. Decommissioned items are not monitored, do not trigger alerts or recommendations, and do not count against your IDERA SQL Inventory Manager license. The data stored before an item is decommissioned remains in the repository database, but is only included in the Decommissioned tab in the Instances view and the Decommissioned Databases list at the bottom of the Instance Details view.
The Decommissioned tab and the Decommissioned Databases list show information about decommissioned items such as the name, timestamp of decommission, SQL Server version and edition (Instance only), recommendations (Databases only), and more. To access the Decommissioned tab, go to the Instances tab, and click Decommissioned.
| Info |
|---|
Users who decommission or recommission instances and databases must be administrators within IDERA SQL Inventory Manager. |
| Tip | ||
|---|---|---|
| ||
To add notes on why an instance is decommissioned, you can use the comments field on the Instance options, or you can create a custom inventory field. You must add the notes before changing the status to decommission. |
Available options
On the Decommissioned On the SQL Licensing view there are two options available on the action items bar:
- Add SQL Server instances. Click Click this option to go to the respective wizard and add new SQL Server instances.
- Export
 . You can choose any of the following formats: PDF, XLS, or XML for exporting the information displayed on the SQL Licensing Decommissioned view.
...
Advanced Filter. Apply advanced filters.
Clear Filters. Clears any applied advanced filters.

| Tip |
|---|
You can type on the bottom section of this view the number of instances you want IDERA SQL Inventory Manager to display per page. Click Refresh to apply the changes. |
...
Options available when you select instances
...
On the SQL licensing Decommissioned view, IDERA SQL Inventory Manager allows you to perform several actions on a single instance as well as bulk actions on several selected instances.
If you select one instance or more instances, you can perform the following actions:
- Recommission
- Remove
- View details
- Refresh data
- Edit properties (Owner, Location, Comments and Credentials)
- Edit Tags
- More actions: Disable Monitoring, Remove, Add SQL Server instance.
| Tip |
|---|
You can also access most of these options from the gear icon next to the selected instance. To access the instance details view, you can click directly on the instance name. |
Viewing instance details
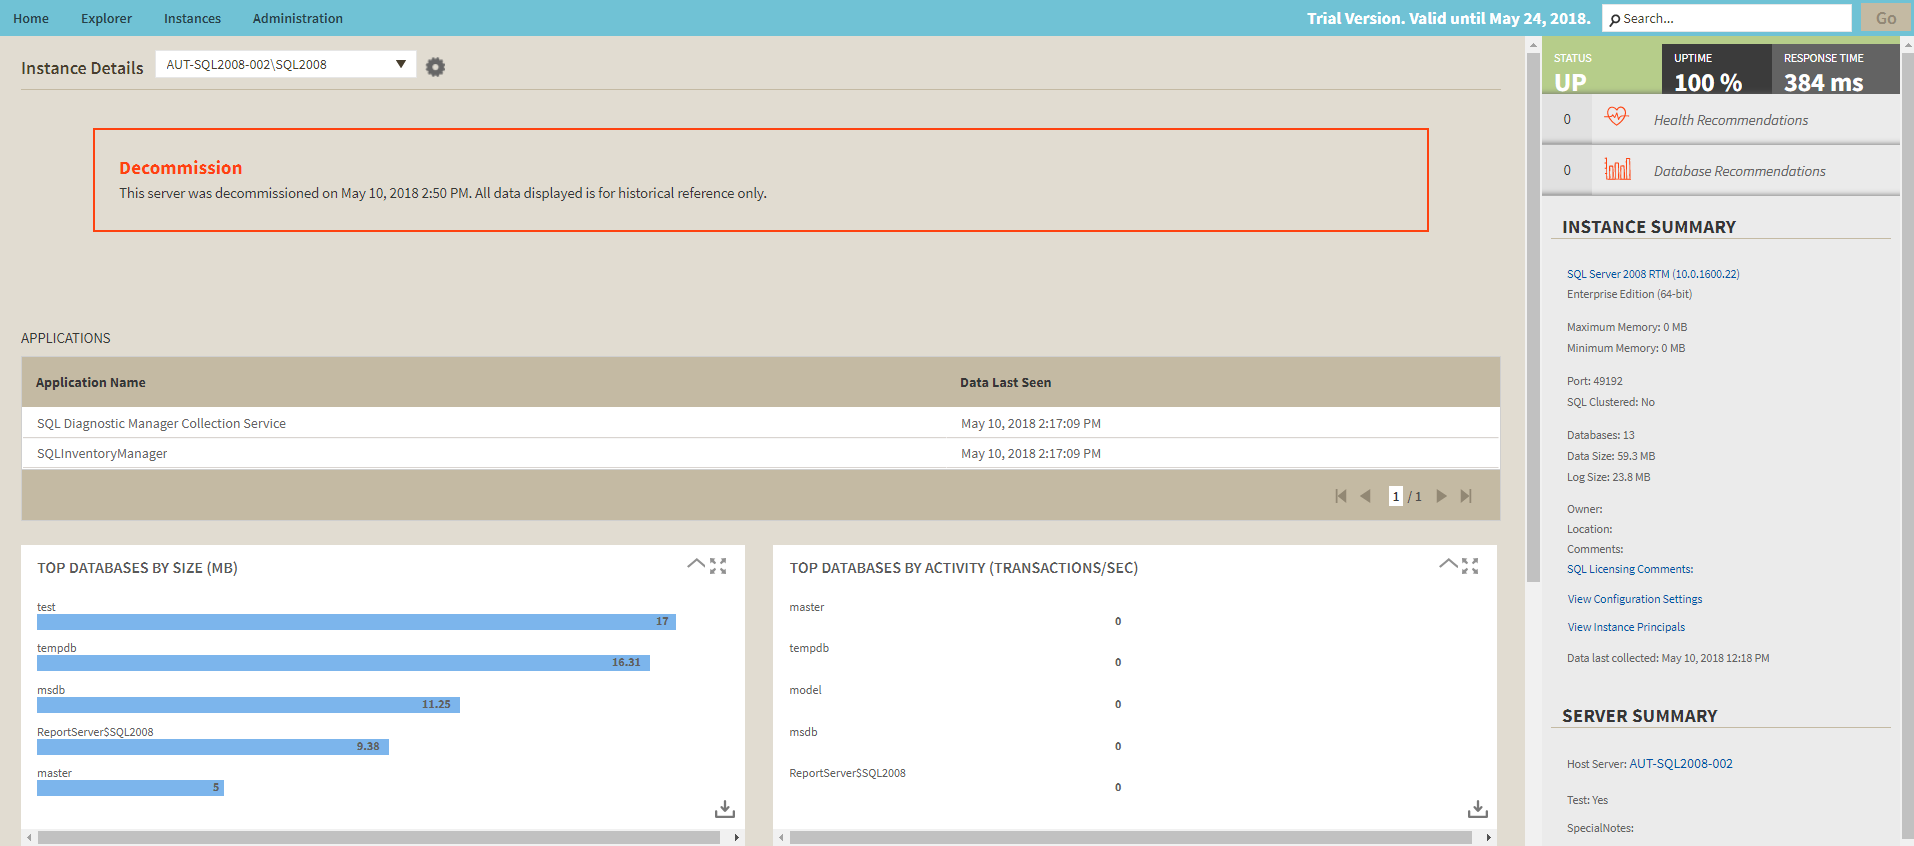
You can access an instance details view by selecting the instance and clicking View Details on the action items bar or by clicking directly on the instance name. For more information about what information is available on the instance details view, refer to Viewing instance details. Refresh Data Decommissioned instances display a large message including the timestamp when the instance was decommissioned and to remind the user that all displayed data is for historical purposes only.
Remove
If you no longer want to refresh the collected data for manage an instance, select the instance and click Refresh Data on the action items bar. You can also find this option by clicking the gear icon next to the respective instance. You can only perform this action for one instance at a time.
Edit instance properties
Select an instance and click Edit Propertiesyou can remove it by selecting the respective instance, going to More Actions on the action items bar, and selecting Remove. You You can also find this option by clicking the gear icon next to the respective instance. On the properties dialog window you can change the owner, location, comments, and credentialsIDERA SQL Inventory Manager displays all removed instances on the Ignored instances view. For more information go to Editing instances propertiesabout removing instances click here. Edit Tags
Recommission
By selecting Select an instance and clicking Edit Tags on click Recommission on the action items bar, SQL Inventory Manager opens a new dialog window where you can add new tags or change the currently assigned tags of the selected instance. You . You can also find this option by clicking the gear icon next to the respective instance. For more information about editing tags for a specific instance, go to Manage tags for a single instance.
More Actions
Under More Actions you can find three additional options: Disable Monitoring, Remove, and Add SQL Server instance.
Disable Monitoring
If you want to disable the monitoring of an instance, select the instance, go to More Actions, and select Disable Monitoring. You can also find this option by clicking the gear icon next to the respective instance. For more information about disabling instances, click here.
Remove instance
If you no longer want to manage an instance, you can remove it by selecting the respective instance, going to More Actions on the action items bar, and selecting Remove. You can also find this option by clicking the gear icon next to the instance. SQL Inventory Manager displays all removed instances on the Ignored instances view. For more information about removing instances click here.
On the confirmation message dialog, verify the correct instance(s) appears, and then click Yes. Note that the instance disappears from the Decommissioned tab and appears on the Managed tab. Remember that this instance is now active and does count against your IDERA SQL Inventory Manager license.
Add SQL Server instance
...
If you want to access the Add SQL Server instance wizard, go to More actions and select this optionclick Add SQL Server instance. The wizard opens and allows you to browse and register SQL Server instances.
If you select several instances SQL Inventory Manager allows you to perform the following bulk actions on the selected instances:
- Edit Owner
- Edit Location
- Edit Credentials
- Edit Tags
- More Actions (Disable Monitoring, Enable Monitoring, Remove, Add SQL Server instances)
For example, if you have a new DBA, you can select all instances on this tab and click Edit Owner to change all instances owner at once.
To bulk edit several instances, select the instances you want to change and follow any of these paths:
- Click the option you want to perform on the action items bar: Edit Owner, Edit Location, Edit Credentials, Edit Tags, Disable Monitoring, and Remove.
- Or click the gear icon next to one of the selected instances. SQL Inventory Manager opens a dialog window that shows you on how many instances you are performing the changes.
Advanced Filter
Apply advanced filters to your instances view, for more information refer to Filtering and Sorting.
Clear Filters
Clears any applied advanced filters.
Exporting from the Decommissioned view
...
On the action items bar of the SQL Licensing Decommissioned view, you can find the Export option ![]() option which allows you to choose your preferred format for exporting the information available on this view. You can export as a PDF, XLS, or XML file. The filters you choose on this view will be taken into account for your exported reports.
option which allows you to choose your preferred format for exporting the information available on this view. You can export as a PDF, XLS, or XML file. The filters you choose on this view will be taken into account for your exported reports.
Filtering
...
On the left section of this view you can find options for filtering your instances by Tags, Owner, Location, and Version. Use these filters to quickly access specific instances that you want SQL Inventory Manager to display on this view. For example, you can choose to display the licensing information of instances that have a specific tag in your environment.
Creating a useful filter to "weed out" unnecessary information takes time but is important when managing large environments. As a result, you may want to save that filter for future use. SQL Inventory Manager now allows you to save filters for use in the Explorer and Instances views. Simply create the filter, and then click Save as Explorer favorite or click Save as Instances favorite, depending on which view you are in when creating the filter. To use that filter, click Load Explorer favorite or click Load Instances favorite.
and Sorting
SQL Inventory Manager offers different ways of sorting and filtering the listed instances/servers, for further information refer to Filtering and SortingYou can enable or disable the option Apply filter as it changes depending if you want to see the changes as you apply the filter, or if you prefer to select your filters first and see the results when you finish.
| Tip | ||
|---|---|---|
| ||
| IDERA SQL Inventory Manager displays the filters you select on the top section of your managed instances view under Filtered by.You can remove filters from this section too. |
Need more help? Search the Idera Customer Support Portal.
...