Page History
...
- Click the drop-down icon beside the title Monitors -> Manage CSO. The twenty-eight pre-defined CSOs display in the left menu.
As an example select the DiskInfo item. The User Defined SQL-query displays in the SQL box. Sample interval and retention timeframe specific for this CSO may be changed as per your preference and you may specify for which MySQL server(s) this particular CSO should be collected. Also note that one or more Key columns are defined. It must be a column or a set of columns returning (a) unique (set of) value(s) (similar to a UNIQUE KEY in MySQL). Without defining a Key Column, the result monitors might now show proper values.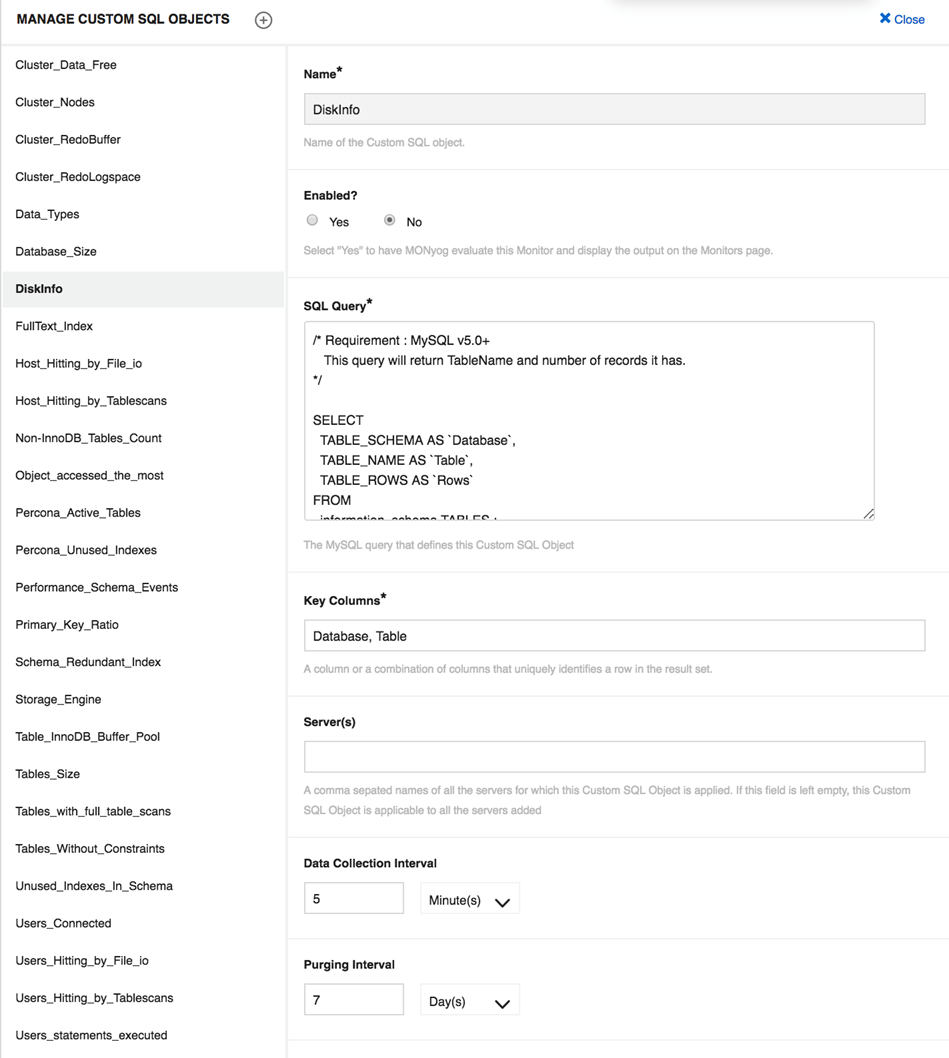
- Go to Monitors page, select Manage Monitor Groups, enable the DiskInfo Group, and Save the changes. This pre-defined group contains pre-defined CSC’s using the CSOs you enabled in the previous step.
- Go to Monitors page, select the DiskInfo group that now displays at the bottom. You can see five new counters in that group that in various ways reference the CSOs that we just enabled (click the counter name and next ‘Customize’ as usually to see the javascript code). Customize those further as you want to do with any counter in SQL DM for MySQL.