Creating a New Application
The following describes the steps for creating a deployment application in RED.
Note
Maximum number of objects in an application:
5000 objects (including jobs)
2000 source views of views
1000 jobs
- Log into RED and click the Deployments menu to select the Create New Deployment Application option.
- The Build Deployment Application window is displayed which enables you to specify the application identification details and optional previous application to be used as a starting point, and pre and post-application load SQL statements to execute; if required.
The other tabs enable you to select the objects to be deployed and/or deleted in the selected destination repository.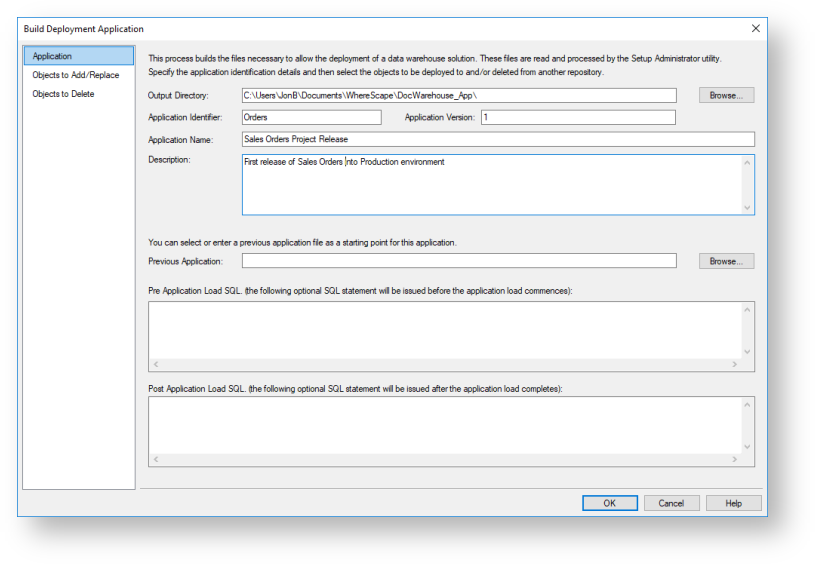
Application
Type in the required application details:Fields Description Output Directory The directory to which the application files will be written. By default, this is the WhereScape program directory.
To browse for the required folder, click the Browse... button. Click New Folder to create a new folder in the selected directory.
Application Identifier The application identifier is a four-character code used to identify the application uniquely. This identifier is used in the naming of the files that are created to contain the application data. Application Version The version is a character string that provides a version number for reference purposes. This version number is displayed when applications are being loaded and is used in the naming of the files that are created to contain the application data. As such, it must contain characters that are valid in a Windows file name Application Name The name by which the application is known. This name is displayed during the selection of an application to load and is recorded in the metadata of the repository into which an application is loaded. It is not used, for documentation purposes. Description This description is displayed during the selection of an application to load. It is not used at any other point, apart from documentation purposes. Previous Application Click the Browse button next to Previous Application to choose a previously built application to use as a list of objects to include in the new application. After using a previous application as a starting point for this application, additional objects can be added or removed from the application. Pre-application load SQL This text box enables you to enter an executed SQL statement before the application is loaded. For example, you may wish to drop the date dimension before loading the application because we have changed the primary key constraint. In such a case, you would enter 'drop table dim_date' in this field to have the table dropped before the application is loaded. Post application load SQL This text box enables you to enter an SQL statement that is executed after the application is loaded. For example, you could execute a function to populate a table. - After defining the application details, click the Objects to Add/Replace tab to select the objects that you want to add or replace in the destination repository where the application will be deployed.
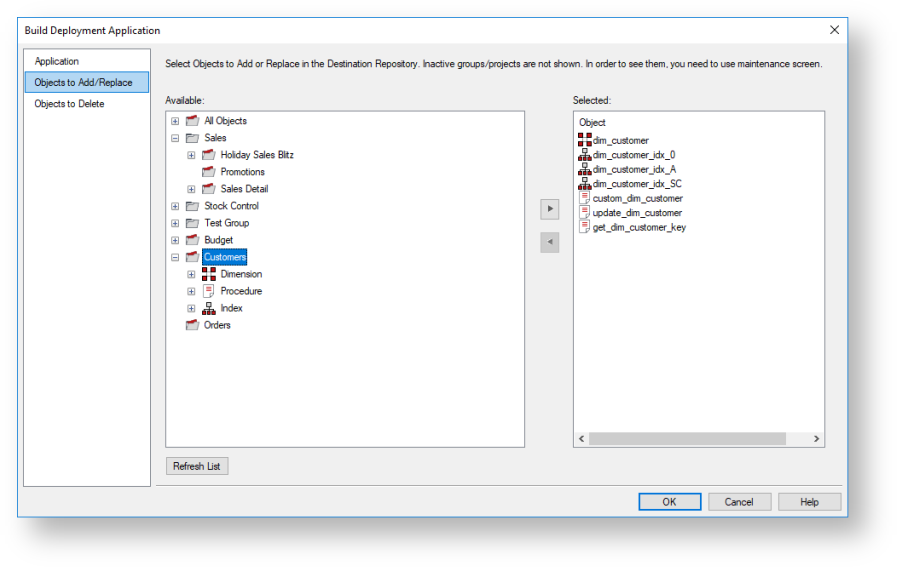
Objects to Add/Replace
Double-click a Project/Group folder to display the objects that are associated with them. Objects can be moved from the left object tree pane to the right pane by double-clicking an object or by using the > button.
If procedures are compiled as part of the subsequent application load, the compiles occur in the order in which they are listed in the application. If procedure dependencies exist, ensure that they are ordered correctly in the application object list.Note
- Projects or Groups that have been flagged as inactive are not displayed in the Available pane. Refer to Maintaining Group/Project Active Flag for details.
- You can select multiple objects using the Windows standard keyboard keys (CTRL or SHIFT) for multi-selection.
- After defining the objects to add/replace, click the Objects to Delete tab if you want to specify Objects in the application that will be DELETED from the selected destination repository when the application is deployed.

Objects to Delete
Click the Available drop-down field to select an option for displaying objects in the left object tree pane, each option is described in the table below. Double-click a Project/Group folder to display the objects that are associated with them. Objects can be moved from the left object tree pane to the right pane by double-clicking an object or by using the > button.Options Description Archived Objects This option includes all objects that have been versioned and deleted. This is the case in a development repository, where the object was removed after versioning.
This is the default option.Current Objects This option includes all the currently available objects and their associated Projects or Groups. All Objects This option includes all the Current Objects plus the Archived Objects (deleted/versioned). Objects that were versioned and deleted will appear in All Objects but not under any Projects or Groups. - Once the application is defined and the objects selected, click OK to generate the application files.
Check the application output folder, the following files are built when an application is created (where XXXX is the application identifier and NNNNN is the application version).File Purpose App_data_XXXX_NNNNN.wst This file contains the scripts and data required to rebuild the objects in the new metadata repository. App_id_XXXX_NNNNN.wst This control file identifies the application and its version. App_obj_XXXX_NNNNN.wst This file contains control information and each object in the application. App_con_XXXX_NNNNN.wst A list of all the connections either in the application or used by objects in the application. App_map_XXXX_NNNNN.wst A list of all the project and group mappings for the objects in the application. Refer to Deploying an Application for details on how to load your new application to a selected RED repository.