DB Change Manager can register data sources by scanning your systems on startup or as needed. Also, instead of scanning, you can provide the information for one data source at a time.
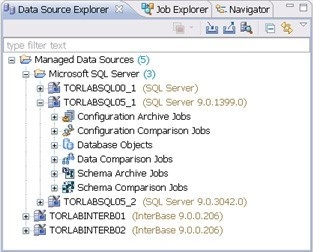
Once registered, the data source appears in the Data Source Explorer view. If you have created more than one workspace, they all share the same data source catalog. You can organize data sources into groups and subgroups.
Once a data source has been registered, the connection parameters are stored locally. In some cases, a user ID and password are required to connect to a registered data source. DB Change Manager can encrypt and save user IDs and passwords to connect automatically.
You can import an existing data source catalog from other IDERA products, or from third- party DBMS sources. You can also export a data source to an XML file. These topics include:

Registering data sources on start up

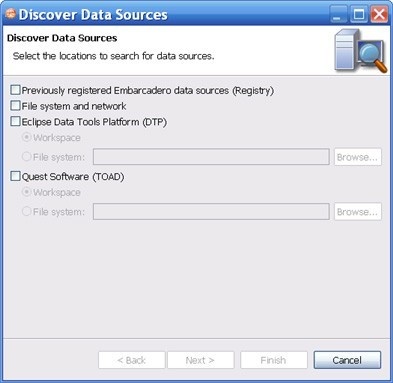
When DB Change Manager first starts, it prompts you to discover data source catalogs that have been created by any previously installed IDERA products (DBArtisan, Rapid SQL, DB Optimizer), or other instances of DB Change Manager.
Additionally, the system can scan your machine for the client software of all supported third- party DBMS platforms (TOAD or Eclipse Data Tools Platform) and add them to the data source catalog.
If you do not want to do this on startup, at a later time you can scan for data sources, or add them one at a time.

Scanning for and registering data sources

DB Change Manager can register data sources by scanning your systems.

To initiate a scan for data sources

  1. Click the Discover Data Sources icon at the top of Data Source explorer.
  2. In the Discover Data Sources dialog, choose the type of data sources that you want returned in the search results.
  3. Click Next.
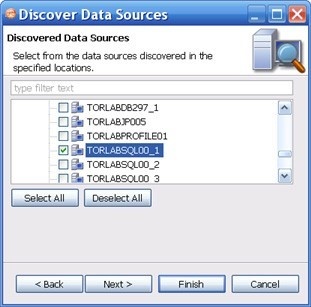
    The search returns a list of the discovered data sources.
  4. Choose the data source(s) that you want to add to the DB Change Manager environment, and then click Finish. Data Source explorer automatically populates with the new data source selections.

Registering a new data source one at a time

If a data source is not present in Data Source explorer, you can add it. 

To register a new data source
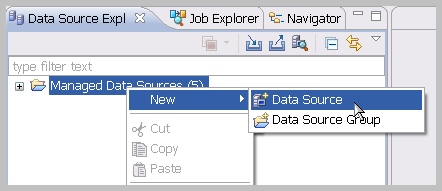
  1. In Data Source explorer, right-click the Managed Data Sources folder, and then select New > Data Source.
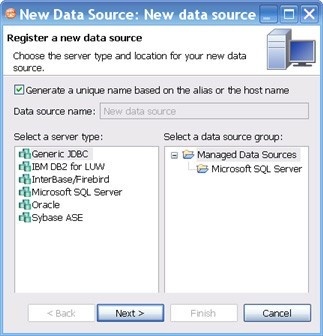
  2. In the New Data Source wizard, select the data source server platform.
  3. If you have previously set up a group and want to add this data source to that group, select the appropriate group in this window. Otherwise, leave the default selection, Managed Data Sources.
  4. Click Next.
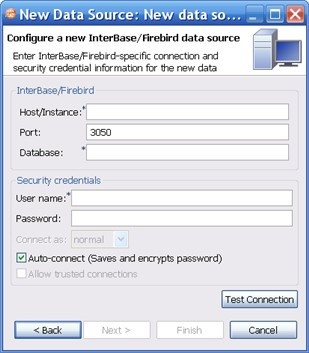
  5. Type the connectivity details and login credentials, and then click Test Connection to confirm that the configuration information is correct.
  6. Click Finish. Data Source explorer now lists the new data source.

Grouping data sources

You can organize data sources in Data Source Explorer into groups and subgroups, which appear as folders. Groups help you manage a large number of data sources.

To create a data source group

  1. In Data Source Explorer, right-click the Managed Data Sources folder and select New > Data Source Group.
  2. Type a descriptive name for the new group in the Name field, and then click OK.
    Data Source Explorer lists the new group. You can drag and drop data sources into the group folder or add new data sources to the folder.

To create a data source subgroup

  1. In Data Source Explorer, right-click the Group folder and select New > Data Source Group.
  2. Type a descriptive name for the new group in the Name field, and then click OK.

Importing and exporting data sources

You can import an existing data source catalog from other IDERA products or from third- party DBMS sources, including:

Conversely, you can export your current data source catalog to a file, which can then be imported into other instances of DB Change Manager using the Previously Registered IDERA Data Sources (File) option.

If you experience problems importing data sources from other IDERA products, you can import the old data sources using your Windows registry by selecting File > Import... > IDERA > Data Sources > Previously Registered IDERA Data Sources (Registry).

To import data sources

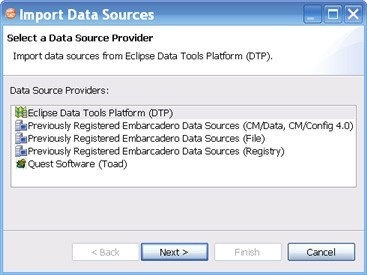
  1. Select File > Import > Data Sources.
  2. Choose a source from which you want to import the data sources, and then click Next.
  3. Specify the details about the location of the import source.
  4. Click Finish. Data Source Explorer is automatically populated with the new data sources.

To export data sources

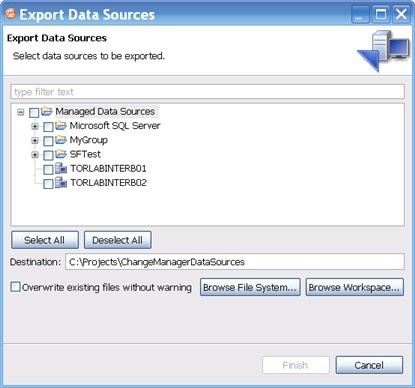
  1. Select File > Export > Data Sources.
  2. Browse the list, and then select a data source to export.
  3. Type or use the Browse File System or Browse Workspace buttons to enter the directory path and file name.
  4. Click Finish. The data source is exported as an XML file. You can import this file to other instances of DB Change Manager.


 |    |  |   |   |