This is a guide for installing Source Enablement Packs for WhereScape RED 8.6.6.1 or higher

python -m pip install --upgrade pip |
pip install pandas fastavro openpyxl xlsxwriter xlrd pyarrow fastparquet pyorc avro avro_python3 jsonpath_ng openpyxl Pillow pyarrow xmltodict lxml pip install --upgrade pandas Amazon S3 pip install boto3 Azure DataLake Storage Gen2 python -m pip install azure-storage==0.36.0 python -m pip install azure-storage-file-datalake Google Cloud python -m pip install --upgrade gcloud python -m pip install google_api_python_client google_auth_oauthlib python -m pip install protobuf google-cloud-core python -m pip install google-cloud-datastore google-cloud-storage Salesforce python -m pip install simple-salesforce requests |
Above mentioned python packages can be installed by running install_WslPython_Modules.bat(refer to section Enablement Pack Setup Scripts.) |
Scripts entirely drive the Enablement Pack Install process. The table below outlines these scripts, their purpose, and if Run as Administrator is required.
# | Enablement Pack Setup Scripts | Script Purpose | Run as Admin | Intended Application |
1 | Setup_Enablement_Pack.ps1 | Installs or updates source enablement pack in existing RED Metadata Repository for the target database | Yes | New and Existing installations |
2 | install_WslPython_Modules.bat | Installs or updates WslPython Modules and required Python libraries on this machine | Yes | New and Existing installations |
The PowerShell script above provides some help at the command line, this can be output by passing the "-help" parameter to the script.
| Note that on some systems executing Windows PowerShell scripts is disabled by default, see troubleshooting for a workaround |
Installation Script to an existing target database repository
Run Windows Powershell as Administrator
<Script1 Location > Powershell -ExecutionPolicy Bypass -File .\Setup_Enablement_Pack.ps1 |
This enablement pack will overwrite any existing Source Enablement Pack UI Configs:
To ensure existing Source Enablement Pack connections and associated Load Tables continue to browse and load: Go into UI Configuration Maintenance in RED before installing this Enablement Pack and rename the affected UI Configurations. While the updated Load Template will work with previous Source Enablement Pack we recommend moving these previous versions of Load Tables to newly created Parser-based connections following this install. The earlier versions of the Source Enablement Pack will be deprecated following this release. |
Post install checks:
| UI Configurations generally come in sets of 2 or 3 for a particular source type, a minimum set will have both a Connection UI Config and a Load UI Config, optionally a Column UI config may also be included. |
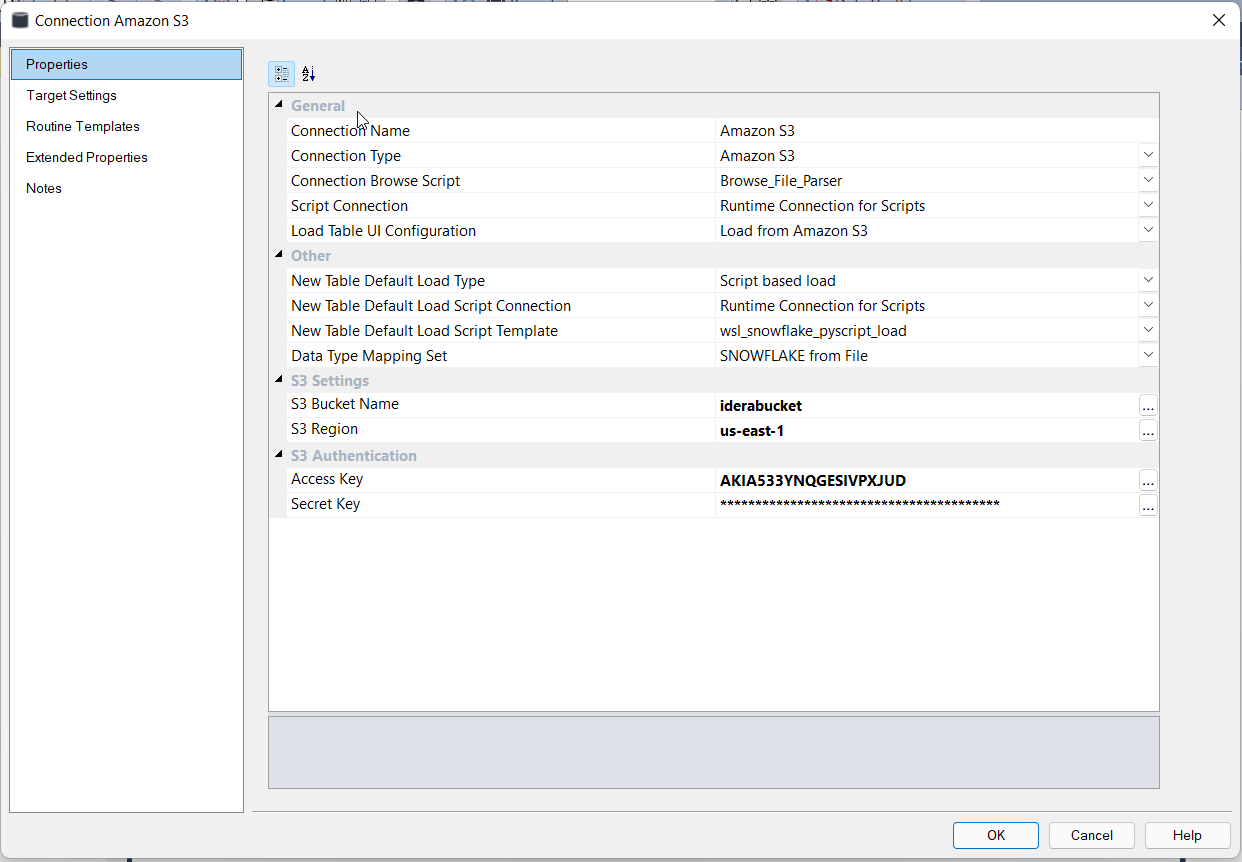
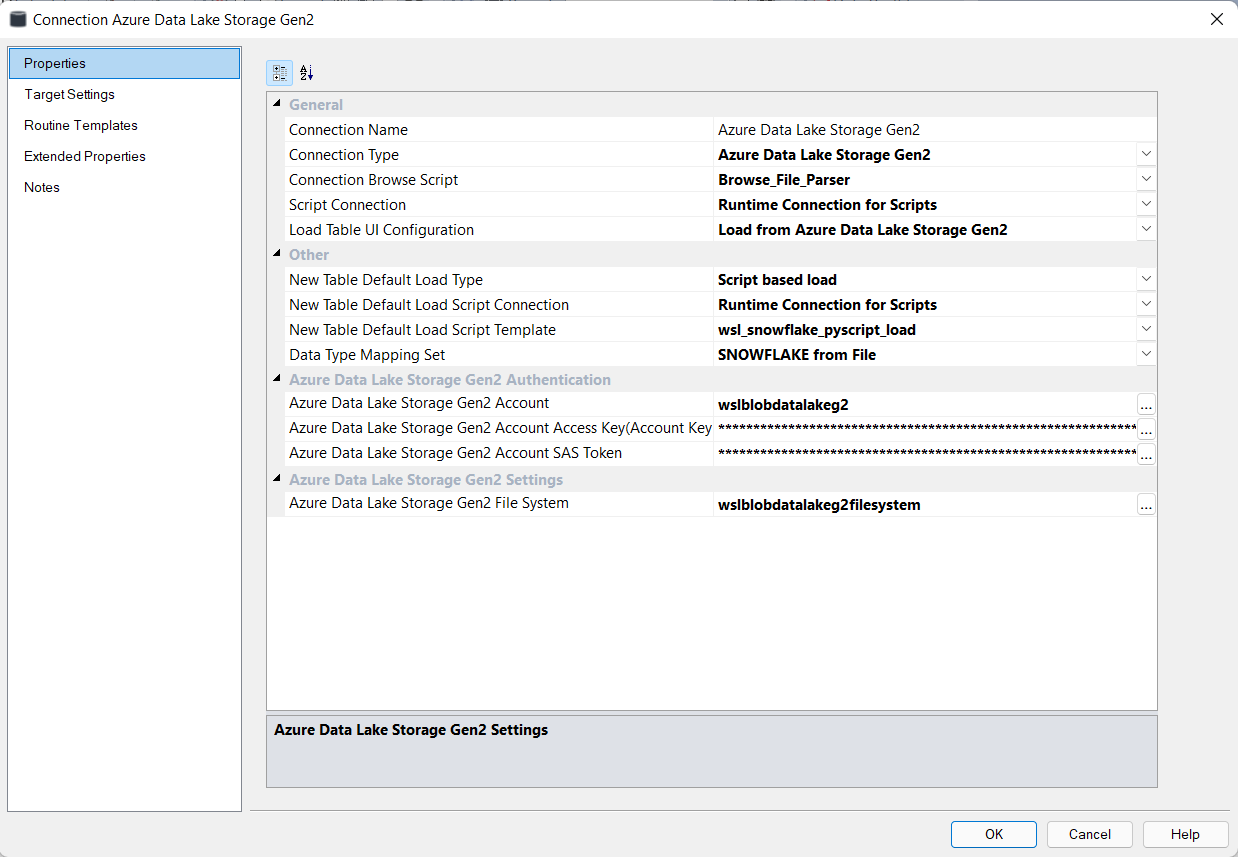
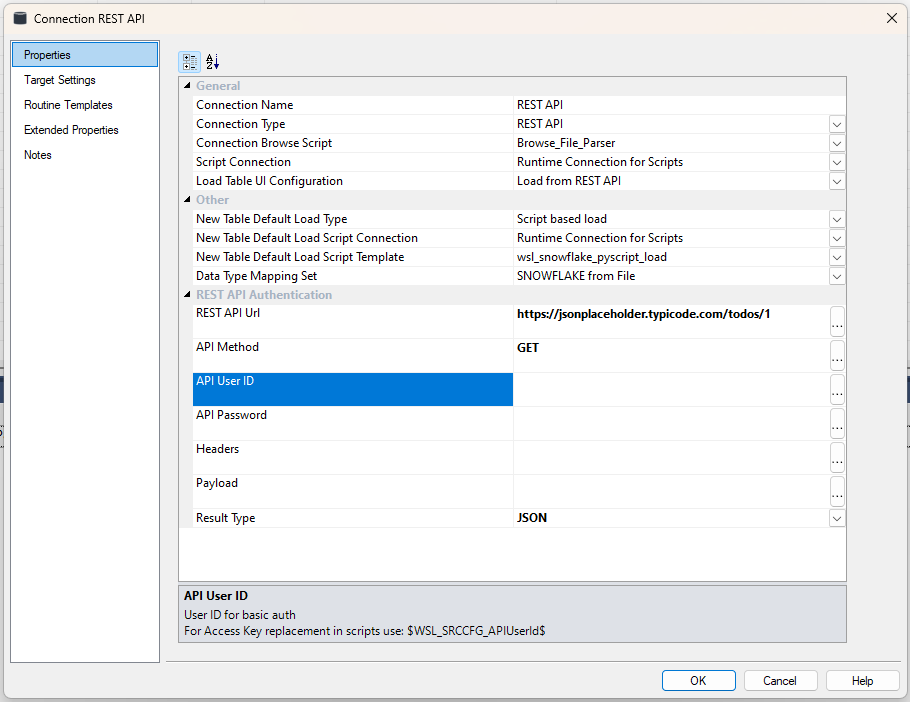
GET Method (Open API)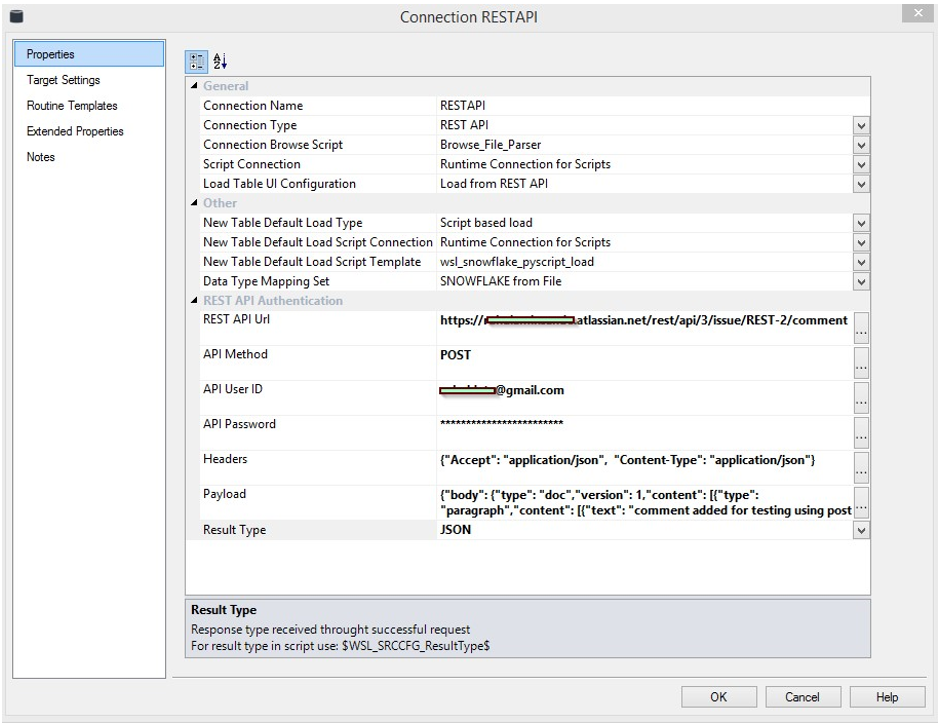
POST Method (With Authentication)
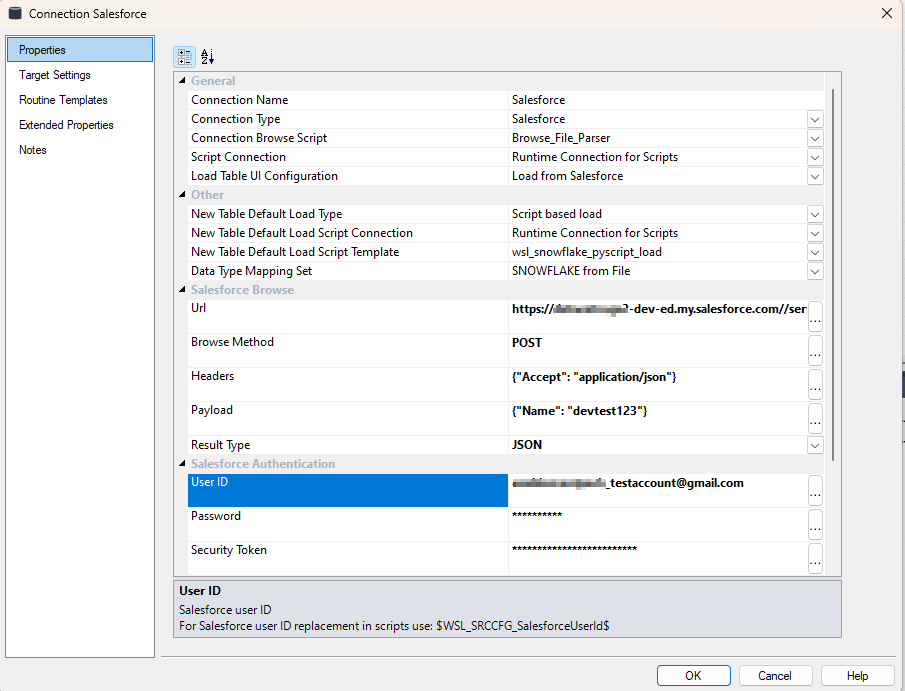
API Method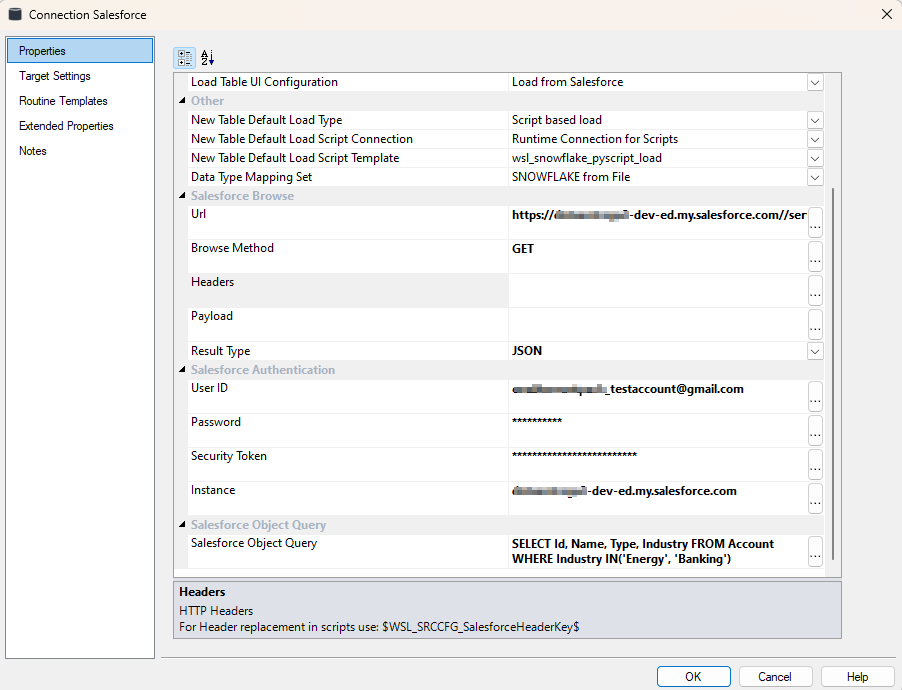
SOQL (Salesforce Object Query) Method
NOTE: For more information on Security Token. Please refer to the official Salesforce documentation here |
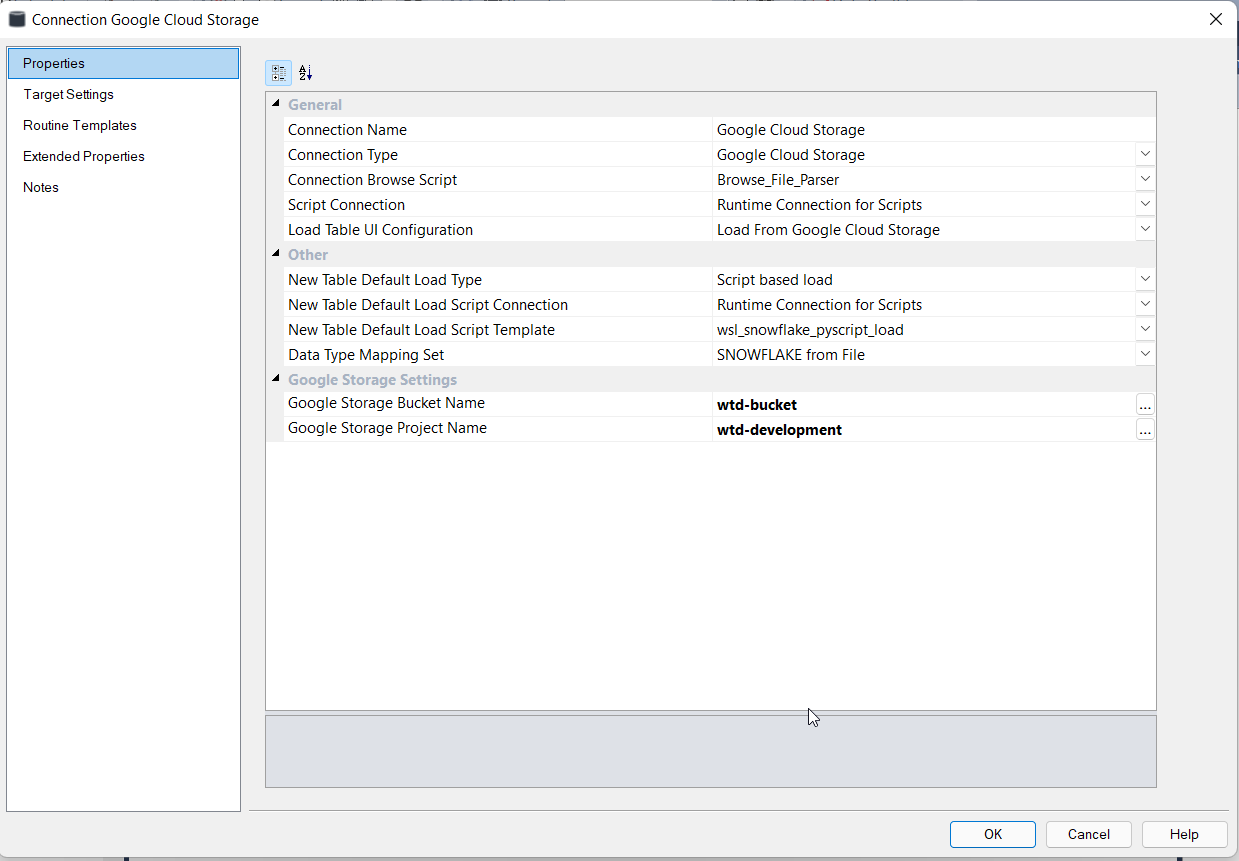
| For Google Cloud, Install and configure Google Cloud SDK |
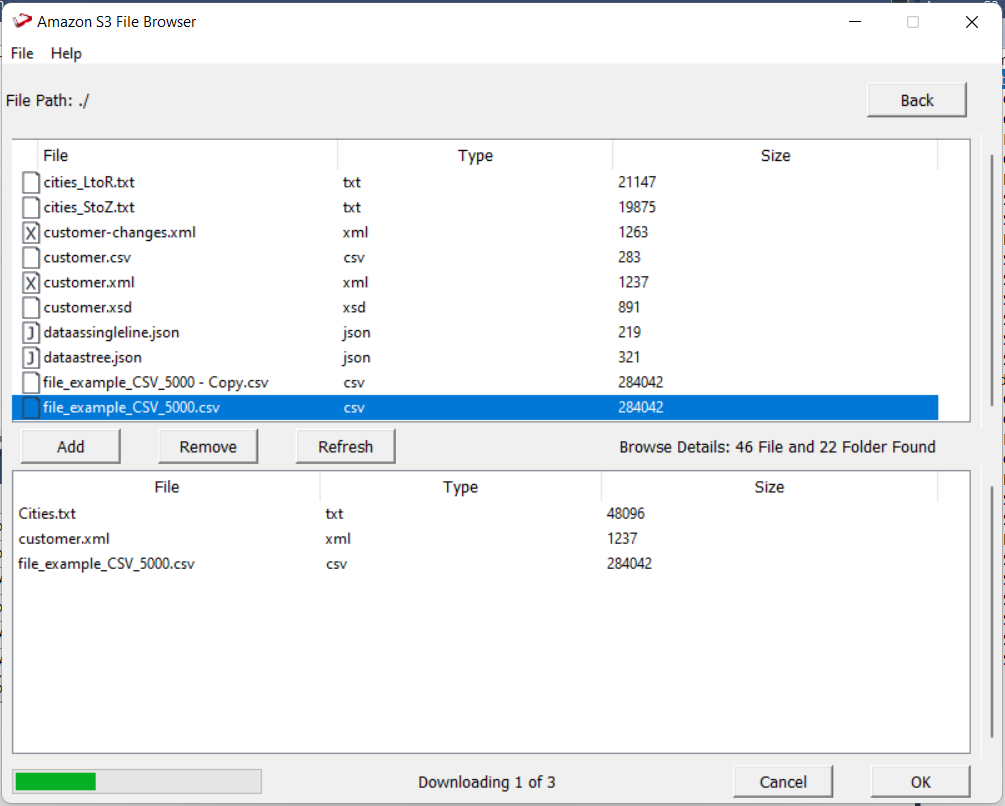
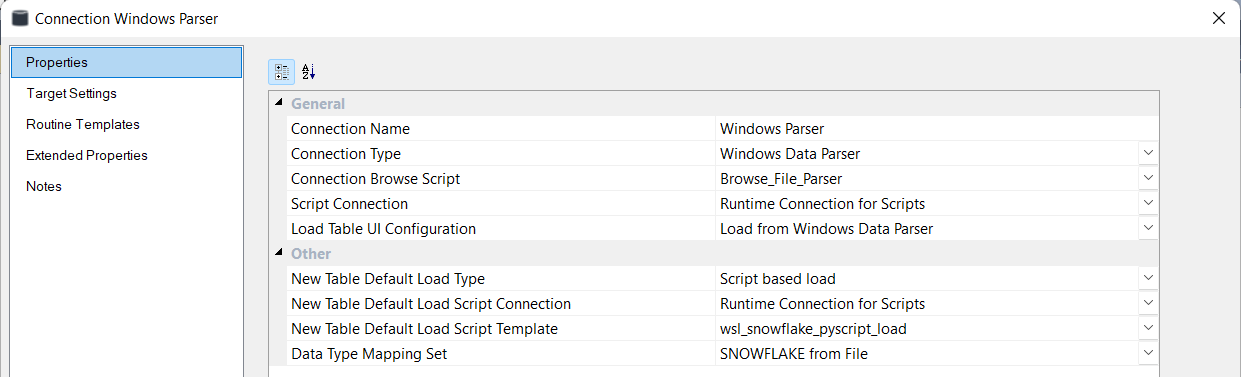
Choose parser as per file type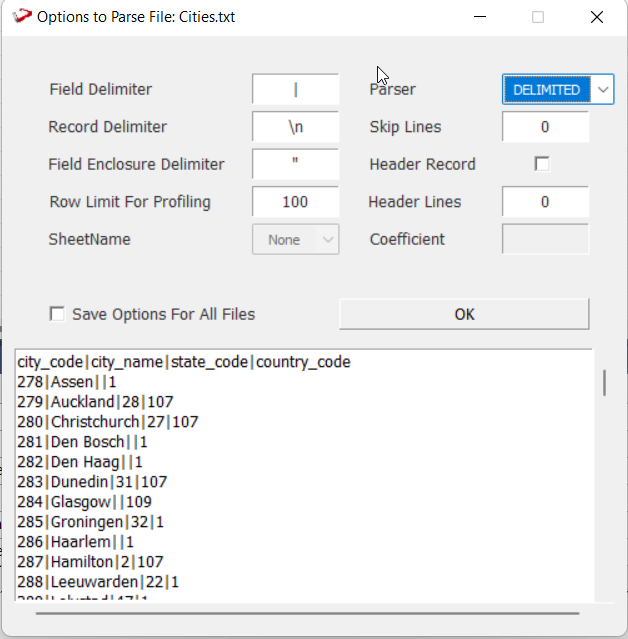
If the files are of same type and parsing options are same, check highlighted box to save same options.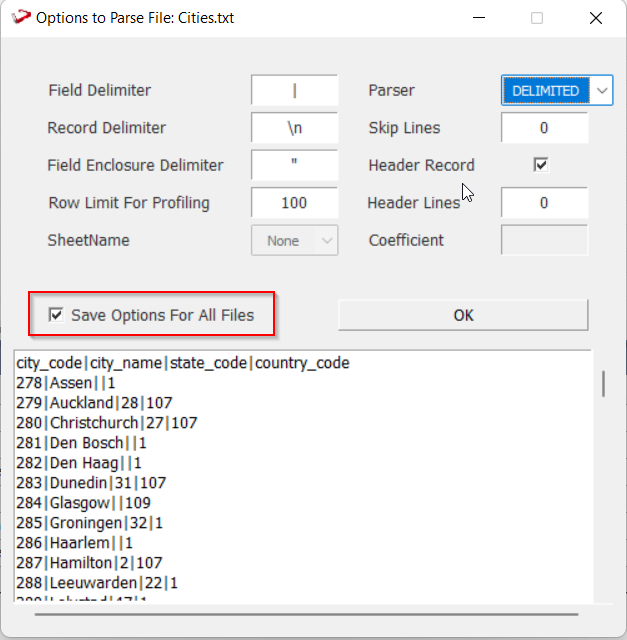
The JSON parser GUI's main pane, The file name is highlighted, and the JSON tree structure is shown below it.
Hovering the cursor over any widget or element in the GUI will display information about that widget or element in the bottom help box.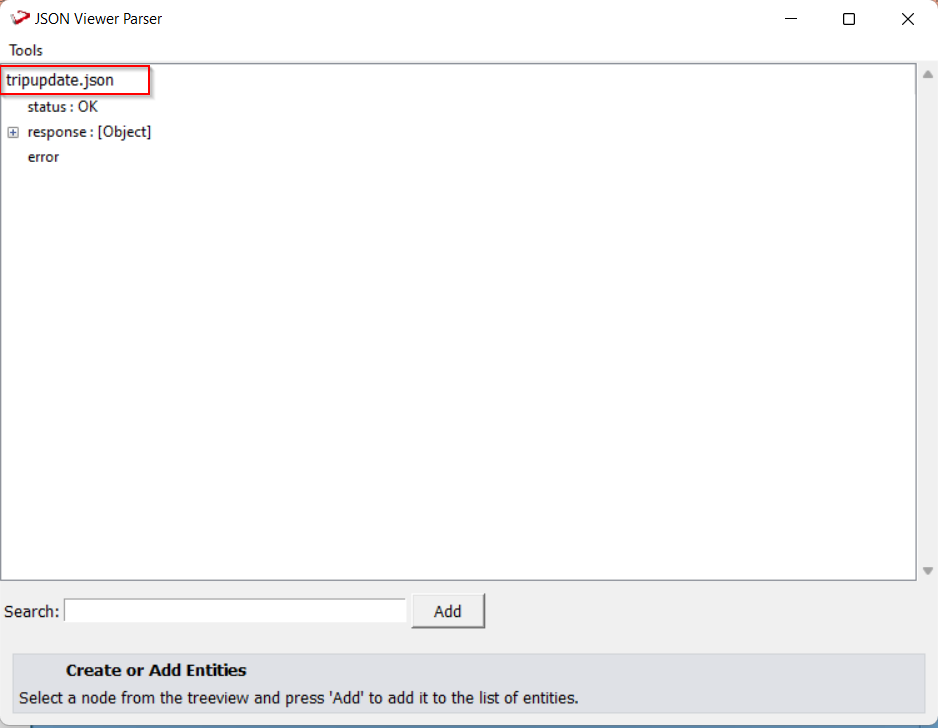
Select any node in the JSON tree and press the Add button at the bottom to create a new entity. On the right side of the window, a new pane will appear. The name of the new entity will be "Entity 0" by default. If the selected node is a leaf node (key value pair), this new entity will include only its key; if the selected node is an object or array, this new entity will include all of its children. The data type of the node is highlighted in the figure below.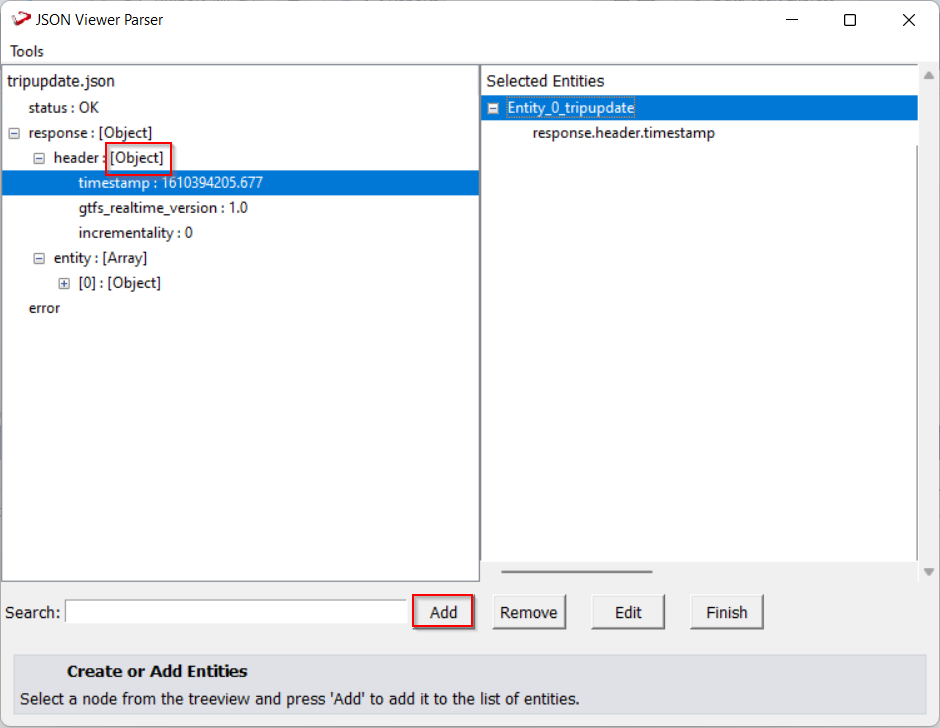
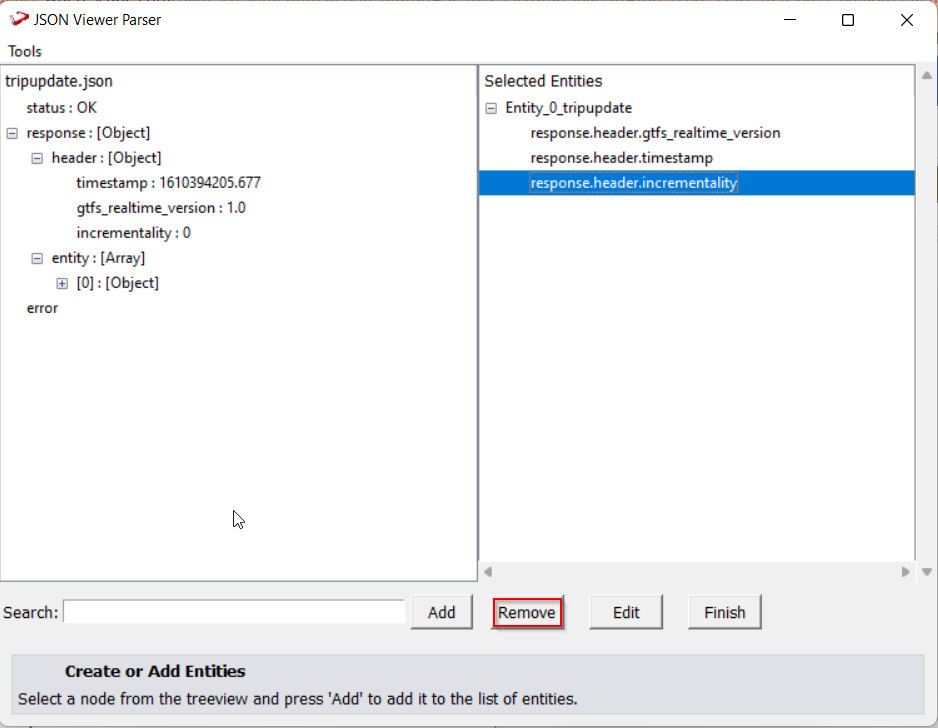
Select the entity and use the Remove button to remove any specific node. To remove the entire entity object, choose the primary node (for example, Entity_0) and press the Remove button in the same way.
| Holding the "Ctrl" key on the keyboard while clicking on different nodes allows the user to select multiple nodes. |
To add a new node from a JSON tree to an entity that has already been created. Select the node in the JSON tree to which the node should be added (Example: Entity_0), select one or more nodes, and click Add to add the selected node to the selected entity.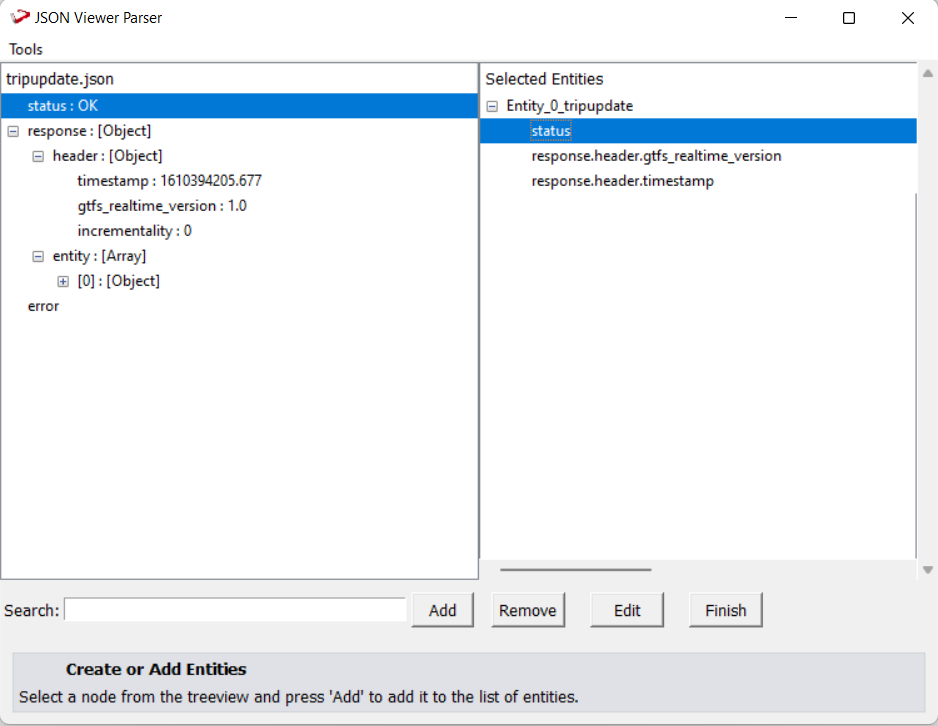
To edit the name of Entity, Select the entity and press the "Edit" button to change the name. This will open a window with a text box where you may type in the new name for that object and then click Ok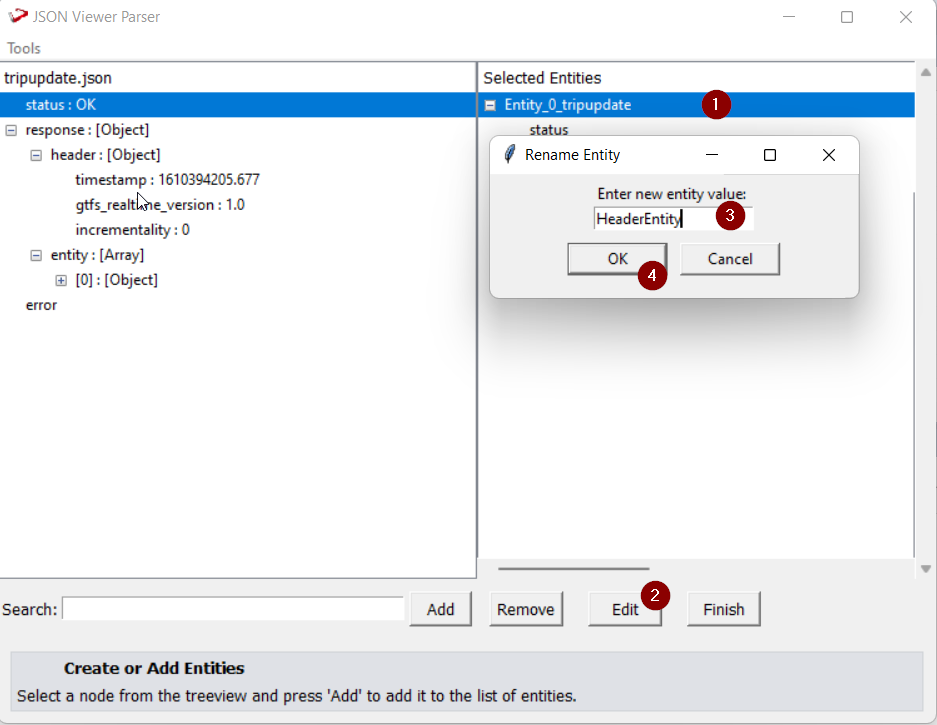
In the selected entities pane, nodes in entities with more than 64 characters are colored "red." In WhereScape RED, the names of these "red" colored nodes are trimmed.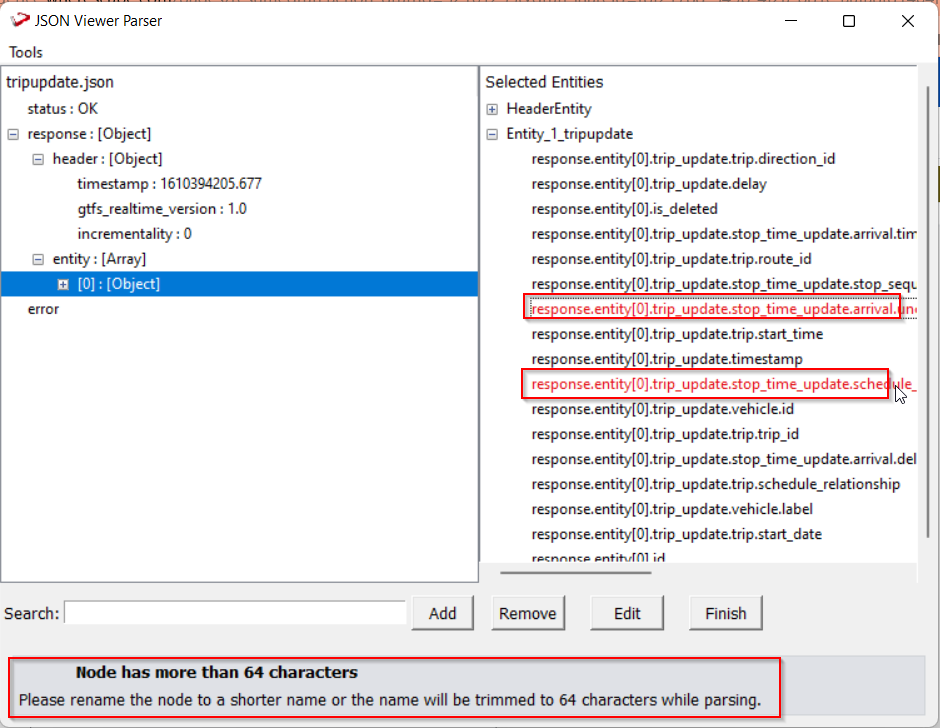
To add a complete file for profiling select the below option from the Tools Menu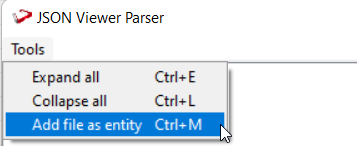
After selecting all the entities and files options,progress of the profiling will appear with the progress bar and can be canceled at any point.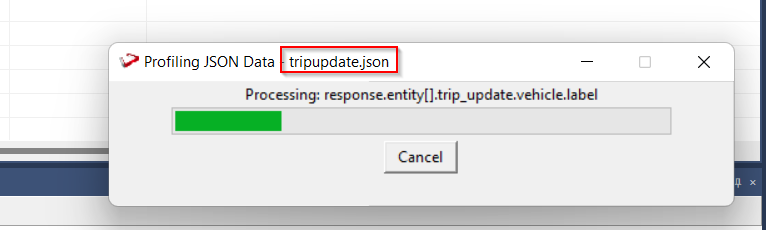
The working XML parser is similar to JSON parser explained above.
Press the Windows Key on your keyboard and start typing cmd.exe, when the cmd.exe icon shows up in the search list right click it to bring up the context menu, select Run As Administrator
Now you have an admin prompt navigate to to the folder where you have unpacked your WhereScape Source Enablement Pack to using the 'cd' command:C:\Windows\system32> cd <full path to the unpacked folder>
Run Powershell (.ps1) scripts from the administrator prompt by typing the Powershell run script command, for example:C:\temp\EnablementPack>Powershell -ExecutionPolicy Bypass -File .\install_New_RED_Repository.ps1
| In the event you can not bypass the Powershell execution policy due to group policies you can instead try "-ExecutionPolicy RemoteSigned" which should allow unsigned local scripts. |
On some systems, Windows Powershell script execution is disabled by default. There are several workarounds for this which can be found by searching the term "Powershell Execution Policy".
Here is the most common workaround that WhereScape suggests, which does not permanently change the execution rights:
Start a Windows CMD prompt as Administrator, change the directory to your script directory, and run the WhereScape Powershell scripts with this command:
cmd:>Powershell -ExecutionPolicy Bypass -File .\<script_file_name.ps1>Some of the setup scripts will track each step and output the step number when there is a failure. To restart from the failed step (or to skip the step) provide the parameter "-startAtStep <step number>" to the script.
Example: Powershell -ExecutionPolicy Bypass -File .\<script_file_name.ps1> -startAtStep 123
| To avoid having to provide all the parameters again you can copy the full command line with parameters from the first "INFO" message from the beginning of the console output. |
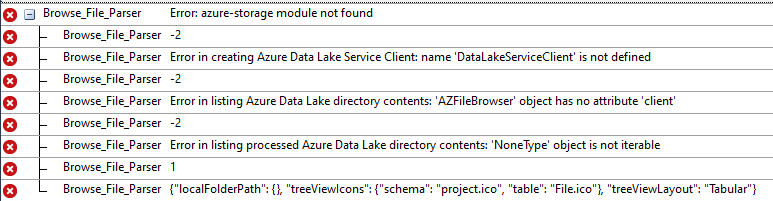
For Error: azure-storage module not found error while browsing Azure Data Lake File Browser Connection.
Follow the below steps: