This is a guide to installing the WhereScape Enablement Pack for SQL Server for WhereScape RED10.3+
Before you begin the following prerequisites must be met:
Get-Host|Select-Object Version |
powershell $psversiontable |
1 [Net.ServicePointManager]::SecurityProtocol = [Net.ServicePointManager]::SecurityProtocol -bor [Net.SecurityProtocolType]::Tls12 2 Register-PSRepository -Default -Verbose 3 Set-PSRepository -Name PSGallery -InstallationPolicy Trusted |
1 Install-Module -Name PoshProgressBar -SkipPublisherCheck -Force |
Before you begin the following prerequisites must be met:
Note: If SSIS was installed without logging components, this feature must be enabled through SQL Server setup modification.
Before you begin the following prerequisites must be met:
python -m pip install --upgrade pipThe Enablement Pack Install process is entirely driven by scripts. The below table outlines these scripts, their purpose, and if Run as Administrator is required.
1 | Setup_Enablement_Pack.ps1 | Setup and configure a RED Metadata Repository for target database | Yes | New and Existing installations |
2 | install_WslPython_Modules.bat | Installs or updates WslPython Modules and required Python libraries on this machine. | Yes | New and Existing installations |
3 | import_python_templates.ps1 | Imports or updates the Python Templates to a RED Metadata Repository. Also includes any Script Imports | No* | Existing installations |
4 | set_default_templates.ps1 | Applies the RED Connection defaults in a RED Metadata Repository for Python or Powershell templates. | No* | Existing installations |
Note that on some systems executing Windows Powershell scripts is disabled by default, see troubleshooting for workarounds |
Each Powershell script in the list above provides some help at the command line, this can be output by passing the -help parameter to the script. For Example > .\Setup_Enablement_Pack.ps1 -help
Run Powershell as Administrator:
Script 1 > Powershell -ExecutionPolicy Bypass -File .\Setup_Enablement_Pack.ps1 |
If RED repository exists, it will prompt to upgrade the repository. This enablement pack will overwrite any existing Source Enablement Pack UI Configs:
To ensure existing Source Enablement Pack connections and associated Load Tables continue to browse and load: |
A change to the script exit code has been introduced. Whenever a load/update script is regenerated, it is essential to regenerate the linked action script. Similarly, regenerating the action scripts requires regenerating the associated load/update scripts to keep both scripts in sync. |
Run Script As Administrator
Script 2 > install_WslPython_Modules.bat |
There are two steps in this script:
1. Install the WhereScape WslPython modules to C:\Program Data\WhereScape\Modules\
2. PIP to download/update required Python libraries - for offline install please see the required library list for Python in the Troubleshooting section.
Run Script as Administrator
Script 2 > install_WslPython_Modules.bat Script 3 > . .\import_python_templates.ps1 Script 4 > . .\set_default_templates.ps1 |
Note : Skip this step for new installations.
Script 4 > . .\set_default_templates.ps1 |
Choose Python when prompted.
Install Visual Studio and Add Integration service Exception.
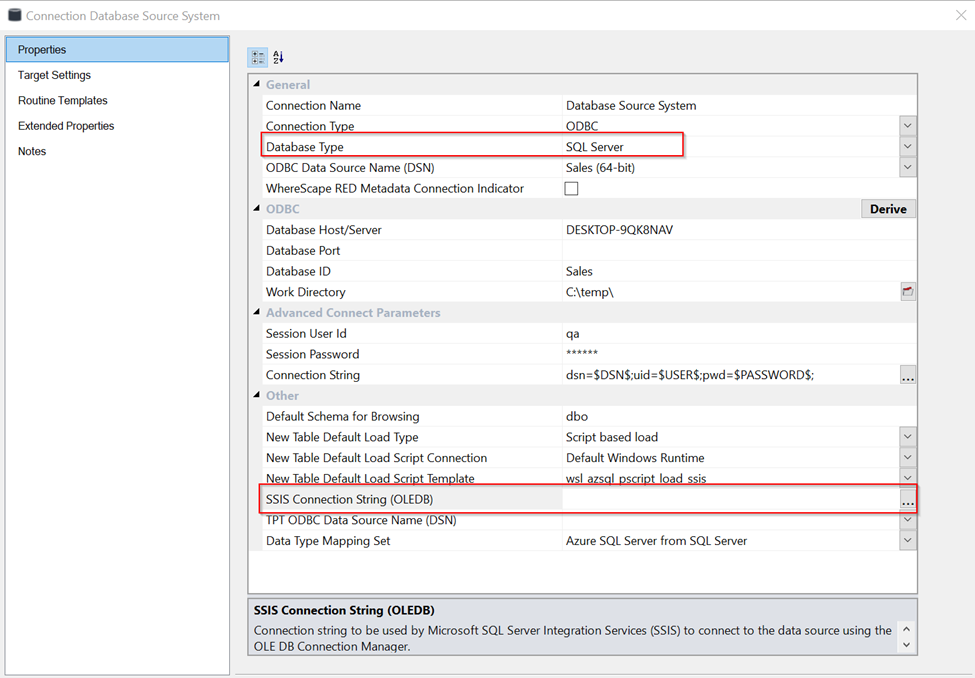
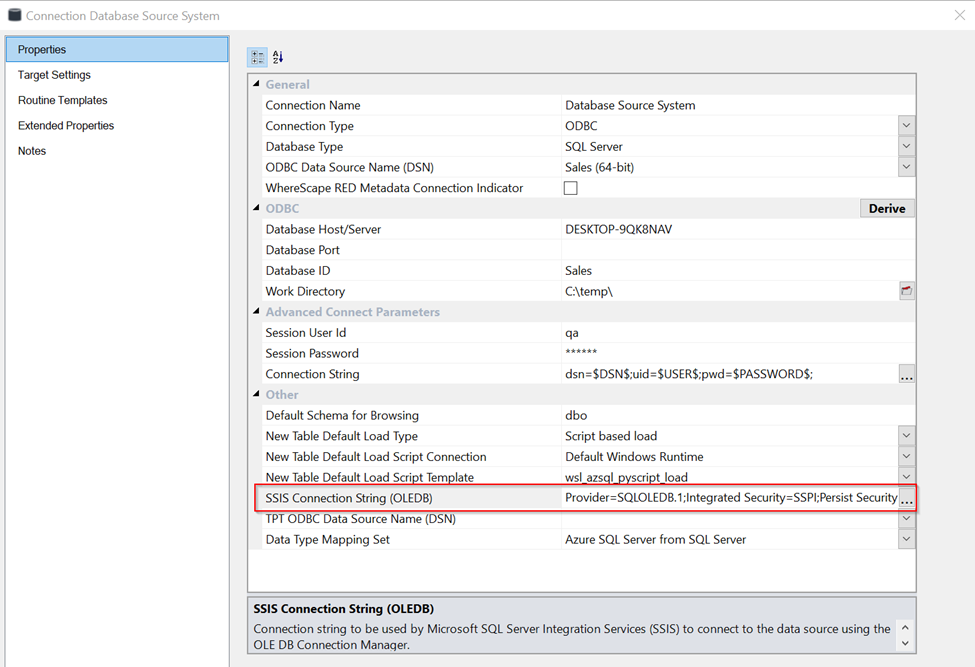
In the Source connection with database type as SQL Server, click on three dots in the SSIS connection string (OLEDB) as shown below:
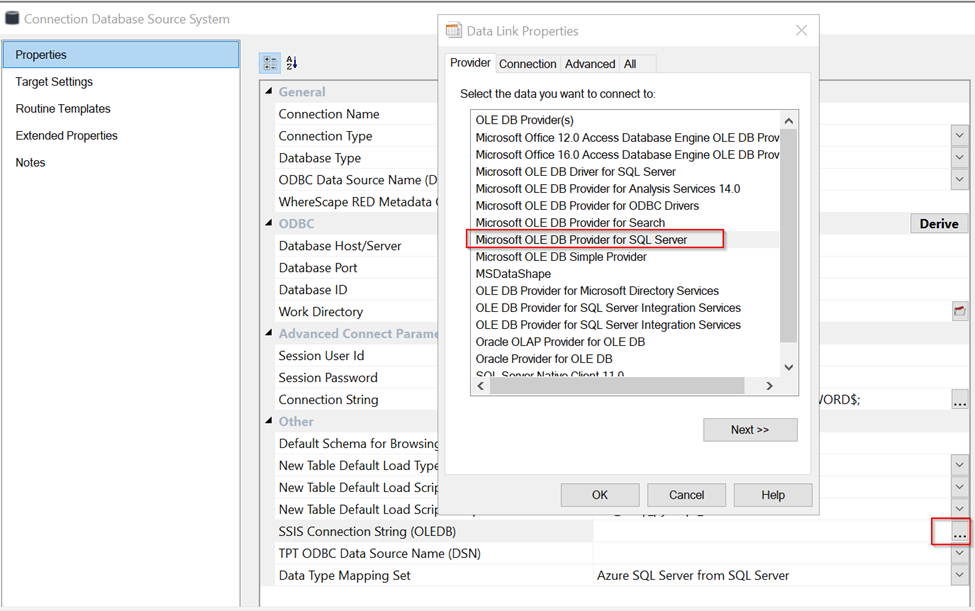
In the Data Link Properties window , select Microsoft OLE DB Provider for SQL Server:
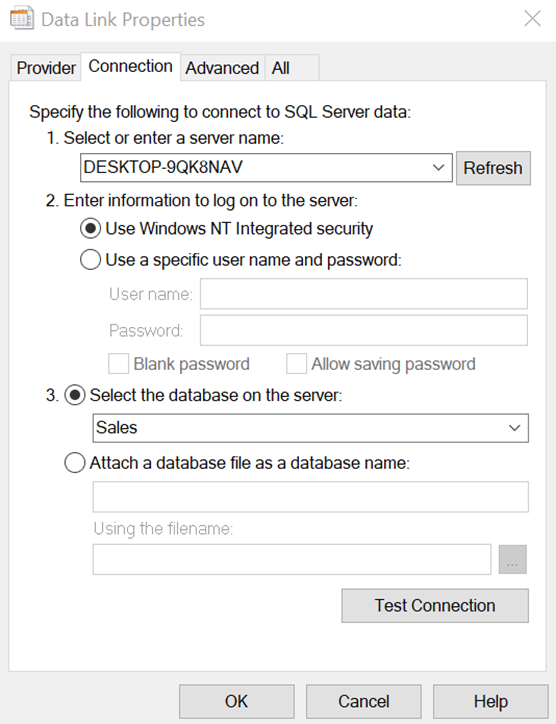
Provide Server and database details:
Test the connection:
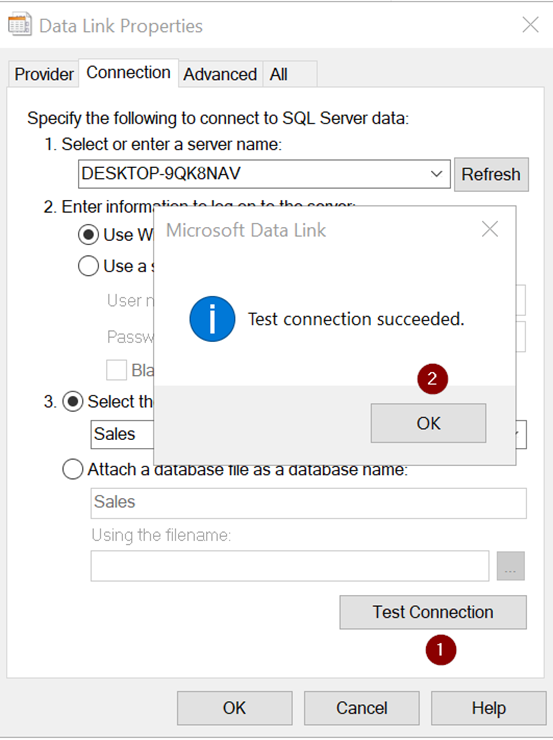
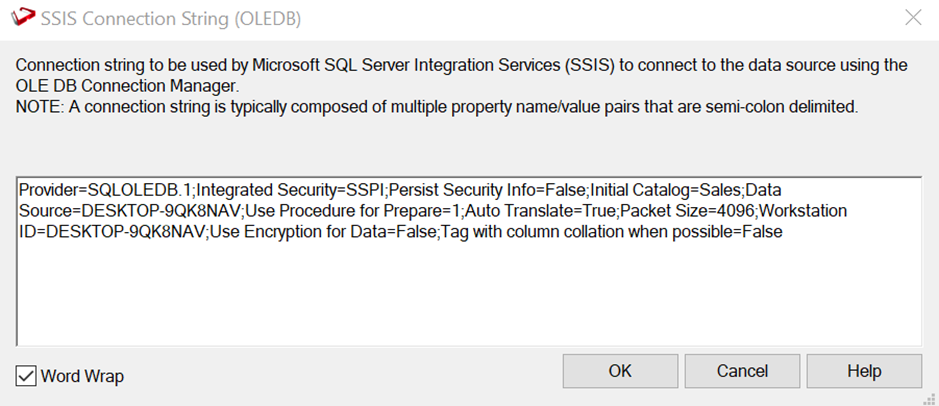
SSIS Connection String generated successfully,
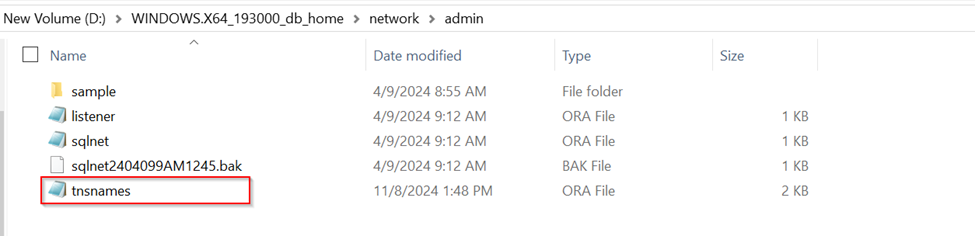
In tnsnames.ora file, define the database connection details as shown below:
ORACLE =
(DESCRIPTION =
   (ADDRESS = (PROTOCOL = TCP) (HOST = 10.220.200.84)(PORT = 1521))
   (CONNECT_DATA =
     (SERVER = DEDICATED)
     (SERVICE_NAME = orclpdb)
   )
)
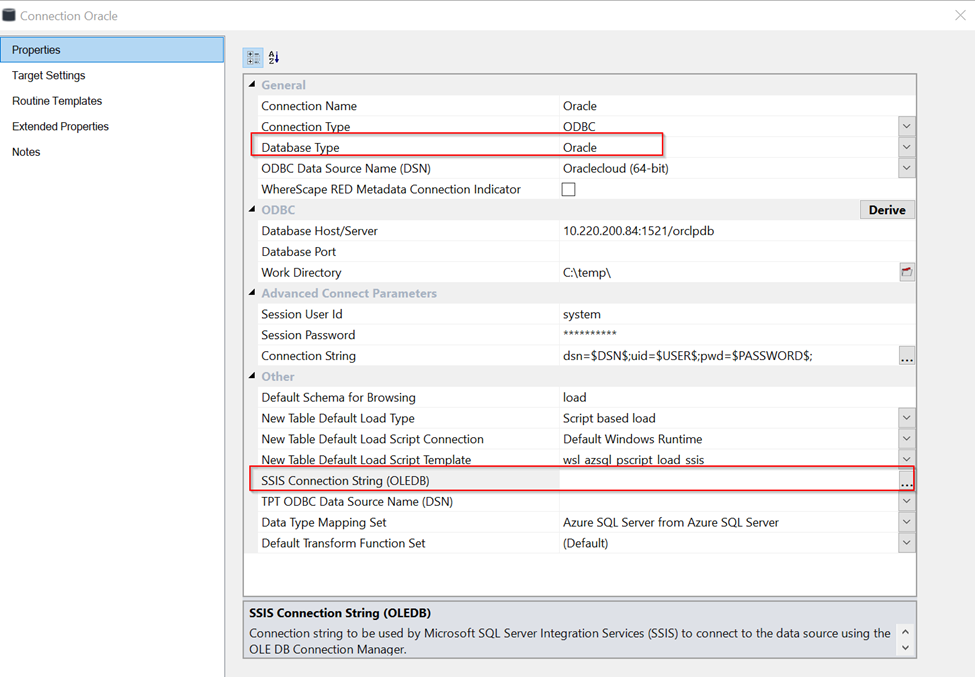
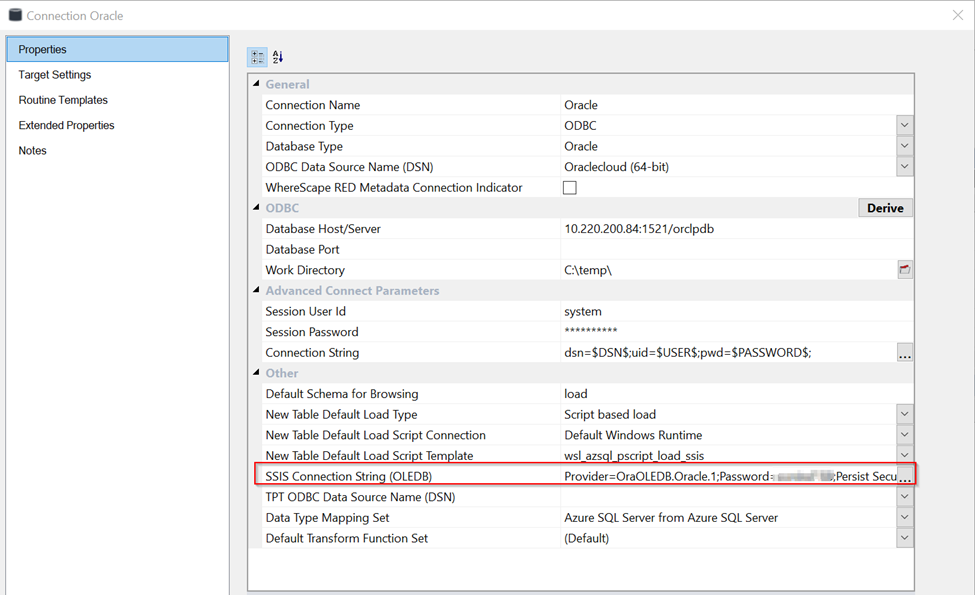
Open Oracle Source connection and click on the three dots in SSIS Connection string option:
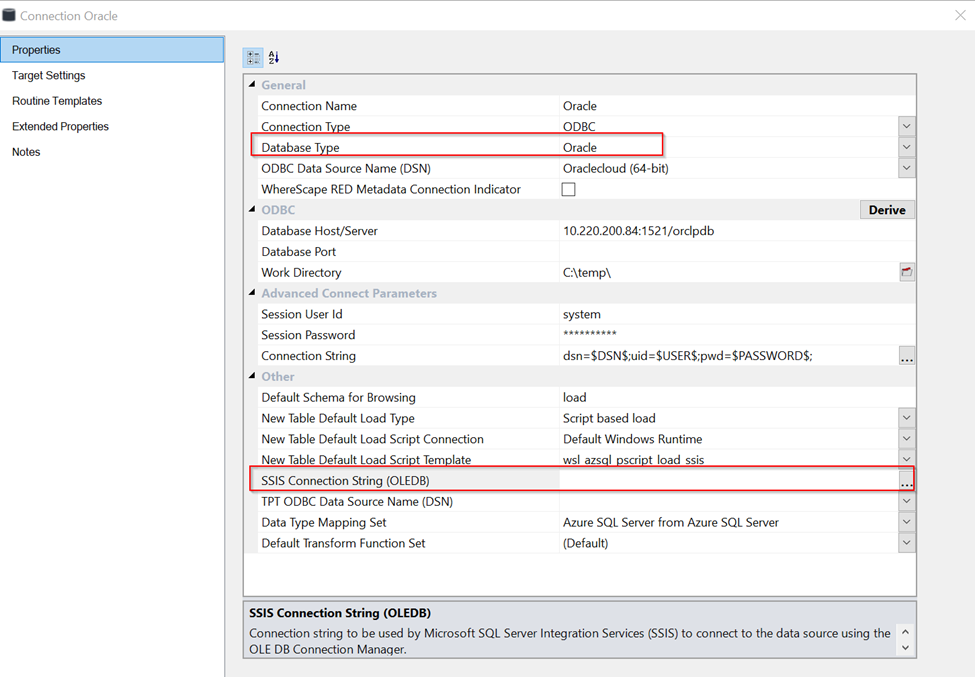
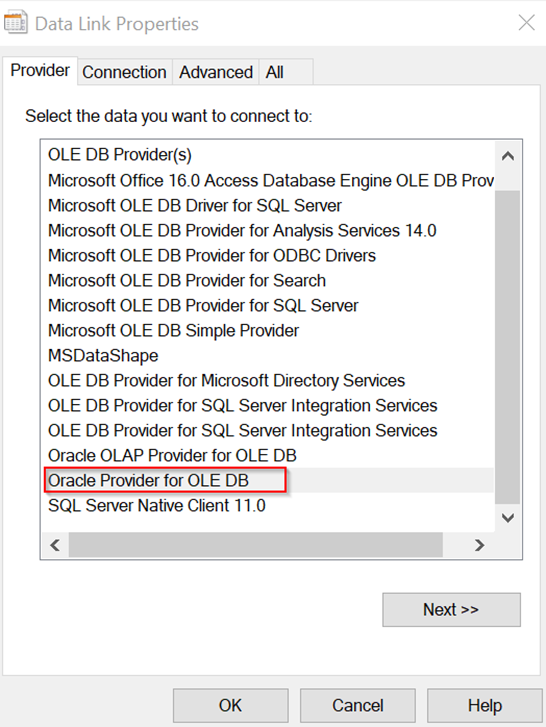
Select Oracle Provider for OLE DB option in Data Link Properties window:
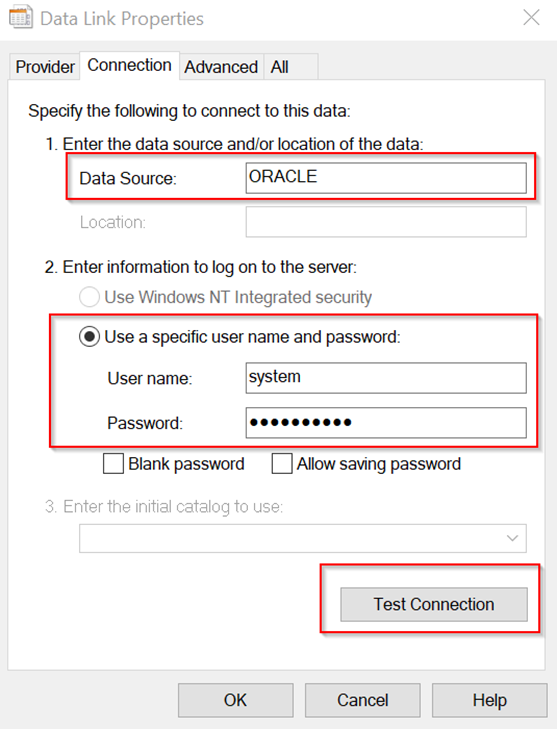
Provide the credentials as shown below:
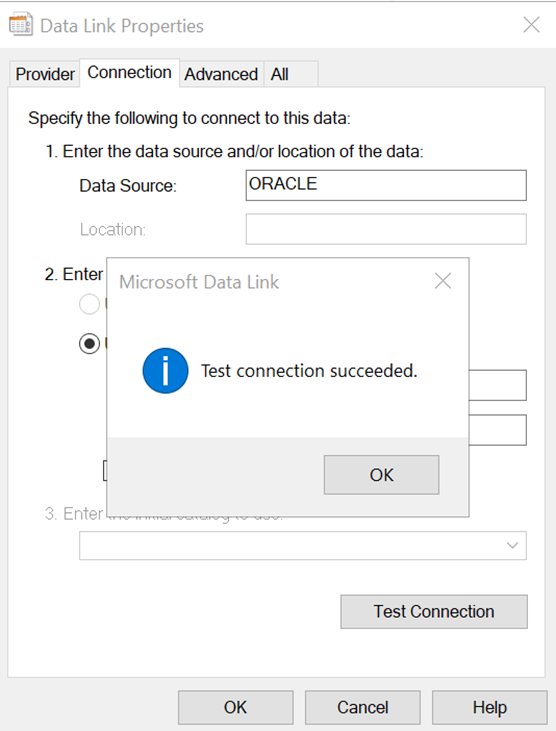
Test the connection:
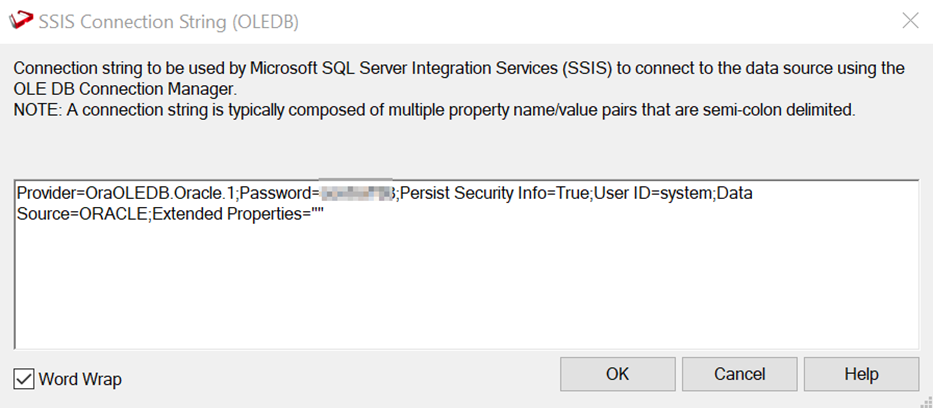
Connection string generated successfully:
With Teradata As Source: -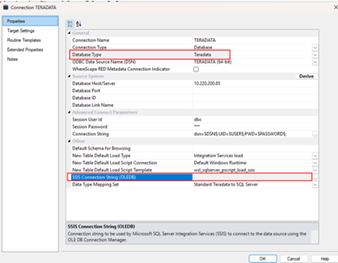
In the Data Link Properties window, select Microsoft OLE DB Provider for ODBC drivers: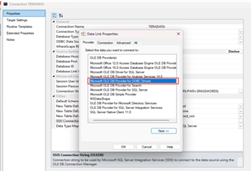
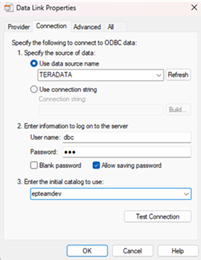
Provide the Credentials as below and test the connection: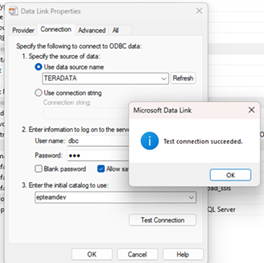
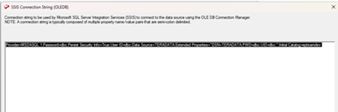
Connection string generated successfully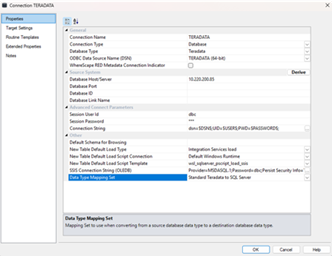
If you used the script Setup_Enablement_Pack.ps1 then the following optional post-install steps are available
There were two connections added that will optionally require your attention:
The below two are common for SQL Server and Azure SQL
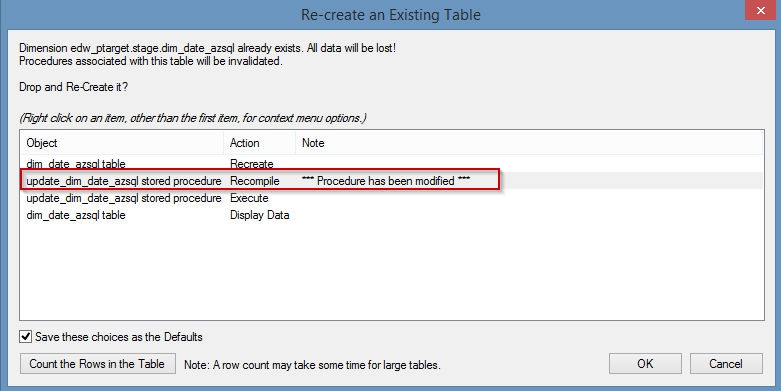
Please avoid regenerating the procedure |
For Azure SQL Target following extended properties will require your attention:
NOTE: For Blob extended properties refer to the below section
Run the below queries in Azure SQL database query editor.
CREATE MASTER KEY ENCRYPTION BY PASSWORD = '<MASTER_KEY>';
CREATE DATABASE SCOPED CREDENTIAL <BlobStorageCredential> WITH IDENTITY = 'SHARED ACCESS SIGNATURE', SECRET = '<SAS_TOKEN>';
DROP EXTERNAL DATA SOURCE <Blob Data Source>;
CREATE EXTERNAL DATA SOURCE <Blob Data Source>WITH (TYPE = BLOB_STORAGE,LOCATION = 'https://<Blob Storage Account>.blob.core.windows.net/<Blob Storage Container>/<Directory>',CREDENTIAL = <BlobStorageCredential> );
NOTE: Keywords mentioned in <> in blue need to be replaced with the values that can be found on Azure
Source Pack Name | Supported By Azure SQL Server/SQL Server | Supported Features | Prerequisites |
Cloud File Parser
|
| Bulk load | Refer to Windows Parser Guide |
Windows Parser |
| Load Template, Source Properties will have the option to select parser type to load the files. | Refer to Windows Parser Guide |
Press the Windows Key on your keyboard and start typing cmd.exe, when the cmd.exe icon shows up in the search list right click it to bring up the context menu, select Run As Administrator
Now you have an admin prompt navigate to to the folder where you have unpacked your WhereScape Red Enablement Pack using the cd command:C:\Windows\system32> cd <full path to the unpacked folder>
Run Powershell (.ps1) scripts from the administrator prompt by typing the Powershell run script command, for example:C:\temp\EnablementPack>Powershell -ExecutionPolicy Bypass -File .\Setup_Enablement_Pack.ps1
In the event, you can not bypass the Powershell execution policy due to group policies you can instead try "-ExecutionPolicy RemoteSigned" which should allow unsigned local scripts. |
On some systems, Windows Powershell script execution is disabled by default. There are several workarounds for this which can be found by searching the term "Powershell Execution Policy".
Here is the most common workaround that WhereScape suggests, which does not permanently change the execution rights:
Start a Windows CMD prompt as Administrator, change the directory to your script directory, and run the WhereScape Powershell scripts with this command:
cmd:>Powershell -ExecutionPolicy Bypass -File .\<script_file_name.ps1>Some setup scripts will track each step and output the step number when there is a failure. To restart from the failed step (or to skip the step) provide the parameter -startAtStep <step number> to the script.
Example: Powershell -ExecutionPolicy Bypass -File .\<script_file_name.ps1> -startAtStep 123
To avoid having to provide all the parameters again you can copy the full command line with parameters from the first "INFO" message from the beginning of the console output. |
Interactive load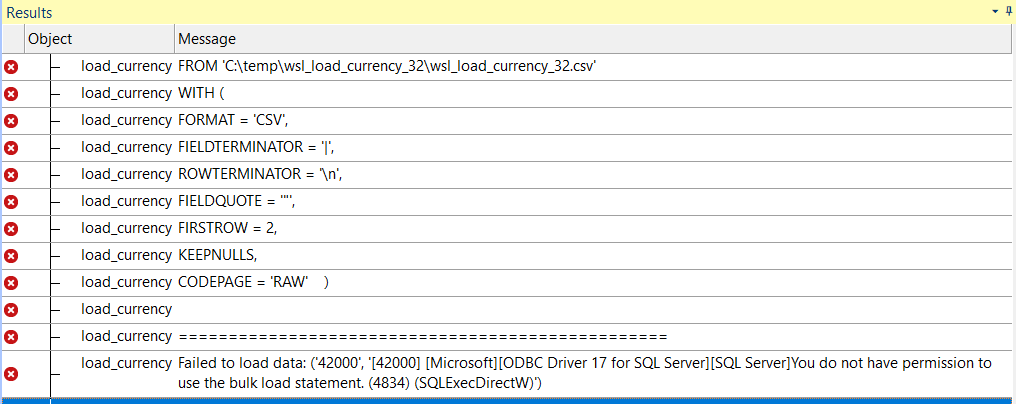
Scheduler load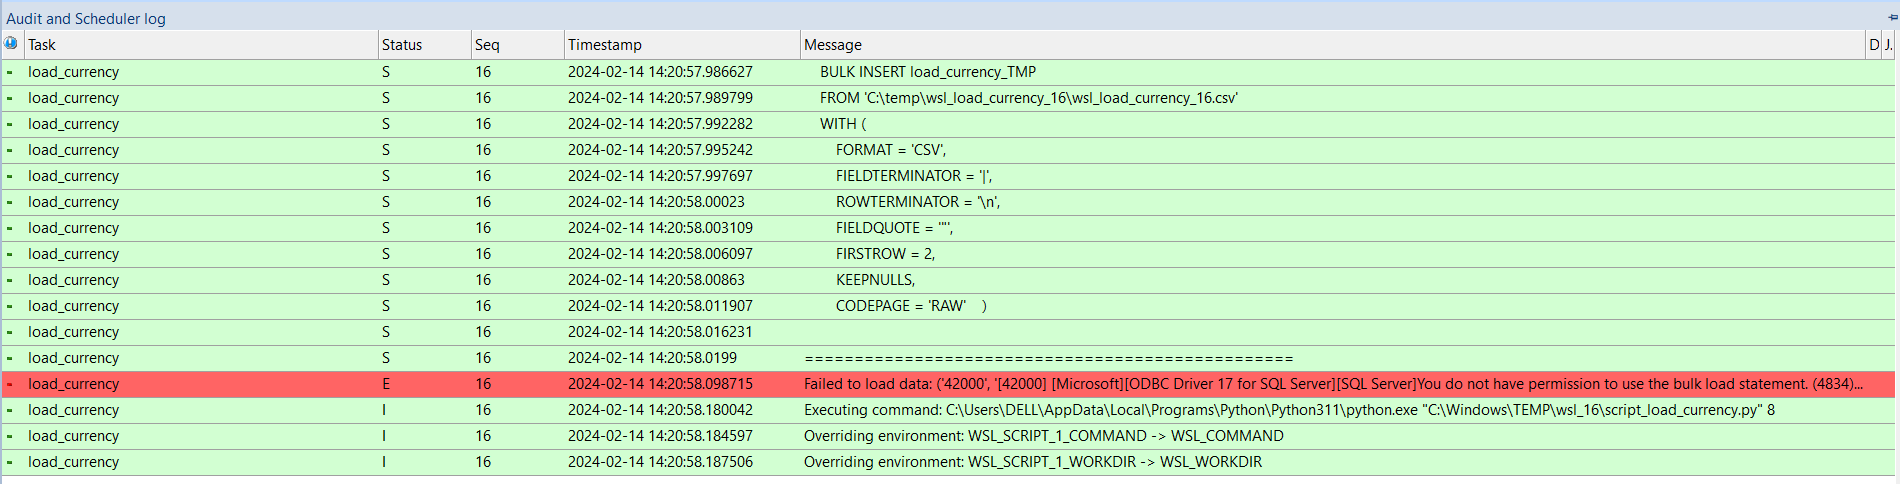
For bulk load errors, the 'bulkadmin' permission is required.
SQL SERVER > SECURITY > LOGINS > USER > PROPERTIES >SERVER ROLES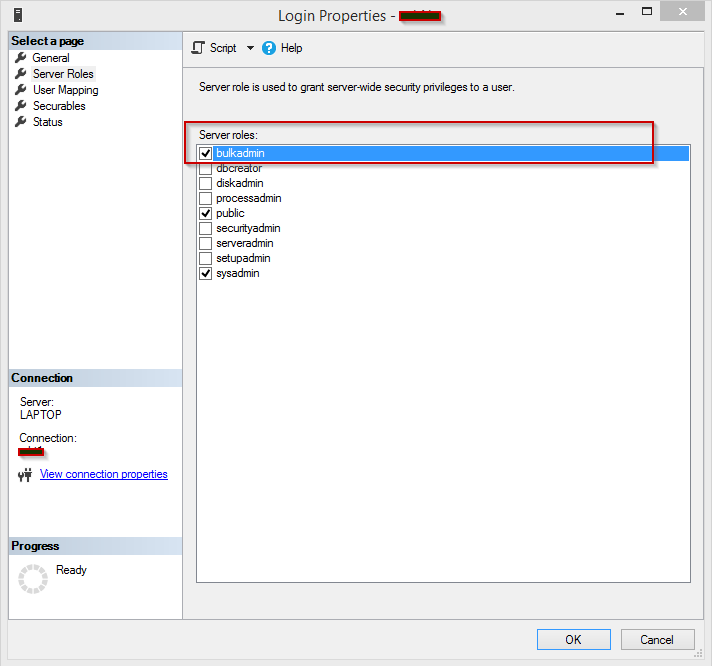
Failed to load data: ('42000', '\[42000\] \[Microsoft\]\[ODBC Driver 17 for SQL Server\]\[SQL Server\]Cannot bulk load because the file "C:\WhereScape\Temp\...\xxxx.csv" could not be opened. Operating system error code 5(Access is denied.). (4861) (SQLExecDirectW)') |

Error Message
Failed to load data: ('42000', '[42000] [Microsoft][ODBC Driver 17 for SQL Server][SQL Server]Cannot obtain the required interface ("IID_IColumnsInfo") from OLE DB provider "BULK" for linked server "(null)". (7301) (SQLExecDirectW)') |
If you have RED 10.x or higher installed but the script (Setup_Enablement_Pack.ps1) fails to find it on your system then you are most likely running the PowerShell (x86) version which does not show installed 64-bit apps by default. Please open a 64-bit version of Powershell instead and re-run the script.