While defining a Transformation Map using the mapping tool, you will select the Database option from the Insert menu (or use the corresponding toolbar button) to insert a database component.

The dialogs you have to complete depend on the type of database connection you insert and on choices you have made in previous sessions in the mapping tool.
The following steps describe some of the most common and important dialogs and choices: The actual windows you will see and have to complete in order to establish your database connection will vary according to the type of database, driver, previous database selections and other factors.
What follows is an example sequence of windows for establishing a new ODBC connection to a Firebird database running on your network. Note that you can also connect using JDBC if you have the appropriate driver installed and correctly configured.
1. On the first panel of the Connection Wizard , choose Firebird (ODBC/JDBC) as the database type and click Next.
(If the Connection Wizard is not shown, click the Connection Wizard button to display it)

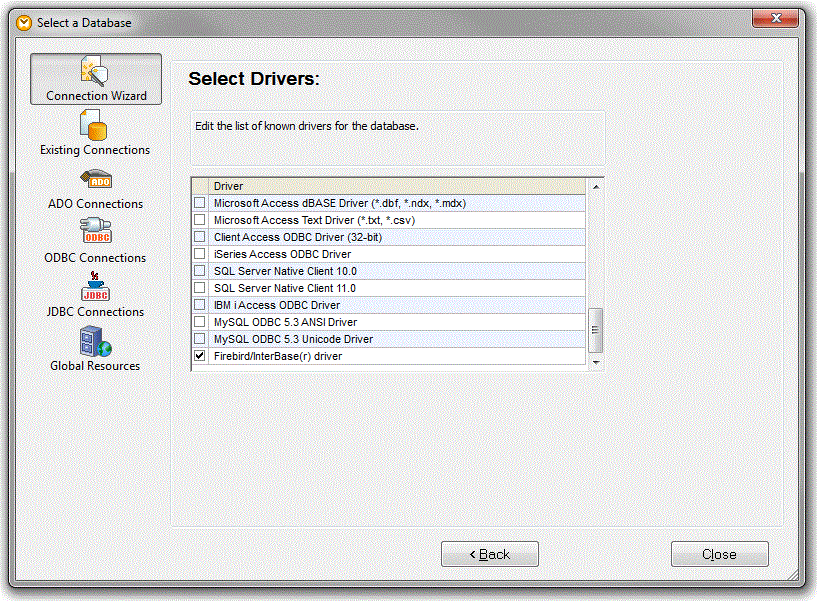
2. When prompted to select an ODBC provider, choose the Firebird/Interbase(r) driver and click Next .
3. At the Connecting to Firebird window, you can choose an existing DSN (data source name) if one already exists for the Firebird database. Otherwise, click the Create a new Data Source Name (DSN) radio button. Click Connect to proceed.
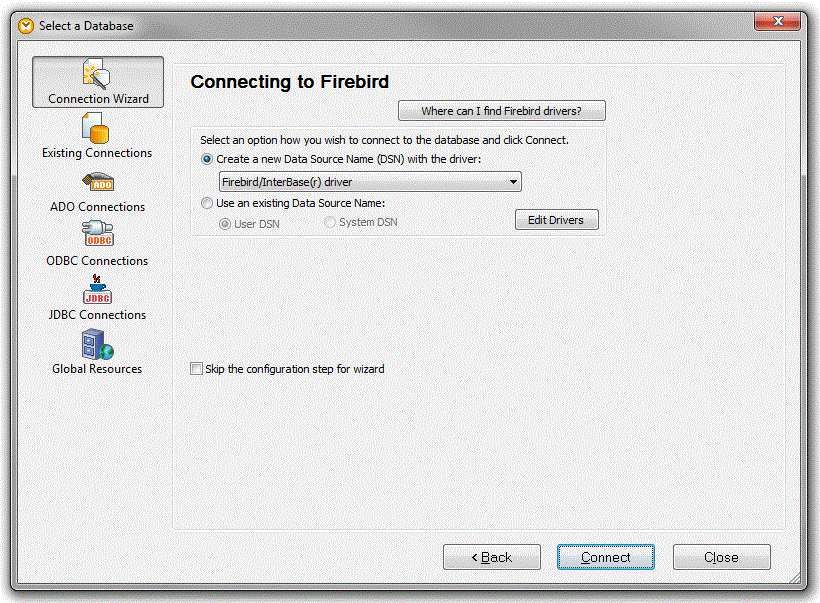
4. If you choose to create a new DSN, complete the prompts to specify the server, database and credentials to use for the new DSN.

- Type the name and description for the new DSN.
- In the Database field, type the connection string to connect to the Firebird database. There are a number of ways in which the connection string can be specified – you should refer to Firebird documentation for details on the possible forms of the connection string.
In the illustration, a TCP/IP connection is specified to Firebird on server localhost . Specify the TCP/IP port number on which the Firebird database instance is listening if it is different than the default 3050. For example: localhost/3051: .
After the colon, the example in the illustration specifies the path (on the server) to the Firebird database. For example: C:\Program Files (x86)\Firebird\Firebird_2_5\examples\empbuild\EMPLOYEE.FDB .
- According to Firebird ODBC help, the Client value is " Required when using the embedded Server . Allows you to specify a command line to start the Firebird embedded database(fbembed) or Firebird SQL client (gds32,fbclient) ". We were able to connect to the supplied example database, EMPLOYEE.FDB, without specifying a value for Client .
- Complete the logon security credentials as required for your server and database.
You can click Test Connection to verify that the connection can be established with the details you have entered. When complete, click OK to continue.
5. When your connection has been successfully established, the mapping tool allows you to choose the particular tables you wish to use in your transformation map:

Select the database tables you wish to use and click OK. A database component representing the selected tables is inserted in the workspace for the map.