Once the data comparison operation is finished you are now ready to start the data synchronization operation.
By default, all tables that are found to have differences and all the different rows in those tables are automatically marked to be included in the synchronization. You can however easily change which tables, and which rows in those tables, should or should not be included in the script by checking or un-checking the Sync checkbox.
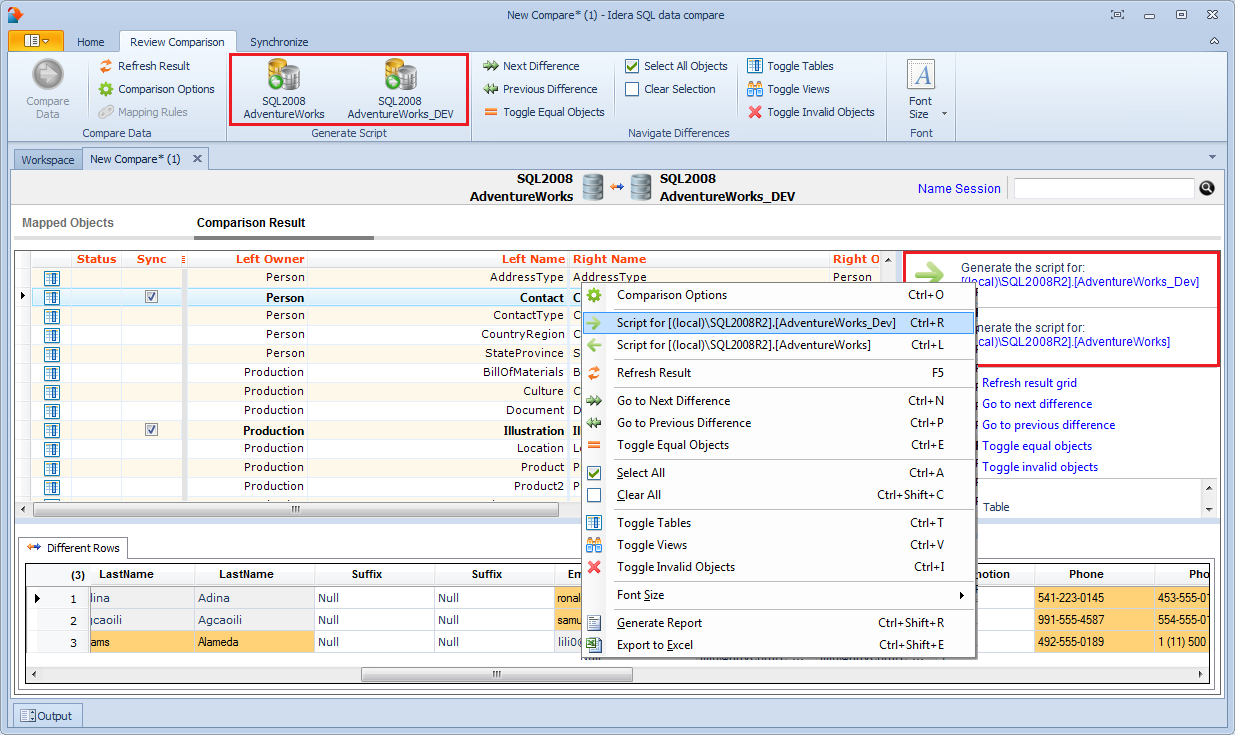
Once you have made your selections you can generate the synchronization script to either change the database on the right of the comparison to make it the same as that on the left or the other way around. There are three ways to start the script generation:
- Ribbon. In the Review Comparison tab of the ribbon there are two big buttons in the middle under the grouping Generate Differences Script. Each button is labeled with the name of the server + name of the database for which the script will be generated.
- Action Links on the right panel. Are listed under the label Generate the script for:. Clicking on the [server].[database] link generates the synchronization script that will make that database the same as the other one.
- Context menu. When you right click on the comparison results grid a context menu will pop up. The context menu allows you to access the comparison options and trigger the generation of the synchronization script in addition of other context relevant actions.
Total compare from data to schema with IDERA SQL Comparison Toolset. Learn more > >
