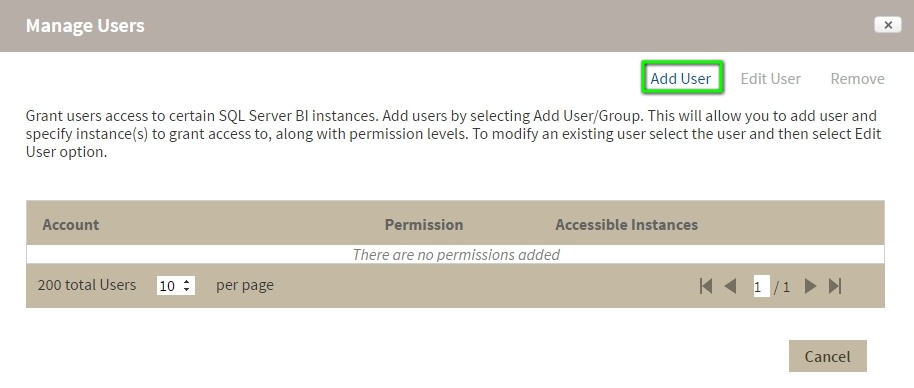
To manage Instance Level Security go to the SQL BI Administration tab and click Application Security. In the Manage Users window, you can view a list detailing user account, permission level, and instances assigned to the account. Users with different permission levels for different instances are listed multiple times. When a user has multiple instances with the same permission level, instances are grouped on the Accessible Instances column, an ellipsis symbol displays if the names do not fit in the column, to view a complete list hover the mouse over the column.
Instance permissions can only be assigned to users who have a Product User role on IDERA Dashboard.
Adding users
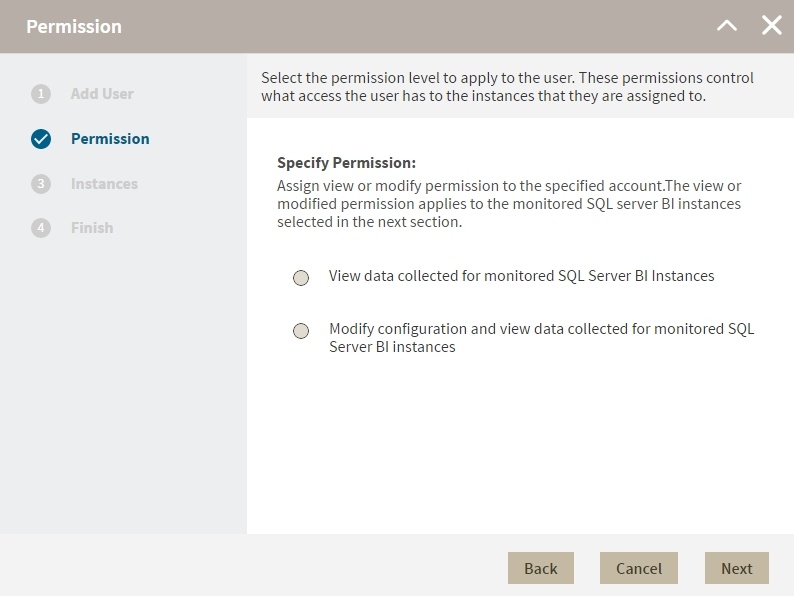
You can assign two different access levels to limit users access to managed instances:
View Only: Users can only view their assigned instances.
Modify: Users can view and change the configuration of their assigned instances.
To add new users follow these steps:
- In the Manage Users screen, click Add User/Group.
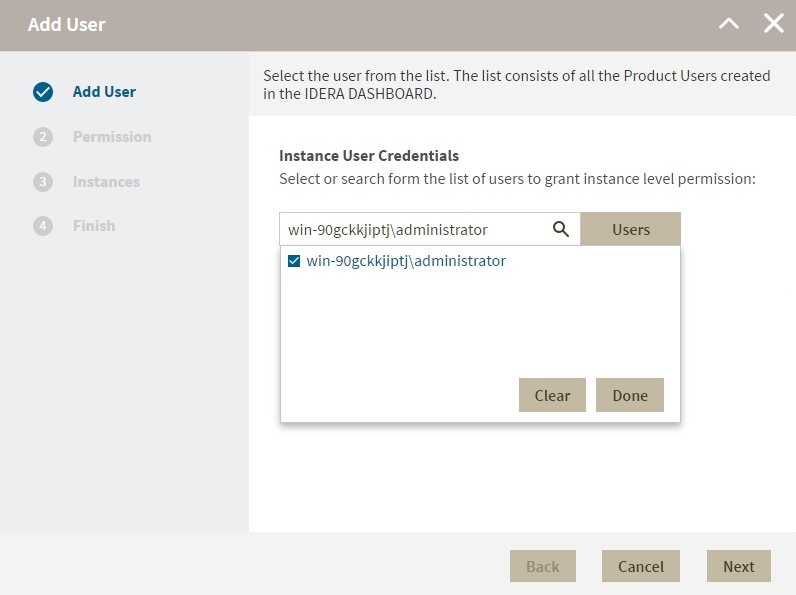
- In the Add User wizard, type a user name on the search box or click Users to select users from a list, you can select one or more users at a time. Once you select users, click Next.
- in the Permissions screen, assign the access level View Only or Modify. Make your selection and click Next.
- In the Add Instances screen, you can select one or more instance and service combinations.
- Select one or more specific instances and services and click
 .
. - Click
 to assign all the listed instances and services.
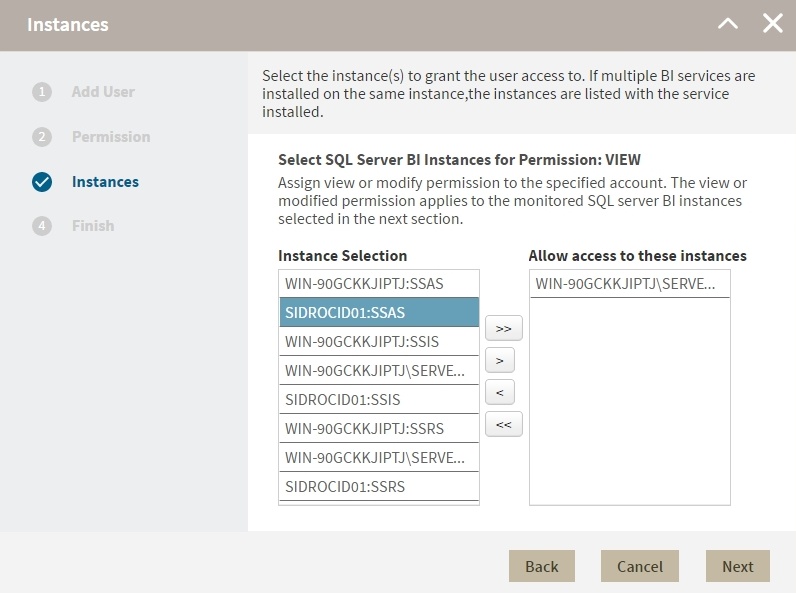
- Select one or more specific instances and services and click
- When you finish assigning instances, click Next.
- In the Finish screen, click Back to make changes in your settings, to continue click Submit.

Editing users
- To edit users open the Manage Users window, select a user, and click Edit User.
- On the Permissions window, select the permission level for the user and click Next.
- On the Instances window, assign or remove instances and services. You can only edit one user at a time.
- On the Finish screen check your settings, to make changes click Back to continue click Finish.
Remove Users
To remove instance permissions from a user follow these steps:
- On the Administration tab go to Application security.
- On the Manage Users window, select a user from the list and click Remove User.
- Click Ok.
When you remove a user you only remove their custom permissions for IDERA SQL BI. Users still remain as Product Users and have read-only access to all managed instances. To completely remove users from SQL BI, change their permissions on IDERA Dashboard.