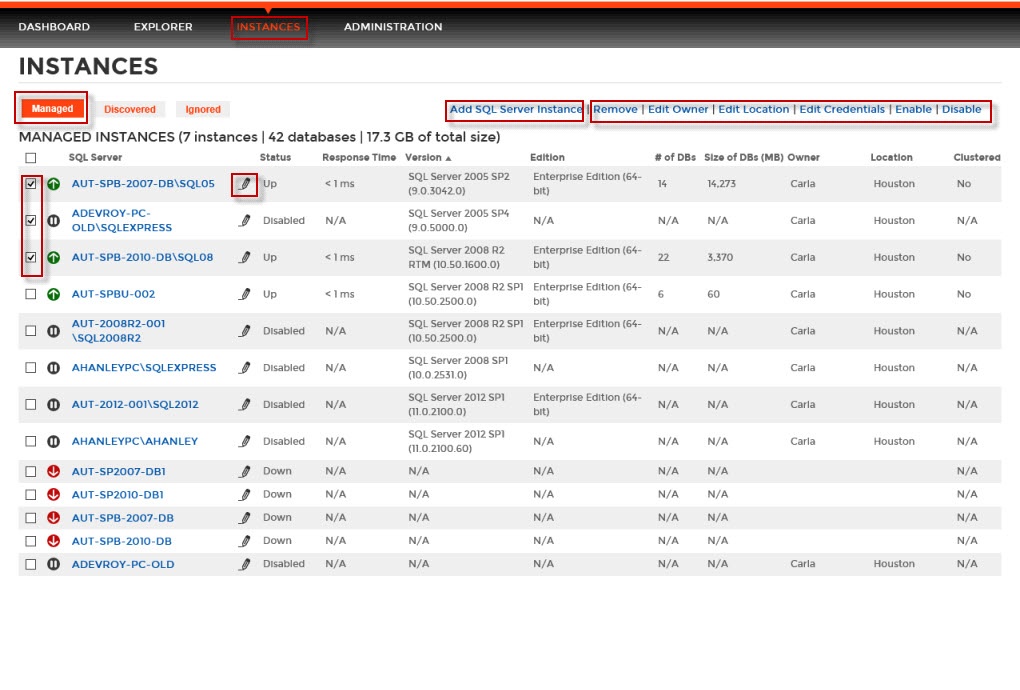
By default when you go to the Instances tab, you access the Managed instances section first.
The list of managed instances displays all your environment´s registered instances together with their status, response time, SQL Server version, edition, number and size of their databases.
You can click the headers of these columns to order your information; for example, click # of DBs to order all your instances according to the number of databases.
Instance status
Next to the instance name, you can find the following icons that represent the instance status:
 Instance up
  Instance down
  Disabled instance
  Instance not available
  Authentication failure
  Slow
Slow
What actions can you perform on this view?
Edit bulk properties
You can use this section to select one or several instances and change:
- Owner
- Location
- Credentials
For example, if you have a new DBA, you can select all instances on this tab and click Edit Owner to change all instances owner at once.
You can also perform the following actions on several instances:
- Enable instances
- Disable instances
- Remove instances
Add SQL Server instance
On the top right section of this view, you can access the Add SQL Server instance wizard. For more information, refer to Adding SQL Server instances.
Instance details
You can also access an instance details view by clicking its name. For more information about what information is available on the instance details view, refer to Viewing instance details.
Edit instance properties
Click the pencil icon, next to the instance name, to access its properties. For more information go to Editing instances properties.
Access from the Dashboard
You can directly access the Managed instances section by clicking Instances on the right sidebar of the dashboard. For more information, go to Viewing information on the Dashboard.