Page History
You To access SQL Inventory Manager over HTTPS with a self signed certificate you may need to enable SSL on SQL Inventory Manager 2.6 REST service for access over HTTPS with a self signed certificate. Follow the instructions below. , and add a certificate.
Using a self-signed certificate
| Note |
|---|
| Using a self-signed certificate only works with both IDERA Dashboard and SQL Inventory Manager installed on a local machine. |
To Create a new self-signed certificate follow the instructions bellow.
Creating a self-signed certificate
Before binding a certificate to Inventory Manager 2.6, you need to first add a certificate for IDERA Dashboard. For information on how to create a self signed certificate for Dashboard refer to Resolving the certificate error message.
| Info | ||
|---|---|---|
| ||
Make sure that the self-signed certificate created with the steps described above, and the keystore keypair are created to have each server listed as the common name. |
Binding a certificate to Inventory Manager 2.6
| Note | ||
|---|---|---|
| ||
Make sure you perform the instructions in Resolving the certificate error message. |
To bind a certificate follow the instructions below:
- Launch the keyStore Explorer application as an Administrator.
- Open the keystore file used for the IDERA Dashboard. When prompted for a password, enter password, and click OK.
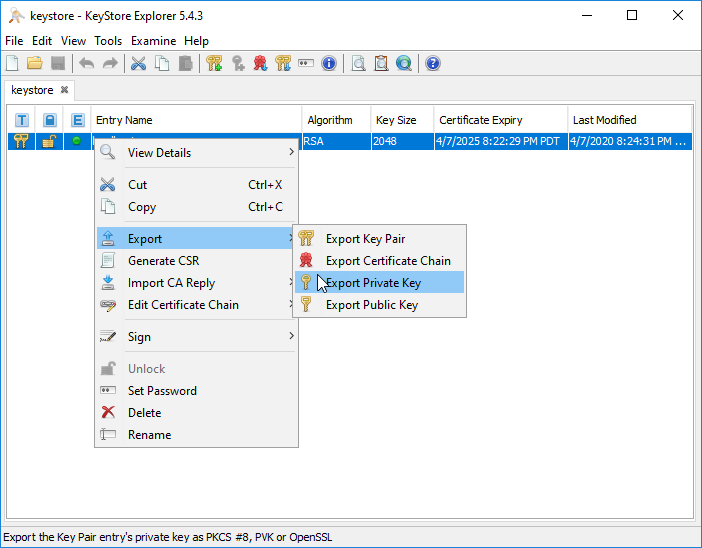
- Right-click on the keypair and select Export> Export Private Key.
- On the Export Private Key Type window, select OpenSSL, and click OK.
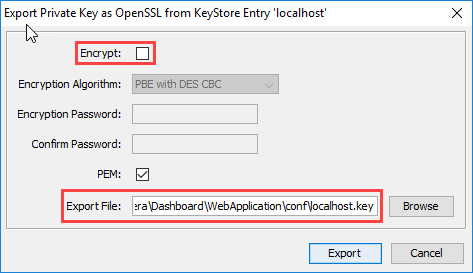
On the Export Private Key as OpenSSL from Keystore Entry window, deselect the Encript option, update the Export File if needed, and click OK.
Note Steps 6 - 9 can be performed on a different computer. These steps are related to the OpenSSL tool, which is not required to be intalled on the server hosting the IDERA products.
Install OpenSSL.
Info You can find a few options available to obtain the software at https://wiki.openssl.org/index.php/Binaries.
- Once you complete the installation of OpenSSl, run the Command Promt as Administrator.
Change the directory to the bin folder within the installation directory of OpenSSL. Enter the following command:
Code Block cd "C:\Program Files\OpenSSL-Win64\bin"Use the following command as an example to generate the PFX key using the private key and certificate that was previously created.
Code Block openssl pkcs12 -export -out <file path to the new personal information exchange file>.pfx -inkey <file path path to private key>.key -in <file path to certificate>.cerExecute the command, and when prompted for a password, enter password for both the export password and the verification password. You will be able to see the newly created PFX key.
Note The following steps must be perfomed on the server hosting the IDERA Dashboard and the IDERA SQL Inventory Manager.
- Open the Microsoft Management Console (MMC) and load the Certificates snap-in.
a. Select Run from the Start menu, enter mmc, and click OK.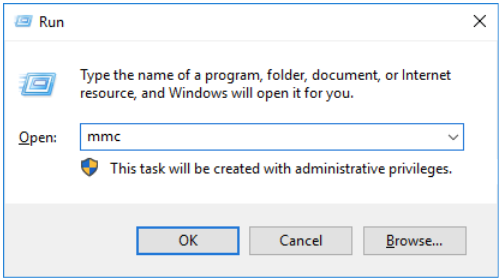
b. On the MMC window, from the File menu, select Add/Remove Snap-in. The Add or Remove Snap-in windows displays.
c. From the Available snap-ins list, choose Certificates, then select Add.
d. In the Certificate snap-in window, select Computer Account, and click Next.
e. In the Select Computer window, leave Local computer selected, and click Finish.
f. In the Add or Remove Snap-in window, select Ok.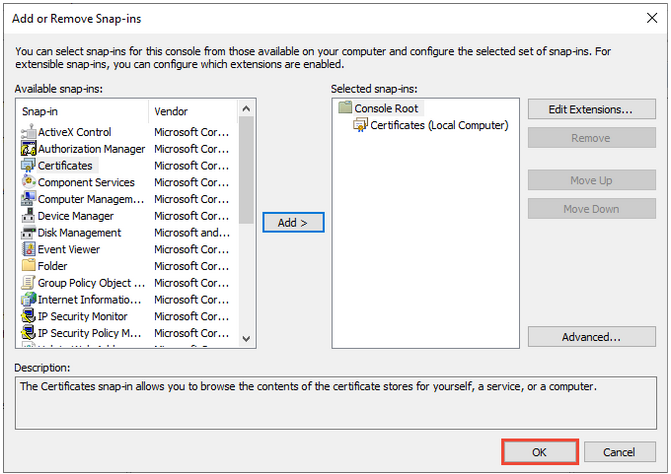
- Expand Certificates and locate the Personal folder.
- Right-click on the Personal folder and select All Tasks> Import.
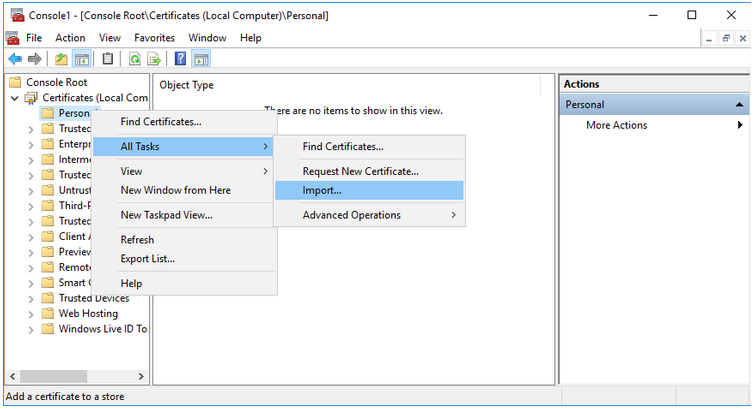
- Use the Certificate Import Wizard to import the PFX file that was previously created.
Retrieve the thumbprint of the imported PFX key.
a. Double-click on the imported PFX key.
b. On the Certificate window, go to the Details tab.
c. Scroll through the list of fields and click Thumbprint.
d. Copy the hexadecimal characters from the box. If this thumbprint is used in code for thex509FindType, remove the spaces between the hexadecimal numbers.Note The GUID for the IDERA SQL Inventory Manager is "{af5a4e5f-435c-4333-ab2b-cac62e140248}".
Run the Command Promt as an Administrator and delete existing bindings to the IDEA SQL Inventory Manager Rest Service port 9276, executing the following command:
Code Block netsh http delete ssl 0.0.0.0:9276Run the Command Promt as an Administrator and bind the new PFX key by using the commands below.
Code Block netsh http add sslOpen a PowerShell window and run the command below.
Code Block language powershell New-SelfSignedCertificate -DnsName "<host-name>" -CertStoreLocation "cert:\LocalMachine\My"- Copy the certificate hash the command above returns.
Open CMD as Administrator and run the command below.
Code Block language powershell netsh http add sslcert ipport=0.0.0.0:9276 certhash=<certficate-hash><thumbprint of the PFX key (with spaces removed)> appid= {random-guid} clientcertnegotiation"{af5a4e5f-435c-4333-ab2b-cac62e140248}" clientcertnegotiation=enable
Using a CA issue certificate
| Note |
|---|
This works both on a local and a remote machine. |
Get certificate hash, refer below on how to do this
b. Customer uses CA issued certificate - this will work on both local and remote machine
i. Get certificate hash, refer below on how to do this
https://docs.microsoft.com/en-us/dotnet/framework/wcf/feature-details/how-to-retrieve-the-thumbprint-of-a-certificate
ii. Add binding for newly created certificate with port 9276 (Step 2 in "Steps to add self-signed certificate" section below)
Description
...
You may create a BAT file to run on startup of Windows, and make sure the certificate is applied when the server starts up, if the service is restarted. The content of the BAT file is the following:
NET START SQLInventoryManagerRestService
TIMEOUT /T 2netsh http delete ssl 0.0.0.0:9276
netsh http add sslcert ipport=0.0.0.0:9276
certhash=<thumbprint of the PFX key (with spaces removed)>
appid="{af5a4e5f-435c-4333-ab2b-cac62e140248}"
Configure the service to have a Manual start up so the BAT file will start the service.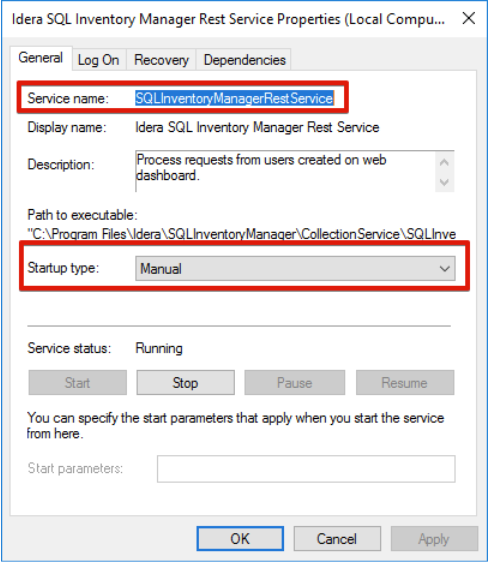
To add a certificate to the Trusted Root Certification Authorities store in Windows, refer to Manage Trusted Root Certificates.
7. For configuration of SSL certificate in step 6.b; below are the two scenarios,
a. Customer uses self-signed certificate - this will work only on local machine
i. Create a new self-signed certificate (Step 1 in "Certificate configuration" section below)
ii. Add binding for newly created certificate with port 9276 (Step 2 in "Certificate configuration" section below)
iii. Trust the certificate once before using application
1) Open below URL in browser
https://nit-lpt-0177:9276/SQLInventoryManager/v3/help
2) Trust the certificate
...