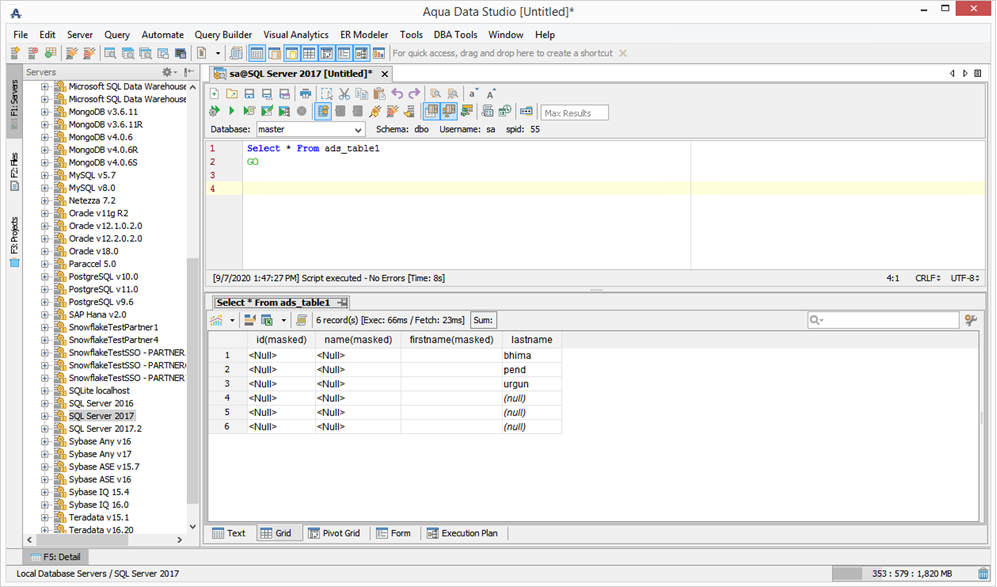
Aqua Data Studio Data Masking lets you mask database table columns that contain sensitive information and protect Aqua Data Studio output from users who do not need to see the information. This is done by either substituting a new value of the same data type or nulling out the column in the result set. Aqua Data Studio users can select specific table columns to mask out before sharing information with colleagues.
The Aqua Data Studio Data Masking tool makes it convenient to select only the information that you want to be visible to others in your result set while still giving them access to a table's complete result set. This is done so that the data remains structurally workable but does not expose sensitive information.

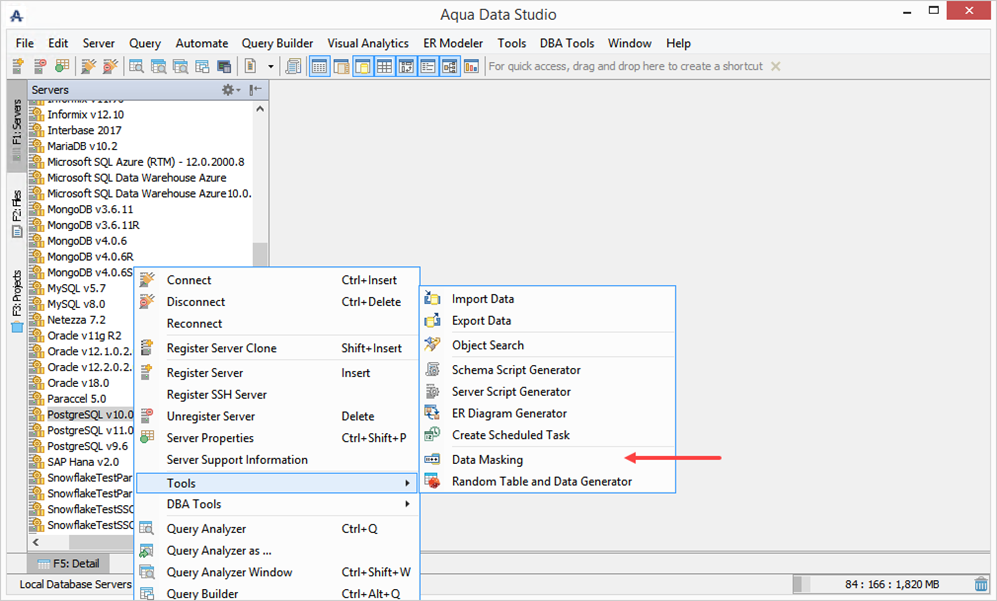
- Aqua Data Studio has made it easy to enable Data Masking for all the database platforms. By selecting Data Masking under the Tools main application menu or by selecting Tools > Data Masking from the right-click menu in the database Schema Browser.
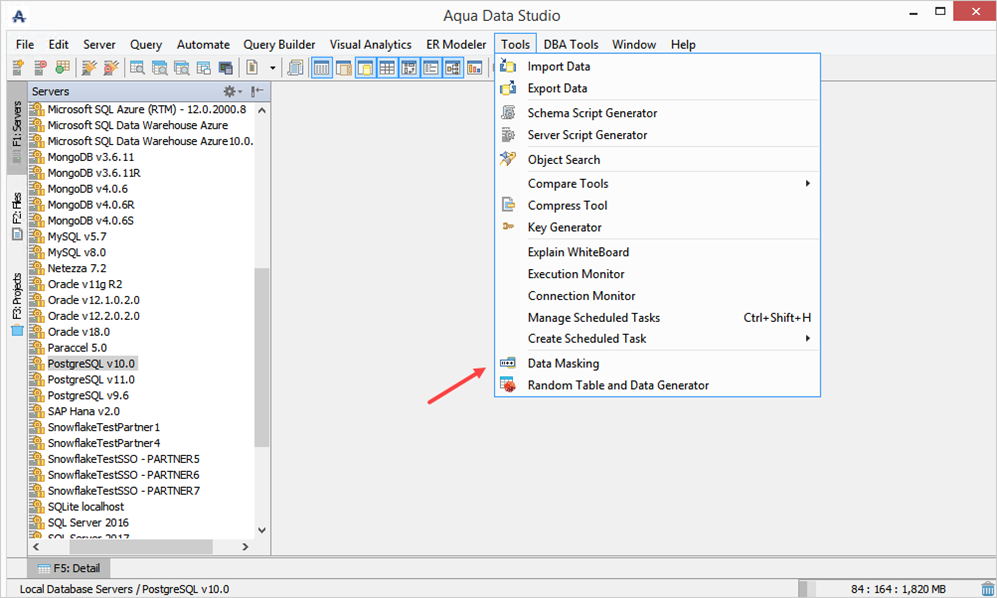
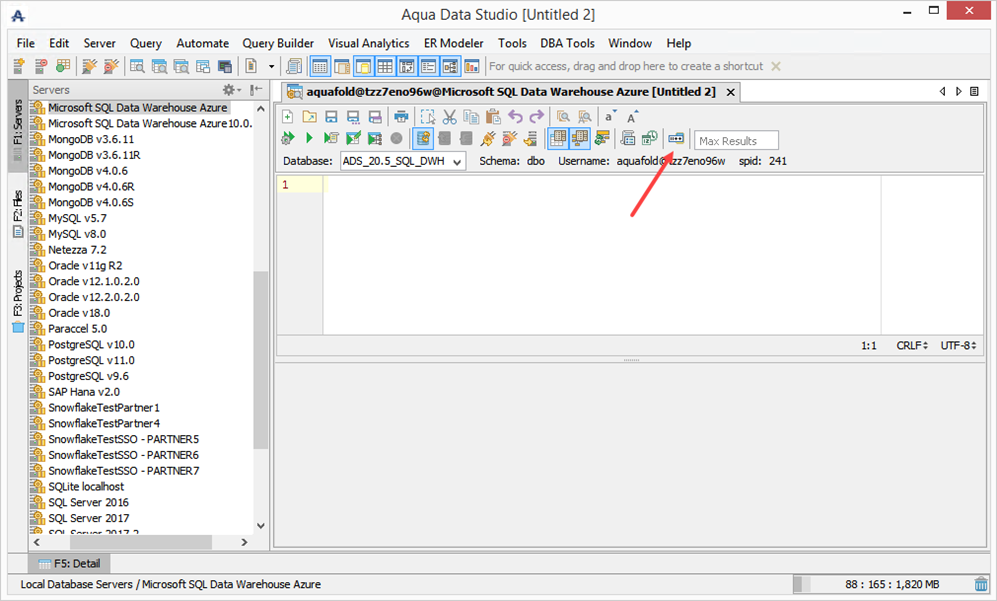
- It is also accessible from the Query Analyzer Toolbar menu.
For a Google BigQuery connection, the SQL Version - Use Legacy SQL option in the Advanced tab must be unchecked in order for Data Masking to work correctly.
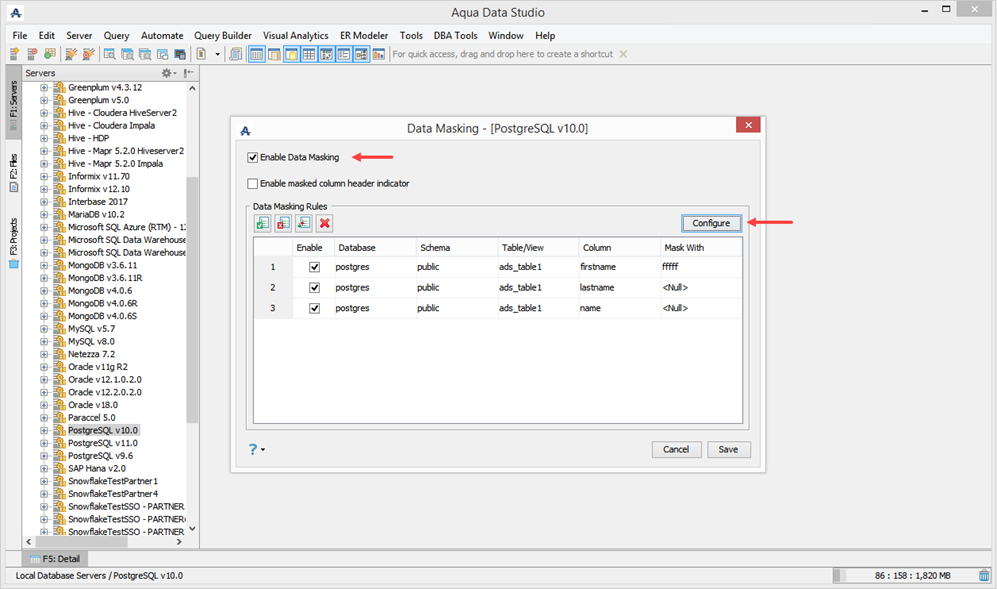
The Data Masking UI has been created to make it easy to mask out specific tables and columns in a Database. All masking configuration changes are connection-specific. If there are two different server connections there will be two different sets of rules. Changes made in one connection will not affect the other connection.
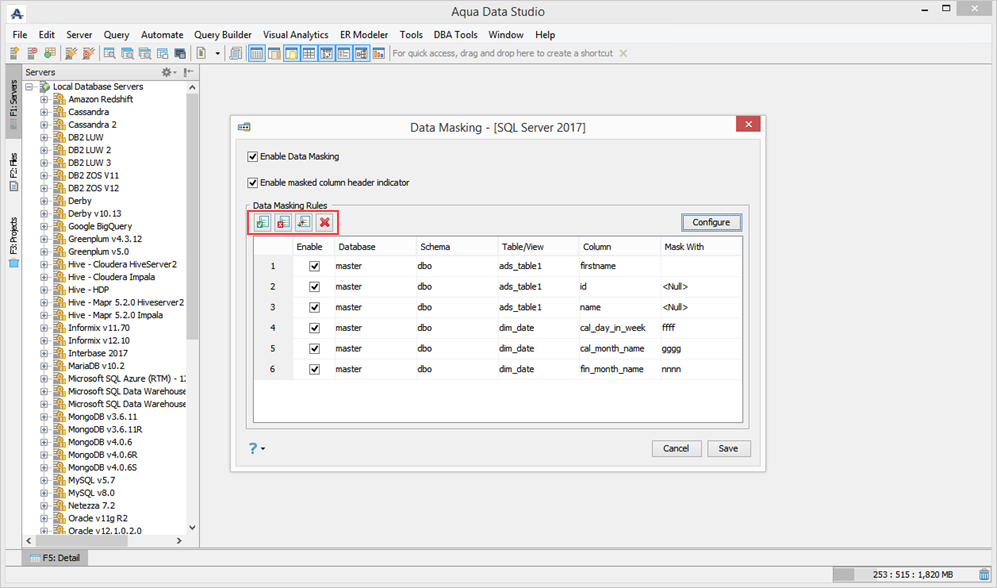
The Data Masking workspace has different options. The Enable Data Masking checkbox at the top lets the user enable or disable all data masking rules. The "Enable masked column header indicator" will display an icon in the result header throughout ADS to let the user know that the column that is displayed is also masked.
The toolbar menu in the Data Masking UI gives users different options. Two buttons to select or unselect different columns at once, one to reverse selected columns and one to delete a specific row.
Configure - To bring up the Data Masking rules dialog.
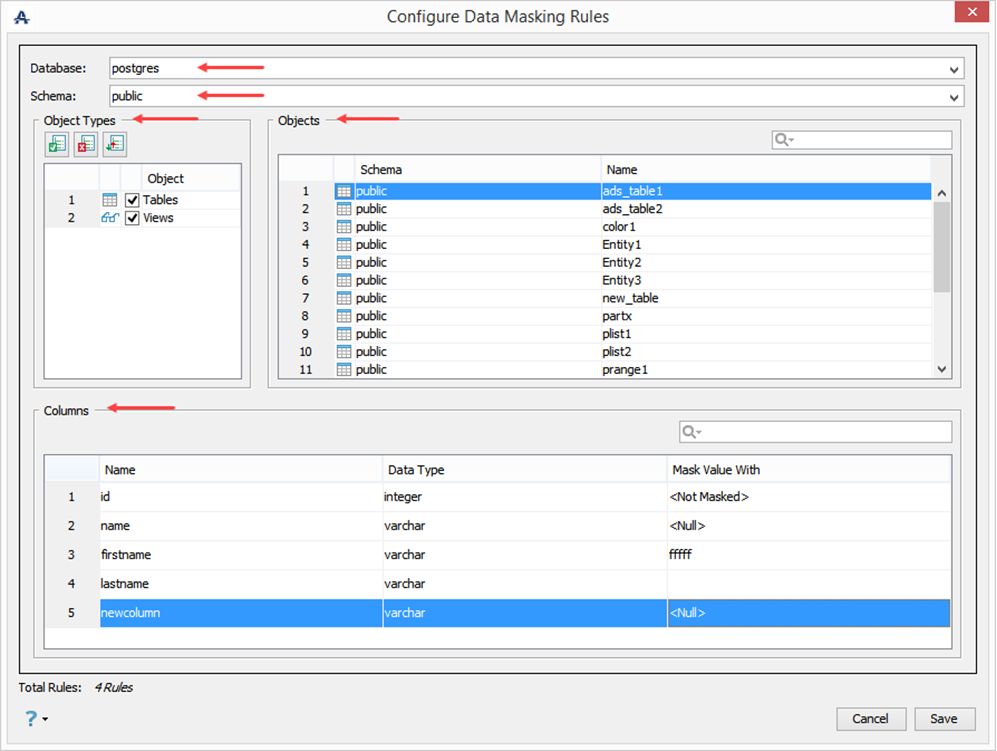
Configure Data Masking Rules - Users can add or delete rules.
- Object Types - The options are pre-selected so that the Objects list is generated. Either tables or views can be selected.
- Objects - In the objects pane, the first entry is selected so that the Columns list is populated. Each time an Object is selected, the Columns section will be updated accordingly. Scrolling up and down in the Objects window will select the columns for that object.
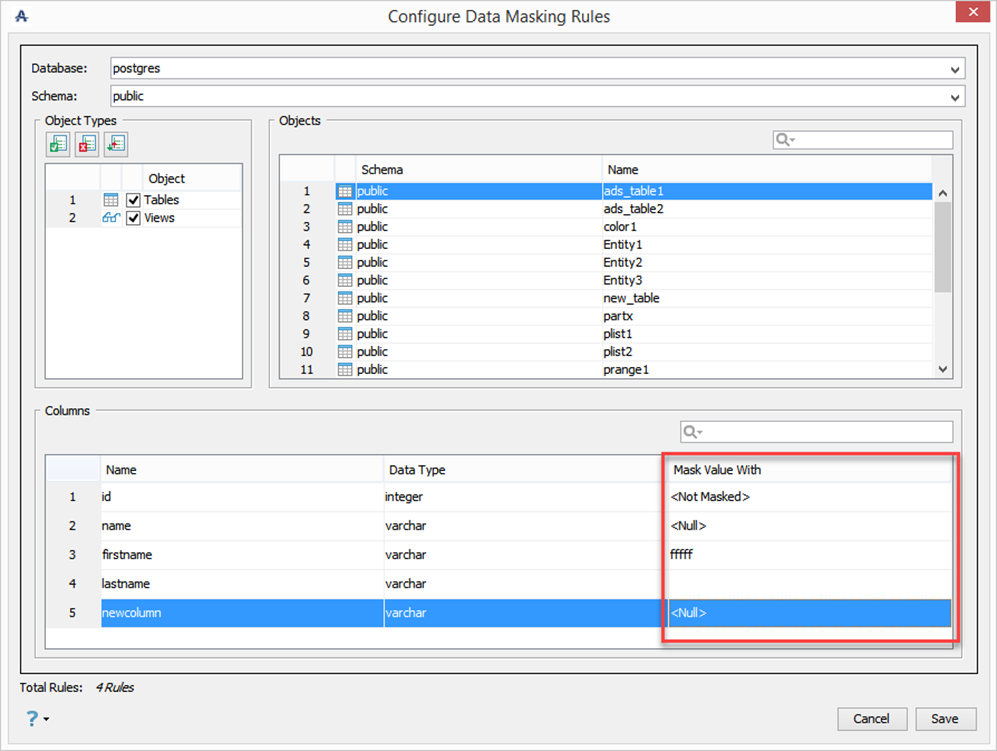
- Columns - In the Columns section, users can select the Name, Data Type, and have the option of giving the mask value for each entry. The mask value has to be validated to ensure that it conforms to the data type. It can either be a null value or the user can type their own value. Keep in mind that if the column data type and mask value are different, the field will be cleared and not valid.
In the Configure Data Masking Rules window, select which Database, Schema, Object Types, and Objects you want to mask out. First, select the database and schema location for the table(s) that you want to mask from the dropdowns. In the Objects Types window, select table and/or views. This will display all the tables and views for that database/schema combination in the Objects window. Selecting an object from the Objects window will display the columns for that object in the Columns section. Select which columns you want to mask and enter the Mask Value.
Editing values can only be done in the Configuration Data Masking rules window. Users can select the row in the main window, click Configure and the selected table will be highlighted in the Data Masking rules dialog so users can conveniently edit the values faster.
Under the Mask Value column, you can select from the dropdown menu if you want it Not Masked, Null, Custom value or leave it Blank. Keep in mind that a blank value only applies to String data types.
Table/View column can only be sorted manually in the main window, by clicking on the Table/View column title.
Data Masking can appear in different tools. Query Analyzer, Query Builder, Fluidshell, Aqua Command, Data Export, Aqua Script, and Edit Table Data.