Before working with tutorials, identify two data sources that you can use for practice. These data sources should not be live or mission-critical, and they should be similar in schema and data.
Data comparison jobs automate the process of comparing and correcting data between data sources at the database, table, and row level. You select a source and a target data source from Data Source Explorer, map databases and tables between the two selections, and then run the comparison job.
DB Change Manager compares the information and returns a results screen with details including:
- An overall percentage of the data that is the same between the source and target
- Discrepancies between the two databases, such as data values that exist on only one
Once a data comparison job has run, you can then correct any synchronization issues by running an automatically-generated SQL script that adds missing rows and updates out-of-sync values. You can modify the SQL script prior to running it, and store it for future use.
To start Change Manager
- Start Change Manager using the Start menu’s IDERA DB Change Manager [version] item.
When DB Change Manager first starts, it displays a Welcome screen. Review the Welcome screen options, and then close it.
Adding data sources
In order to define and run jobs, you first register data sources by providing connection information and other details to DB Change Manager. Once a data source has been registered, it remains stored in a catalog and does not need to be reregistered each time you open DB Change Manager. You can use a single registered data source in multiple jobs.
Data Source Explorer shows the registered data sources and their associated jobs, if any. Before registering a data source, gather the information about the repository location and connectivity permissions.
To add a data source
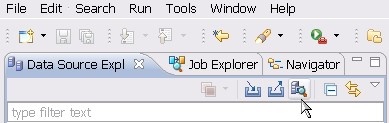
- Click the Discover Data Sources icon at the top of the Data Source Explorer view.
- In the Discover Data Sources wizard, select the locations to search for data sources, and then click Next.
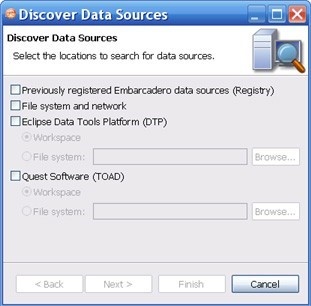
Select the data sources you want to add to the DB Change Manager environment, and then click Finish.
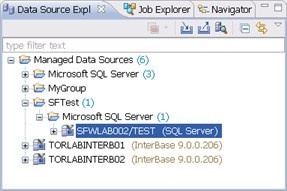
The new data source or sources appear in the Data Source Explorer.An alternative to using the Discover Data Sources wizard is to click File > New Data Source and set its connection properties.
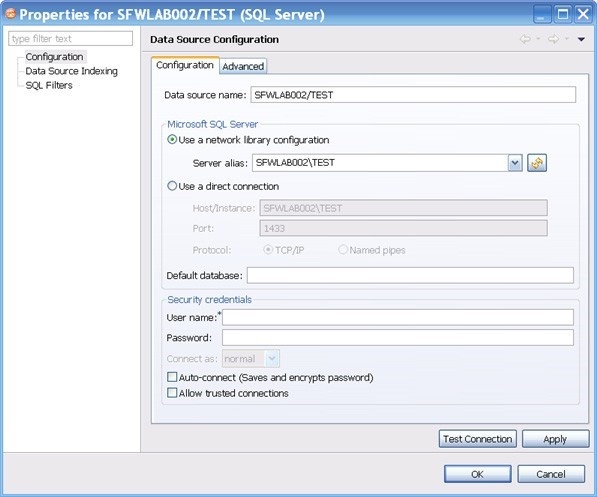
- In the Data Source Explorer, right-click on a data source and select Properties to work with connection properties for the datasource.
Creating a data comparison job
Prior to performing the following steps, make sure you have at least two data sources registered in DB Change Manager. Ideally these two data sources are similar in schema and content, so that the comparison is meaningful to you.
To create a data comparison job in the Overview tab
- Click File > New > Data Comparison Job.
- Use the Select a Project dialog’s Create New button to open a dialog that lets you provide a name and location for a project for this exercise. Select the new project from the Select a Project dialog.
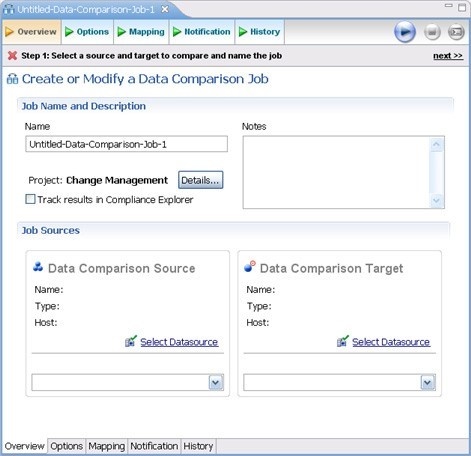
- In the Overview tab, type the name of the job in the Name field.
- Click and drag a data source from Data Source Explorer to the Data Comparison Source box.
By default, all databases in the data source are selected. If you prefer, use the menu to specify a single database. - Click and drag a data source from Data Source Explorer to the Data Comparison Target.
- Click File > Save or type Ctrl+S to save the job.
To customize the job in the Options tab
- Click the Options tab.
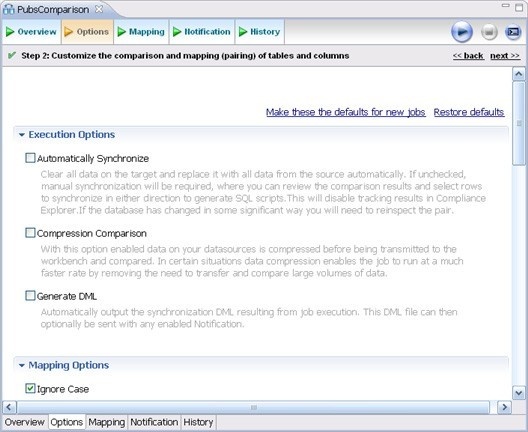
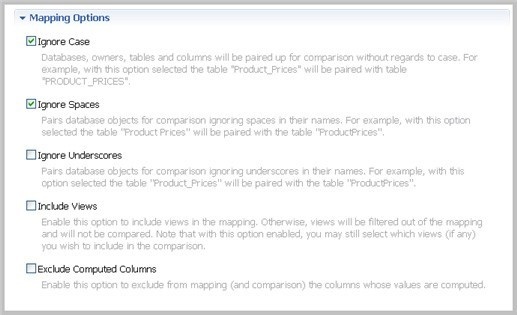
- In the Options tab, review the various settings available to you. In particular, select or de- select the check boxes in the Mapping Options section.
To refine comparisons in the Mapping tab
- Click the Mapping tab.
Select the databases you want to compare; usually they have the same or a similar name.
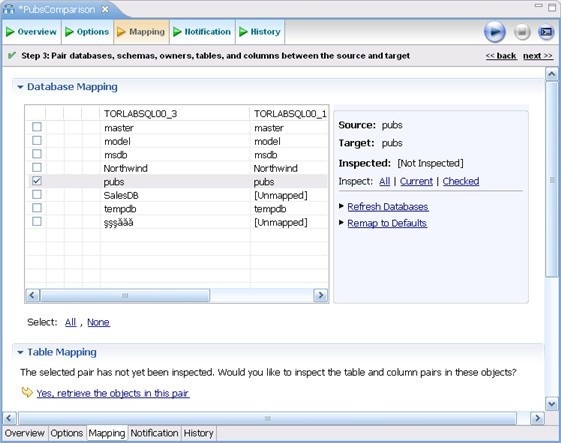
Use the All and None commands at the bottom of the pane to select all or none of the databases.
- By default, DB Change Manager does not show the table mappings. To see them, select the Inspect: Checked option on the right side of the Database Mapping pane. The progress bar displays in the lower right corner. The Table Mapping pane shows how and whether the tables map to each other in the two databases.
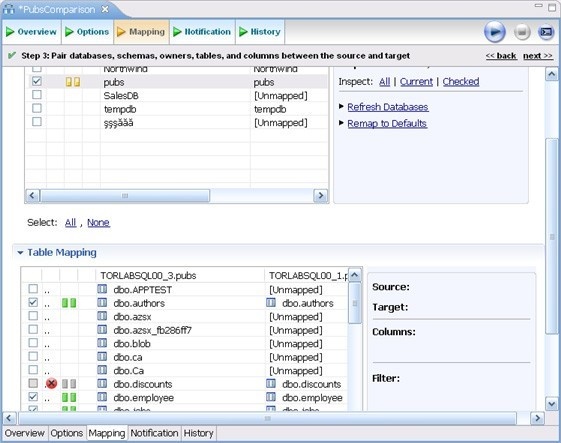
The Data Comparison Job Editor automatically maps and selects databases and tables between the source and target when it detects correspondences. It indicates when there is no mapping and displays information when it cannot make a match.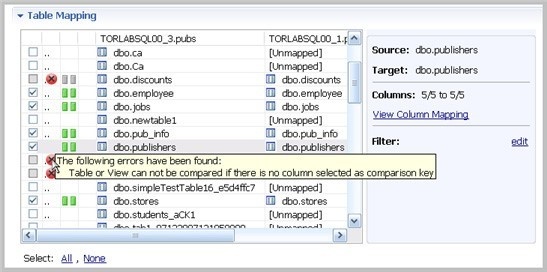
- Select or de-select the check box next to each mapping, as needed. You can adjust incomplete mappings before running the job. Click undefined items in the Target data source column and use the drop down menu to map them.
Click Filter: edit while a pair is selected to use the Columns, Comparison Key, and Filter dialog and further refine the mappings, such as inserting a WHERE clause.
To specify notifiers in the Notification tab
- Click the Notification tab.
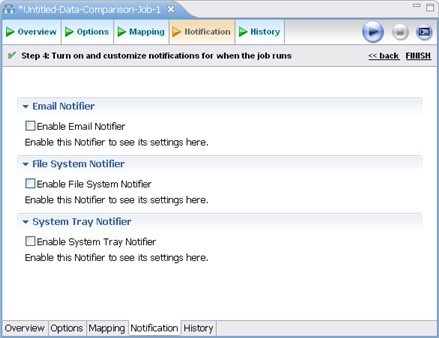
- In the Notification tab, select where DB Change Manager sends notifications when this job is run.
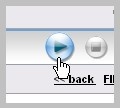
To run the job and see the results
- Click the Run Job icon located in the upper-right side of the window.
The Results tab displays the job progress bar and the results, when available. - Click View in the Results column to view information for an individual pair.
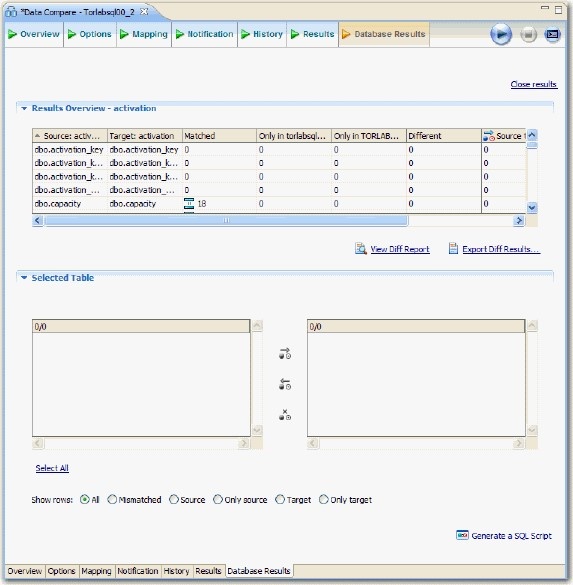
- In the Database Results tab, review the detailed results for the tables and rows of the selected databases.