Before working with tutorials, identify two data sources that you can use for practice. These data sources should not be live or mission-critical, and they should be similar in schema and data.
Data masking is a way of securing sensitive data during the development or testing phases of a database development project. It is often performed as a security or compliance measure that protects important information. By masking valid production data, you can provide a copy of the data that is “scrambled” but still represents your production environment.
To mask data
- Select File > New > Data Comparison Job and if prompted, select a project.
- Provide a name of the job in the Name field and then drag and drop datasources from the Data Source Explorer to the Data Comparison Source and Data Comparison Target boxes.
- In the Options tab, ensure that Automatically Synchronize is selected and read the description shown for that option.
- In the Mapping tab, select a row corresponding to a matching database pair in the Database Mapping box, and then select Yes retrieve the objects in this pair.
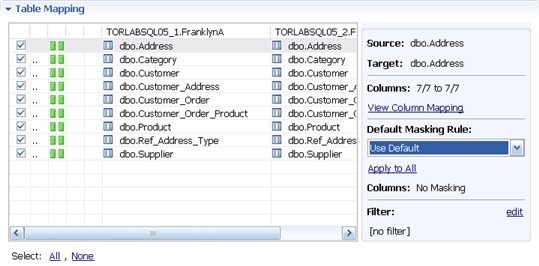
- In the Table Mapping box, click View Column Mapping.
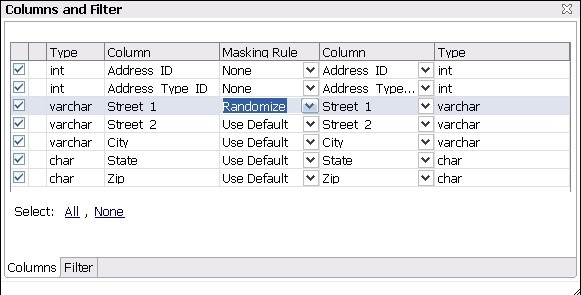
- Click on the Data Masking Rule option for a column and select one of the following:
- Use Default. The default masking rule as set in the Database Mapping box.
- None. No masking is applied.
- Randomize. Replaces characters with other random characters.
- Shuffle. Reorders the values in different rows; for example, in a First Name column, Bob, Ted, and Alice can change to Alice, Bob, and Ted.
- Close the window.
- Continue to experiment with selection and settings until you are comfortable with masking options.
- Click File > Save to save the job.
- Click the Run Job icon.
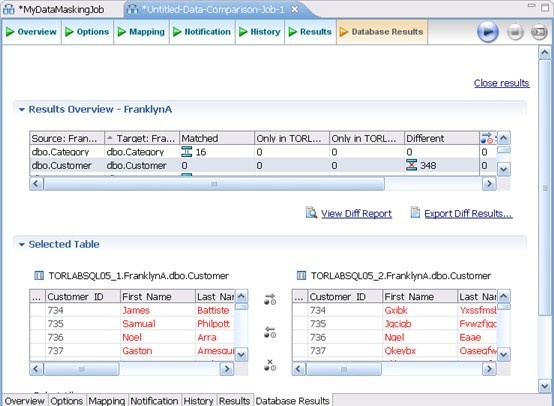
The Database Results tab shows the masked data.