Before installing the Precise framework, see Precise requirements for installation.
To install the Precise framework
- Download the following zip file for the appropriate Precise version:
Precise x.x.x from https://downloadfiles.idera.com/products/Precise.zip/ - Unzip the downloaded files for Precise x.x.x into an empty folder. We recommend that you keep the Precise x.x.x download available for use after finishing the Precise installation.
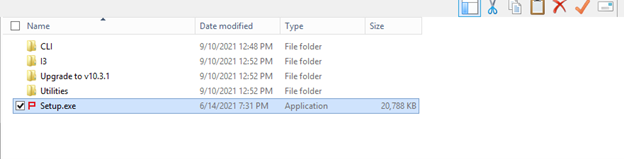
- On a Windows server, open the folder containing the unzipped Precise x.x.x files.
- Open the Precise x.x.x folder, and then double-click setup.exe. The Precise Framework installer appears to guide you through the Precise Framework installation.
The Precise framework installer displays a series of screens, most of which require you to input details regarding your information systems. Below is the Framework installation procedure and a brief explanation of the requested input on each screen. It is recommended to compile a list of all required user inputs based on this section before continuing.
Welcome
The Welcome tab is the first to appear in the installation process and provides the End User License Agreement for you to review and accept.
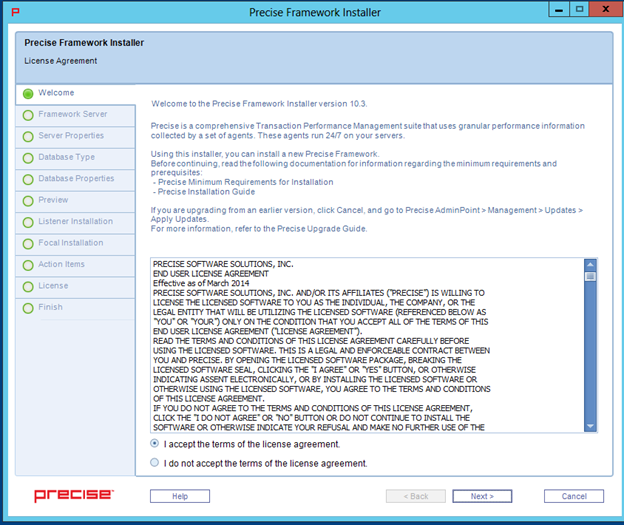
To complete the Welcome screen
- Click I accept the terms of the license agreement.
- Click Next. The Framework Server screen appears.
Framework Server
The Framework Server tab allows you to select details about the server on which you want to install the Precise framework.
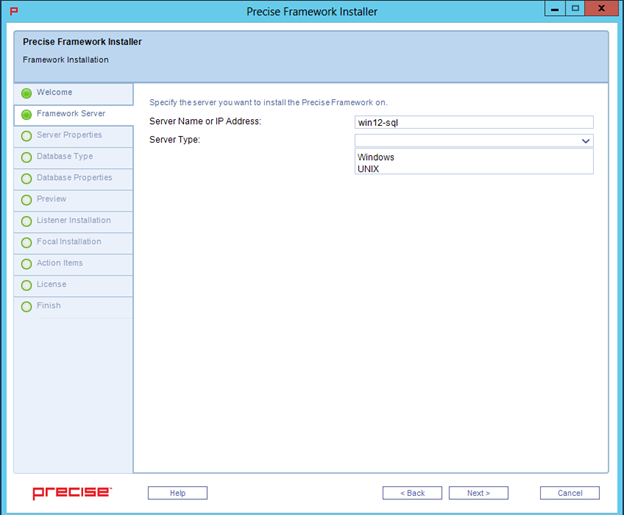
To complete the Framework Server screen
- In Server Name or IP Address, type the name or IP address of the server on which you want to install the Precise framework.
- In Server Type, use the drop-down list to select the operating system type for the server, whether Windows or UNIX.
- Click Next.
Server Properties
The content of the Server Properties tab varies based on the server type selected in the previous screen. This example uses a Microsoft Windows server installation.
Framework installation on a Windows Server
The Precise framework is created for an automatic or manual installation.

Select Manual Installation only in the event that you have a Windows server that does not allow remote installation or if you encounter issues during the automatic Windows server installation. For more information, see the next set of installation steps.
To install the Precise framework on a Windows server using automatic installation
- Select Automatic Installation.
- If you want to use the credentials of the user account currently accessing the server:
- Select Use Current Credentials.
Select an installation folder by clicking the browse button (...), and then searching for the appropriate destination.
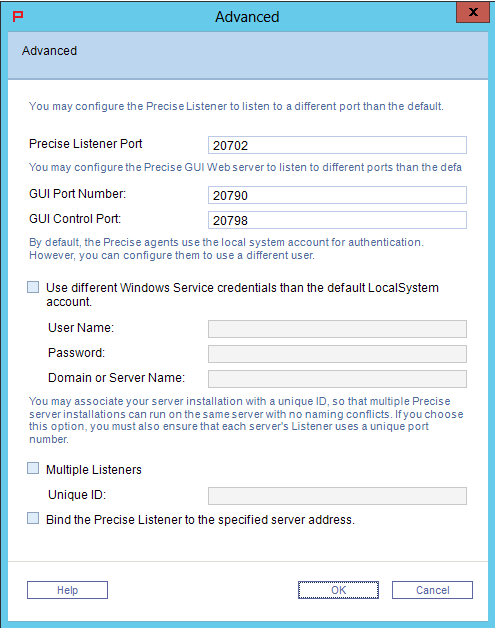
If you need to change Precise listener or GUI port numbers, click Advanced, and then complete the appropriate fields in the Advanced window. For more information about this window, see About the Advanced window.
- If you want to use a different user account with administrator permissions:
- Select Change Credentials.
- Complete the following fields:
- User Name
- Password
- Domain
Select an installation folder by clicking the browse button (...), and then searching for the appropriate destination.
If you need to change Precise listener or GUI port numbers, click Advanced, and then complete the appropriate fields in the Advanced window. For more information about this window, see About the Advanced window.
- If you want to use the credentials of the user account currently accessing the server:
- Click Next.
To install the Precise framework on a Windows server using manual installation
- Select Manual Installation.
- Click Next.
For more information about manually installing the Precise framework on your server, see Adding a Windows server using manual mode.
About the Advanced window
The Advanced window shows you which ports Precise uses. These ports are bi-directional.
Framework installation on a UNIX Server
Select UNIX manual installation mode only in the event that you have a UNIX server without Telnet/SSH/SCP connection or if you encountered issues during the UNIX server installation using automatic mode.
To install the Precise framework on a UNIX server (common server) with Telnet/SSH/SCP connection from the client PC to the Precise FocalPoint
- Select Automatic Installation.
- Complete the following fields:
- User name
- Password
- Select an installation folder by clicking the browse (...) button, and then searching for the appropriate destination.
- Click Next.
To install the Precise Framework on a UNIX server using manual installation
- Select Manual Installation.
- Click Next.
For more information about manually installing the Precise framework on your server, see Adding a Windows server using manual mode.
Database Type
The Database Type tab allows you to select the PMDB for the Precise framework.
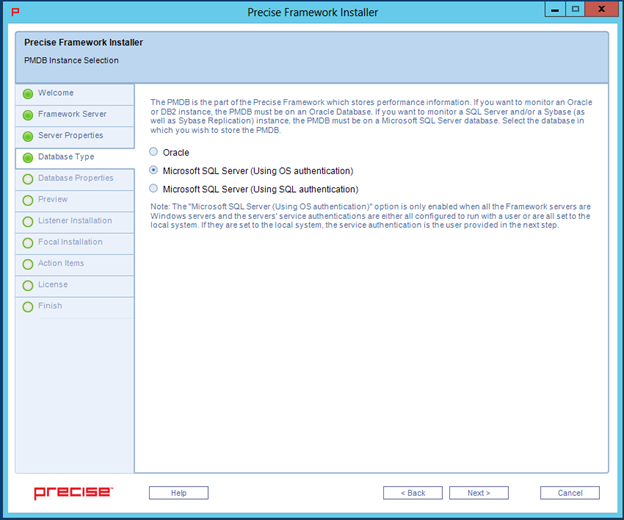
To select a PMDB instance
If you want to monitor an Oracle or Db2 instance , you must select Oracle. If you want to monitor a SQL Server and/or a Sybase instance , select one of the Microsoft SQL Server options.
The Microsoft SQL Server (Using OS authentication) option is enabled only when all the Framework servers are Windows servers, and the service authentications are either all configured to run with a user or are all set to the local system. If they are set to the local system, the service authentication is the user provided in the next step.
- Click Next.
For more information about the PMDB instances, see:
Using an Oracle PMDB
To enter Oracle server PMDB login information
- In the Oracle Database Server field, click the drop-down menu, and then select the Oracle server from the list, or type in a different server. The selected Oracle server is used as the PMDB.
- In the Oracle SID field, click the drop-down menu, and then select the Oracle SID or manually type it in the field.
- Type the Oracle Listener Port Number.
- If you want to use RAC , check Use Oracle RAC Service Name.
- If you want to install the PMDB in an Oracle Container database, then the PMDB must be installed in one of the PDBs and not the main Controller. Check Use Oracle RAC Service Name. By default, the PMDB schema is automatically installed. To install the schema manually, see Manually installing the Oracle PMDB schema.
- Type the name of the Oracle DBA user. This name is used only during the Precise framework installation.
- Type the Password for the Oracle DBA user account.
- Click Next.
To enter Oracle server PMDB schema storage parameters
- Complete the following fields:
- Datafiles storage folder location. The Datafiles storage folder location is where all datafiles are created (storage parameters). The folder must exist in the file system.
- Update the tablespaces definitions (optional). See Updating the tablespaces definitions.
To enter Oracle server PMDB schema information
- In the User Name field, type a new Precise user name, or click the drop-down menu to select an existing Oracle schema user name. When using a Oracle containerized database as the PMDB, it is recommended that the PMDB is set up on a PDB and not on the root container . This can be done by using the Service Name checkbox in the database details screen of the framework installer. This is the name of the Precise user created in the Oracle instance to hold the PMDB schema. You can create a new Precise user, or select an existing user from the list.
- Type a new Password for the new user, or an existing password if you have chosen an existing user.
- Confirm the password.
- Next to the Store datafiles in this location field, click the browse button (...), and then select the folder for storing datafiles. For Oracle ASM, specify the ASM disk group. (For example: +DISKGRP1/ora11asm/).
- Click Next.
Using a Microsoft SQL Server PMDB
To enter Microsoft SQL Server PMDB login information (using OS authentication)
- In the SQL Server instance field, click the drop-down menu, and then select the SQL Server instance from the list, or type in a different instance. The selected Microsoft SQL Server instance is used as the PMDB.
- Type the User Name. The user name is used both for the PMDB installation, as well as for connecting to the SQL server when using the PMDB.
- Type the Password for the user name specified.
- Type the Domain or Server Name.
- Type the name of the database you want the PMDB to use. If a database with that name already exists, it is used. If not, a new database is created. For a new database, complete the data path and log path fields.
- By default, the PMDB schema is automatically installed. To install the schema manually, see Manually installing the SQL Server PMDB schema.
- Click Next.
To enter Microsoft SQL Server PMDB login information (using SQL authentication)
- In the SQL Server instance field, click the drop-down menu, and then select the SQL Server instance from the list, or type in a different instance. The selected Microsoft SQL Server instance is used as the PMDB.
- Type the Login Name. The login name is used both for the PMDB installation, as well as for connecting to the SQL server when using the PMDB.
- Type the Password for the login name specified.
- Type the name of the database you want the PMDB to use. If a database with that name already exists, it is used. If not, a new database is created. For a new database, complete the data path and log path fields.
- By default, the PMDB schema is automatically installed. To install the schema manually, see Manually installing the SQL Server PMDB schema.
- Click Next.
Completing the new database properties
The New Database Properties tab of the Advanced window allows you to enter properties for the new database.
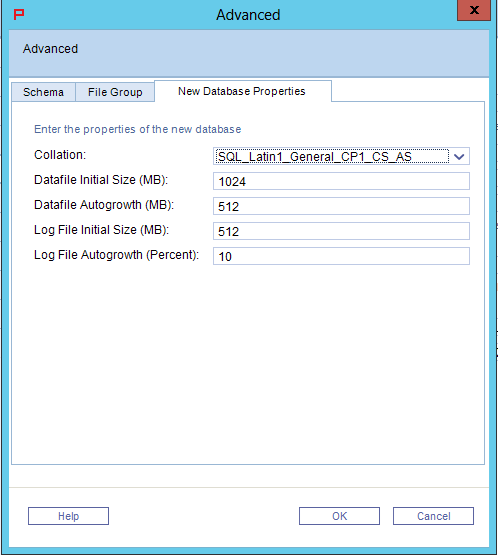
To change the new database properties
- In the PMDB Instance Parameters screen, click Advanced.
- In the New Database Properties tab, complete the following fields:
- Collation
- Datafile Initial Size (MB)
- Datafile Autogrowth (MB)
- Log File Initial Size (MB)
- Log File Autogrowth (Percent)
- Click OK.
Preview
The Preview tab signifies that the Precise framework installer contains enough information to begin the installation phase.
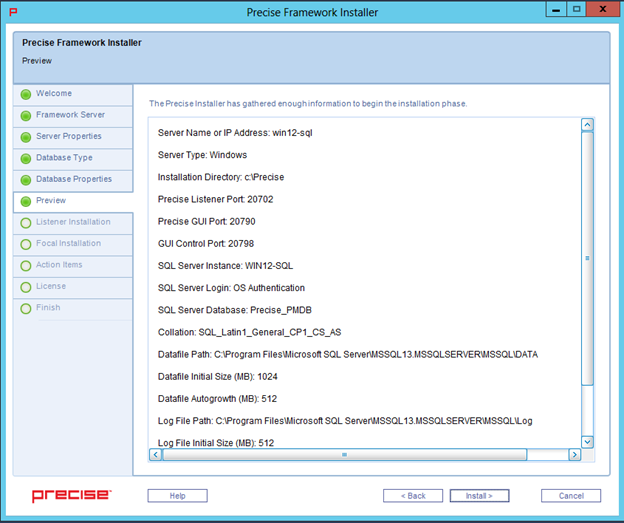
The Preview tab displays a number of details about the installation. Note that you still may change any of the displayed settings.
- To change any of the displayed settings, click Back. Make the necessary changes, and then continue.
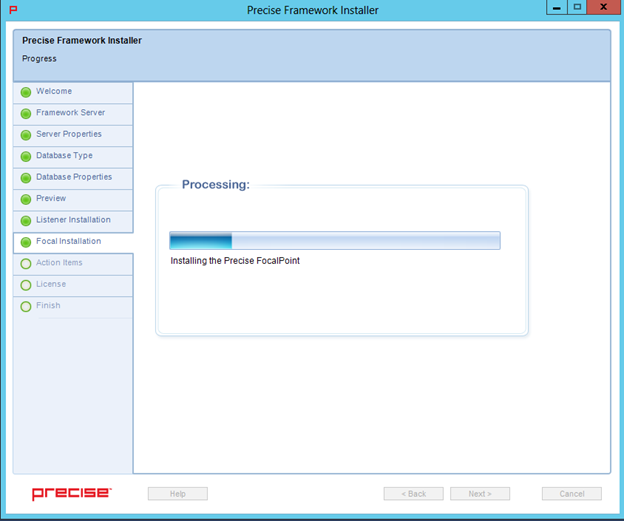
- To continue with the installation, click Install. Installation may take several minutes to complete. A progress bar appears to let you know how installation is progressing through the Listener Installation and Focal Installation tabs.
Make sure to note the location of the installation folder selected during this stage. This folder is known as the <precise_root>, and is referred to during the next steps.
Framework installation progress screen
The framework installation progress bar appears when the Precise Framework Installer is actually performing installation. Installation may take several minutes. The progress screen visually displays the progress of actual installation.
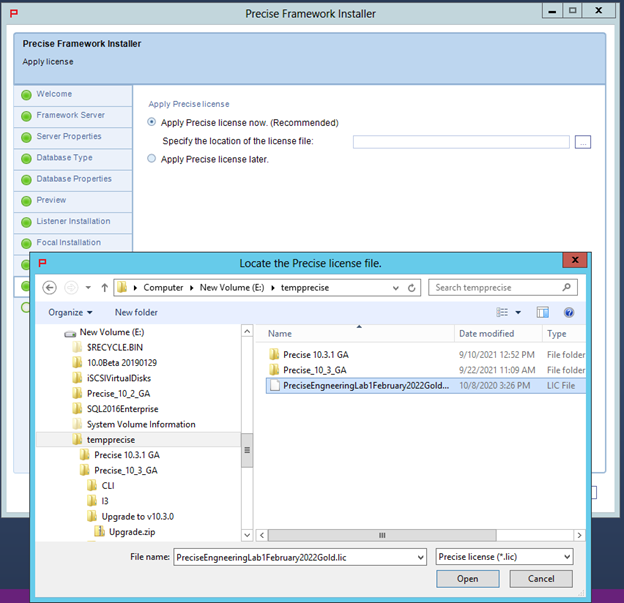
License
The License tab allows the user to apply a Precise license, which you received at purchase. Search for, and then select the license file.
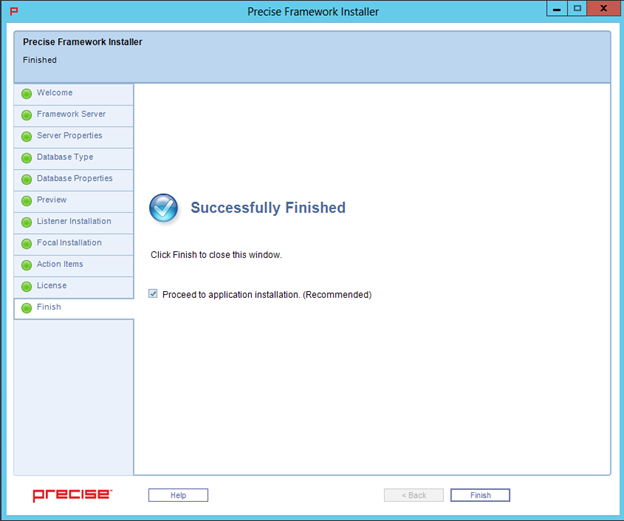
Finished
The Precise installer finished screen appears when the Framework Installer is complete. If you selected the manual schema option, you now must run the schema creation script and the required action item to finish the installation.
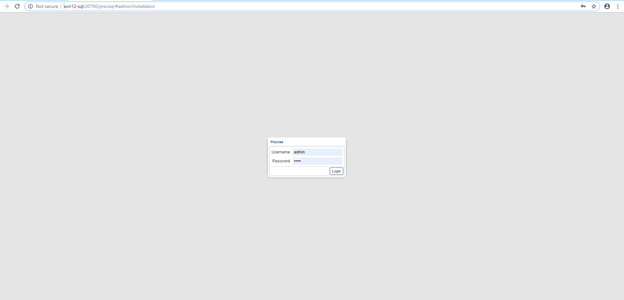
Launching the Precise framework URL
The Precise URL launches in your default Web browser. The default Username and Password are admin/admin.