Tags help you group or organize your instances and databases for better management. For example, use a tag name such as "Disaster Recovery" to identify all your registered instances and databases that are vital to your disaster recovery plan, and have quick access to views and details from this group.
When you register an instance, SQL Inventory Manager gives you the option to associate that instance to an existing tag, or to create a new tag. For more information on how to add tags when registering an instance, see Add your SQL Server Instances section. You cannot assign tags to databases when adding an instance, but you can make this association when viewing Instance Details or Database Details.
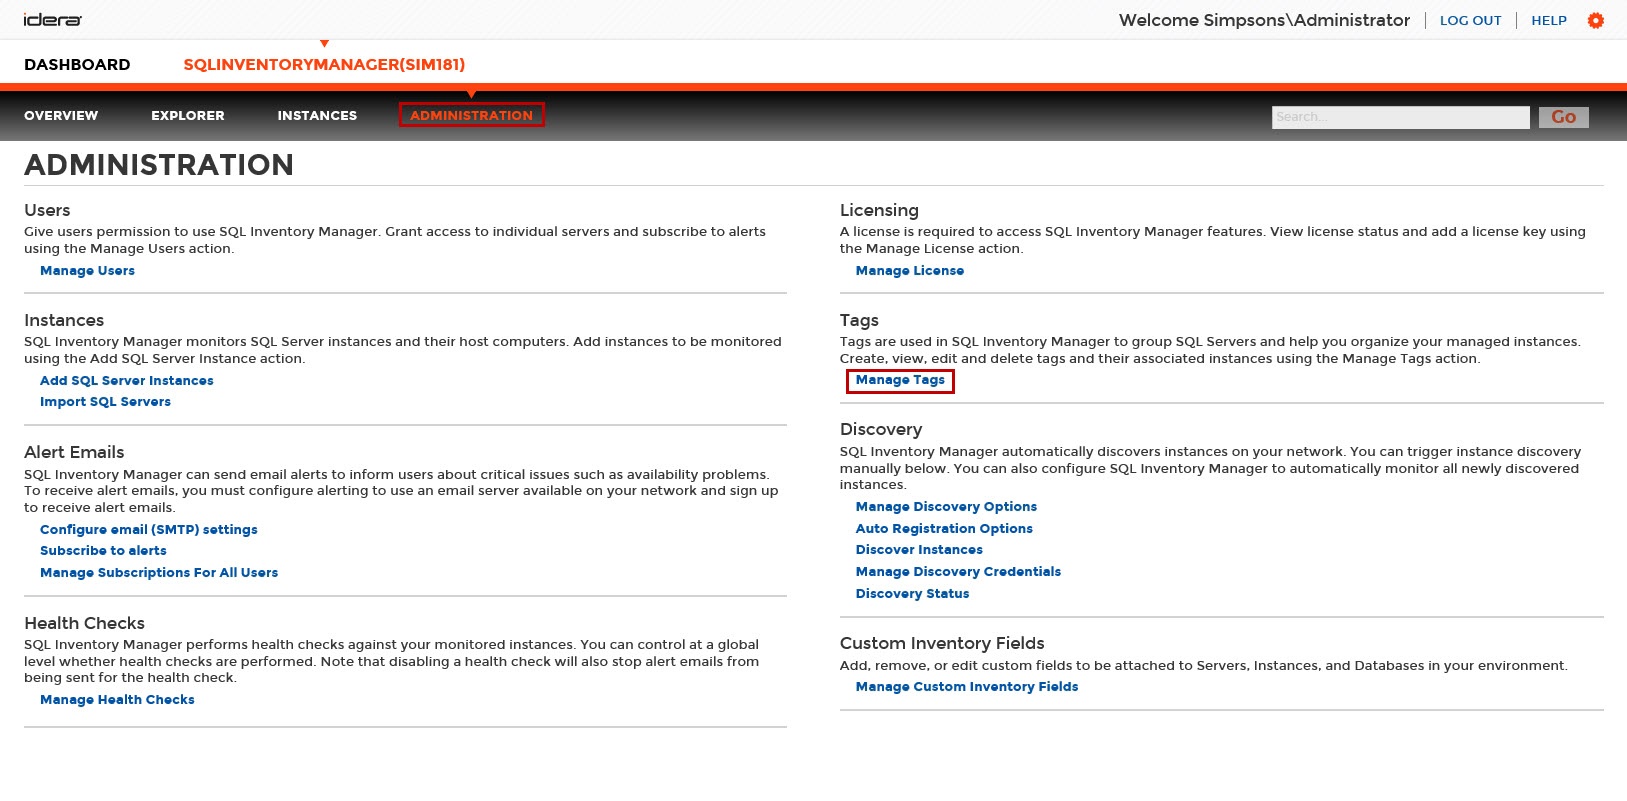
The Manage Tags section on the Administration view allows you to manage the complete list of tags for all your environment.
You can also access the Manage Tags window on the Overview by clicking the pencil icon of the Tags section on the status right sidebar.
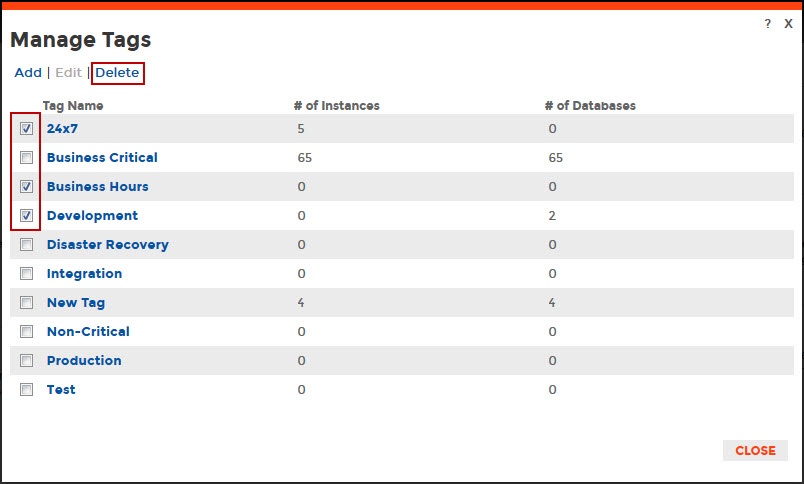
In the Manage Tags window you can:
- View the number of instances and databases associated with a tag
- Add new tags
- Edit the list of instances and databases associated with a tag
- Delete tags
Tip
On the Manage Tags window, click the tag name to quickly access the Edit Tag dialog for that tag.
Add a new tag
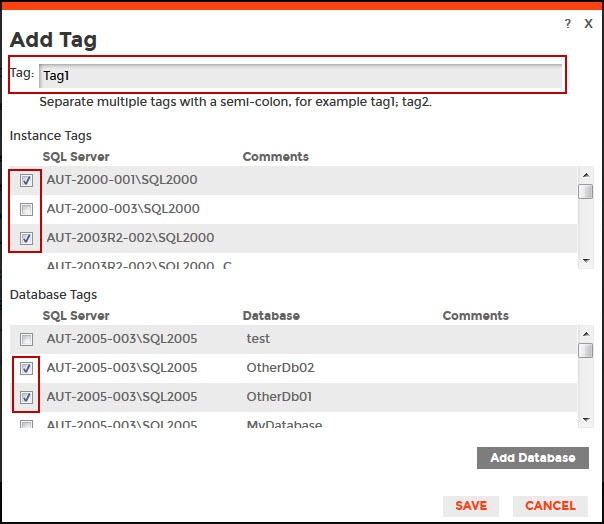
In the Manage Tags window, click Add and SQL Inventory Manager opens the Add Tag window.
Type the name of the new tag you wish to add, or type several names separating them with a semicolon.
Below the Tag field, SQL Inventory Manager displays a list of registered instances and databases in your environment. Select the checkbox(es) for each instance and database you want to add to this tag, and then click SAVE.
Warning
- The tag name must begin with an upper or lowercase alphanumeric character
- Your tag name must have a maximum length of 20 characters
Edit a tag
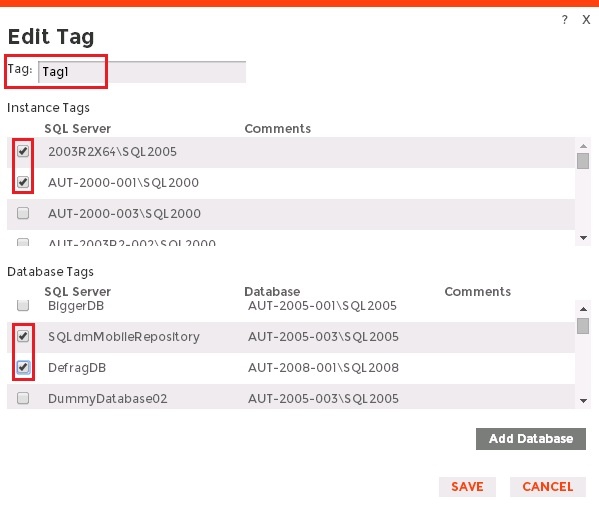
Editing a tag lets you rename the tag or change which instances or databases are associated with the tag.
To edit a tag, select the checkbox next to the tag you want to edit, and then click Edit. You can also access this option by clicking directly on the tag name. Note that you can only edit one tag at a time.
Make the appropriate changes, and then click SAVE.
Delete Tags
To delete one or more tags:
- In the Manage Tags window, select the checkbox next to the tag(s) you want to delete, and then click Delete. SQL Inventory Manager displays a warning message that requires a confirmation whether you want to delete the selection.
- Click Yes. SQL Inventory Manager deletes the tag(s) and users can no longer use those tags. If you did not mean to delete the selected tags, click No.
Managing tags for a single or several instances
SQL Inventory Manager allows you to manage tags for a specific instance. When you access this option you can choose which tags you want to add or delete for the selected instance. For more information on how to edit tags for single instance, see Manage tags for a single instance.
You can also edit tags for several instances at a time (bulk editing). You can choose to apply a new tag to a group of instances, for example, or delete a tag from selected instances. For more information on how to bulk edit tags on several instances, see Bulk edit tags for several instances.
Need more help? Search the Idera Customer Support Portal.


