- Select Preferences > SQL Editor.
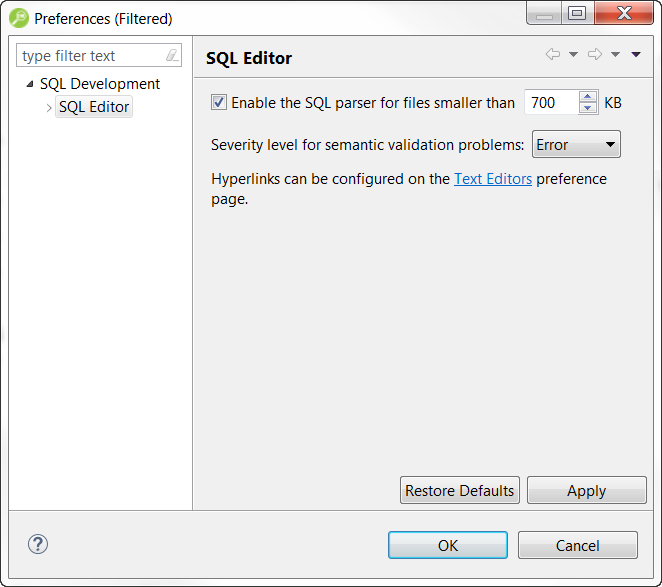
- Change the settings as appropriate in each section and then click Apply.
- Enable the SQL parser...: For performance reasons, you may want to enable the SQL parser only if a SQL file is smaller than the size you specify here.
- Severity level for semantic validation problems: Choose a security level from this list.
This determines how semantic code errors are flagged in the editor and the Problems view.
The link to specify hyperlinks takes you to the Text Editors preference page.
Clearing Enable SQL Parser will disable many of the "smart" SQL editor features, including code formatting, auto completion, semantic validation, and hyperlinks. For better performance, you may disable the parser for files above a specified size
See the following topics to configure other SQL Editor preferences.
- Specify Code Assist Preferences
- Specify Code Formatter Preferences
- Specify Code Quality Preferences
- Specify Results Viewer Preferences
- Specify SQL Templates Preferences
- Specify Syntax Coloring Preferences
Specify Code Assist Preferences
The Code Assist panel is used to specify configuration parameters that determine how code completion features in SQL Editor behave.
Select Preferences > SQL Editor and then in the Preferences dialog, expand SQL Editor and click Code Assist.
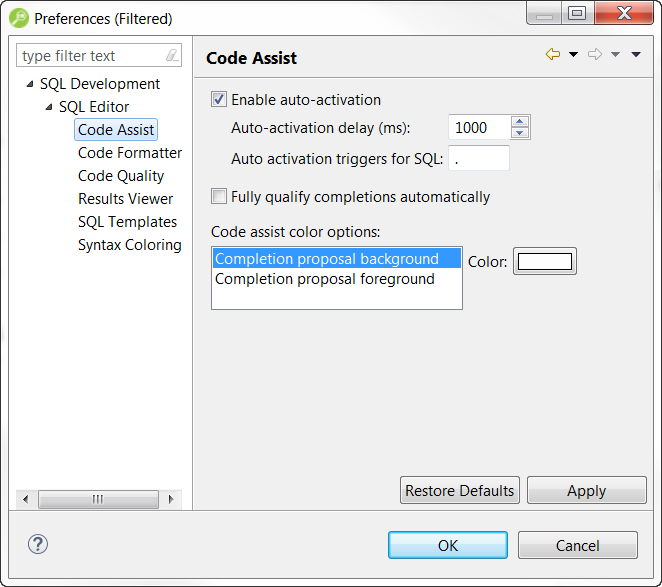
The following describes the options on the Code Assist Preferences page.
- Enable auto-activation: When selected enables code assist functionality with the Ctrl + Space command. If this option is selected, the code assist window automatically appears when you stop typing.
- Auto-activation delay (ms): Specify the amount of time in milliseconds that the window automatically appears.
- Auto activation triggers for SQL: Enter a trigger character or trigger characters. When you enter an activation trigger in the SQL Editor, you will see the code assist options available.
- Fully qualify completions automatically: When selected, specifies if code completion results are returned specific (fully qualified), rather than the minimum required to identify the object.
- Code assist color options: Specifies the color formatting of code completion proposals.
Select background or foreground options from the menu and modify them as appropriate.
Specify Code Formatter Preferences
The Code Formatter pane provides configuration options for code formatting functionality in SQL Editor.
Select Preferences > SQL Editor and then in the Preferences dialog, expand SQL Editor and click Code Formatter.

The panel provides a drop down list of formatting profiles and a preview window that displays how each profile formats code.
- Select a profile: From the list, choose the profile you want to view.
- Click Show to view the details of the Profile. On the Show Profiles dialog that appears, you can edit the profile and save the changes.
- Click New to define additional code formatting profiles.
- Click Edit to modify existing profiles. You can modify how code characters appear in the interface and how SQL Editor determines line breaks.
- Click Rename to change the name of an existing profile. The new name cannot be the same as another existing profile.
If you create a new profile with a name that already exists in the system, a prompt will appear asking you to change the name of the new code formatting template.
Create and edit Code Formatting Profiles
You can create your own code formatting profiles that will define how your SQL code is formatted.
- Select Preferences > SQL Editor and then in the Preferences dialog, expand SQL Editor and click Code Formatter.
- On the Code Formatter pane, click Show or New and a dialog similar to the following appears.
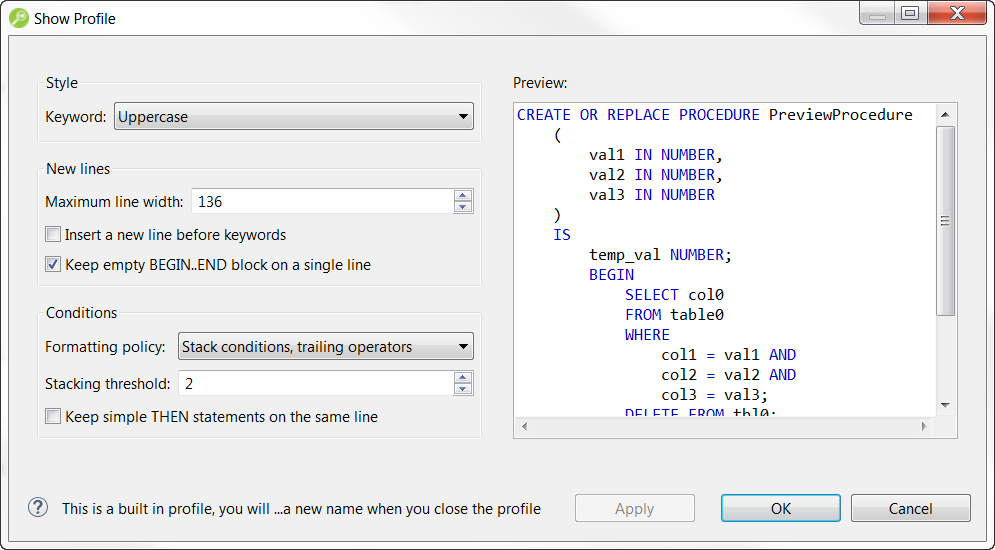
- Make your changes, click Apply to preview your changes and then click OK to create the new profile or to exit the Show Profile dialog.
- Use the preview pane to preview the changes you make to your code formatting preferences. Changes are not implemented until you click Apply or OK.
Specify Code Quality Preferences
The Code Quality preferences allow you to specify the severity level for several categories of problems that result in inefficient or erroneous SQL.
- Select Preferences > SQL Editor and then in the Preferences dialog, expand SQL Editor and click Code Quality.
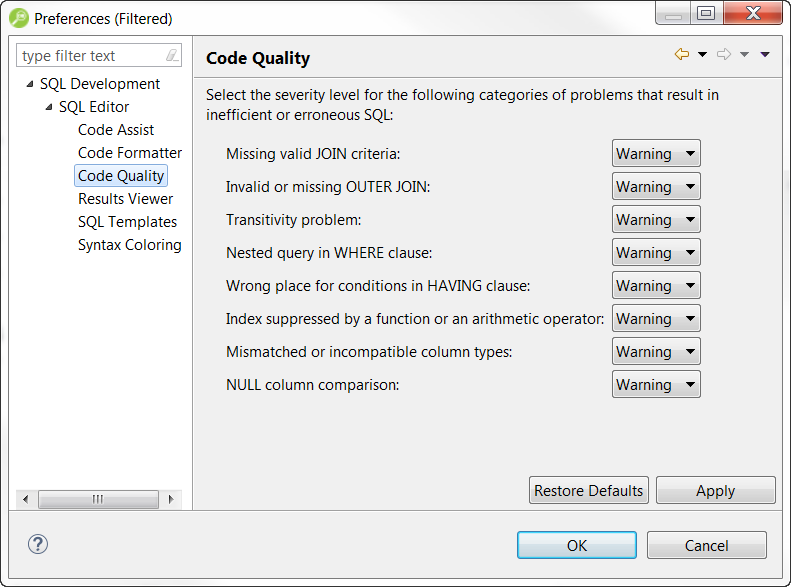
- Change the severity levels by clicking the list next to the category and choosing the level.
- To save your changes, click Apply.
Specify Results Viewer Preferences
The Results Viewer pane provides configuration options that specify how the Results view displays or saves results.
- Select Preferences > SQL Editor and then in the Preferences dialog, expand SQL Editor and click Results Viewer.
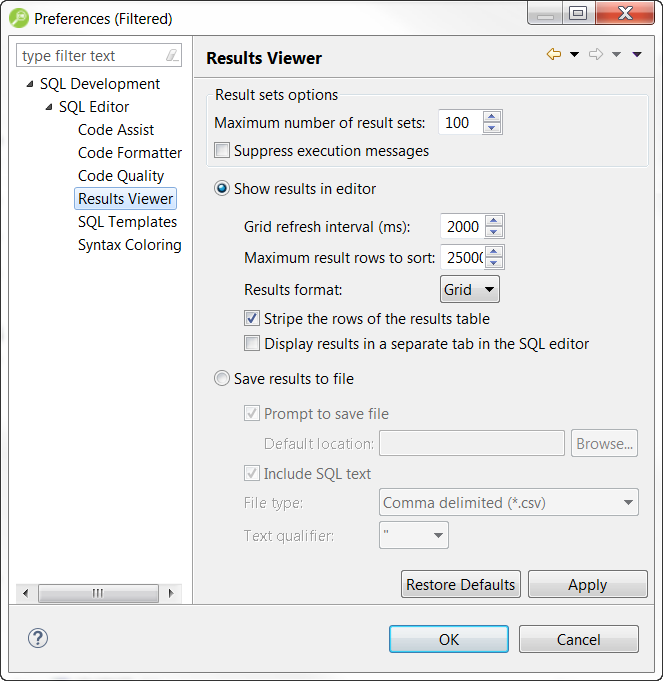
- Make your preference changes and then save your changes by clicking Apply. The following describes the preference options available:
- Maximum number of result sets: If selected and the executed SQL returns more results sets than the maximum specified, result sets in excess of the maximum specified will not be displayed.
- Suppress execution messages: If selected and the SQL you execute returns informational messages, they will not be displayed.
- Show results in editor: Execution results can be either shown in the editor or sent to a file. If you choose
- Grid refresh interval: Indicates the speed in milliseconds that the Results view refreshes.
- Maximum result rows to sort: If the number of rows and results exceed this number, the column sorting in the result set is disabled.
- Results format: These are the different formats that can be used to display the results in the editor.
- Stripe the rows of the results table: Adds intermittent highlighted bars in the Results view.
- Display results in separate tab in SQL Editor: Opens the Results view in a separate window on the Workbench.
- Save results to file: Provides options that let you save the contents of the result sets to a file. You can also specify the file type, delimiter and text qualifier.
Specify SQL Templates Preferences
The SQL Templates panel provides customization options for creating and modifying SQL code templates.
- Select Preferences > SQL Editor and then in the Preferences dialog, expand SQL Editor and click SQL Templates.
The SQL Templates panel displays a list of all SQL code templates currently available. Additionally, when you select a template from the list, the Preview section displays the code block as it will appear when the template is selected in SQL Editor.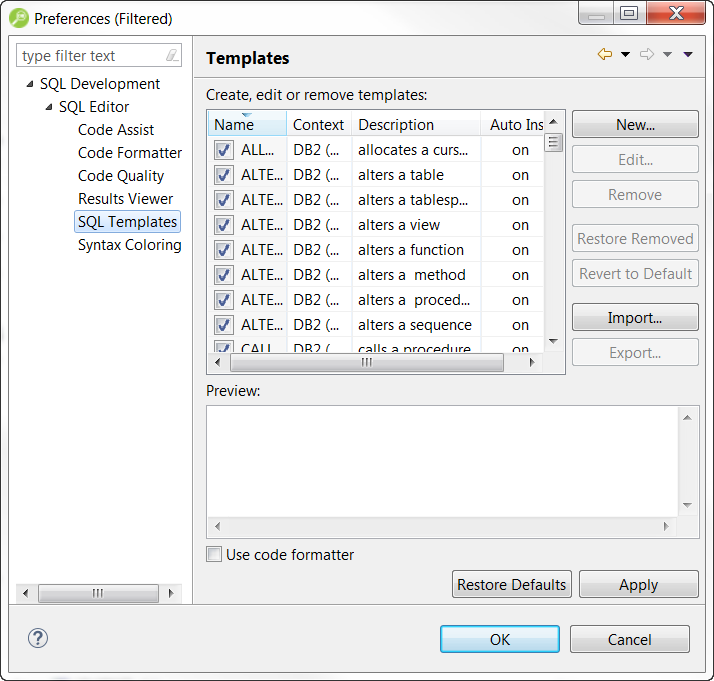
- Click on the check box beside each template to specify if it is included in the code assist check or not, within SQL Editor. Use the buttons on the right-hand side of the panel to create, edit, or delete SQL templates, as needed.
When you create or edit a template, the Edit SQL Template dialog appears.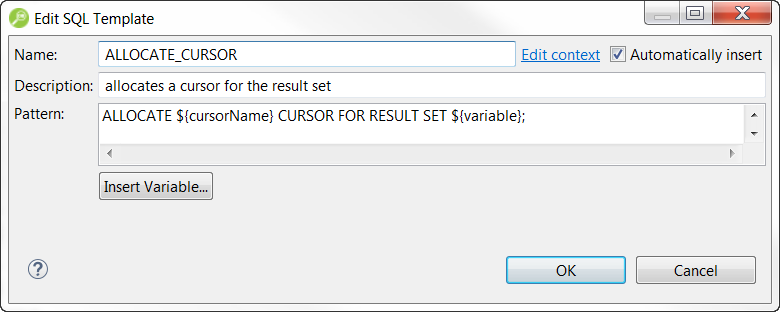
- Enter a Name, Description, and Pattern in the fields provided, and click OK.
If the template name doesn't match an existing SQL code template, your new template is added to the list, and will automatically be considered when the code assist function is executed in SQL Editor. - Select the Use Code Formatter check box to apply code formatting preferences to the specified template. See Specify Code Formatter Preferences for more information about setting code formatter preferences.
Specify Syntax Coloring Preferences
The Syntax Coloring panel provides configuration options that change the look and feel of code syntax in SQL Editor.
- Select Preferences > SQL Editor and then in the Preferences dialog, expand SQL Editor and click Syntax Coloring.
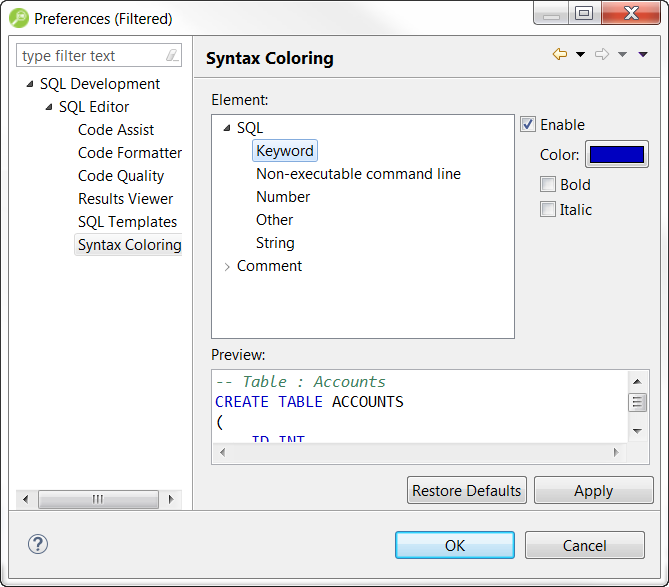
- Use the tree view provided in the Element window to select the comment type or code element you want to modify. Select the options to the right-hand side of the window to modify it.
The Preview window shows a piece of sample code that updates according to the changes you made.