Page History
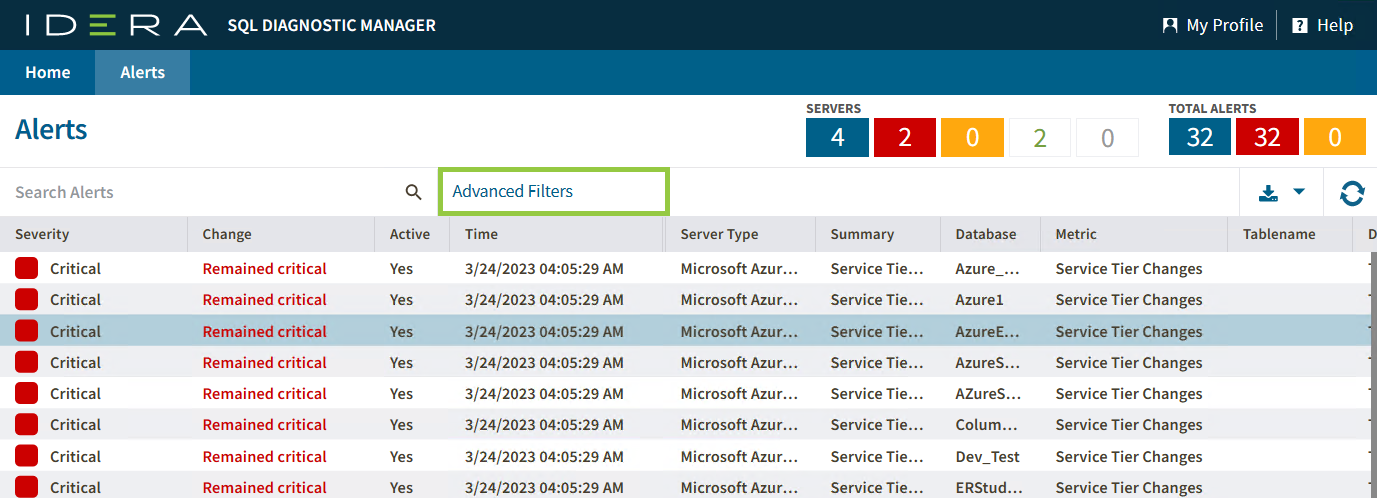
The Advanced filters Filters option allows you to create custom filters that helps help you segment instances using single or multiple conditions. Access this feature by clicking on the Advanced Filters option.
Advanced Filter dialog
- Custom Filter Name - Enter a name for your custom filter.
Use the following fields to create your custom filters. Custom filters on IDERA SQL Diagnostic Manager have the following structure:
- Add Filter - Allow you to add an additional filter.
- Clear Filters - Clears the value of filter creation fields.
- Cancel - Cancel the creation of the filter.
- Apply Filters without Saving - Applies the current advanced filter without saving it.
- Save and Filter - Saves and applies the filter.
Creating an Advanced Filter
Advanced Filters custom fields
The Advanced Filters feature allows you to configure a filter according to your needs. Set it up with the drop-down fields described below.
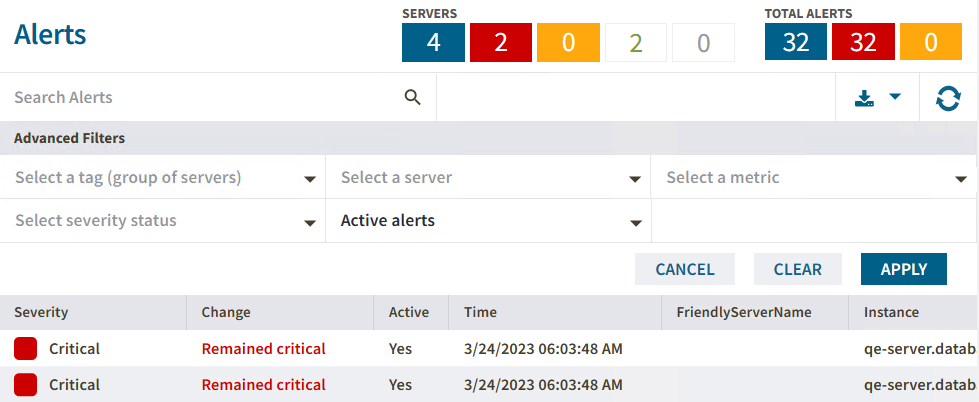
- Select a tag (group of servers) - Configure your filter by tags previously created in your SQL Diagnostic Manager environment.
- Select a server - Select a server from the drop-down servers list.
- Select a metric - Pick a specific metric from the drop-down metric list.
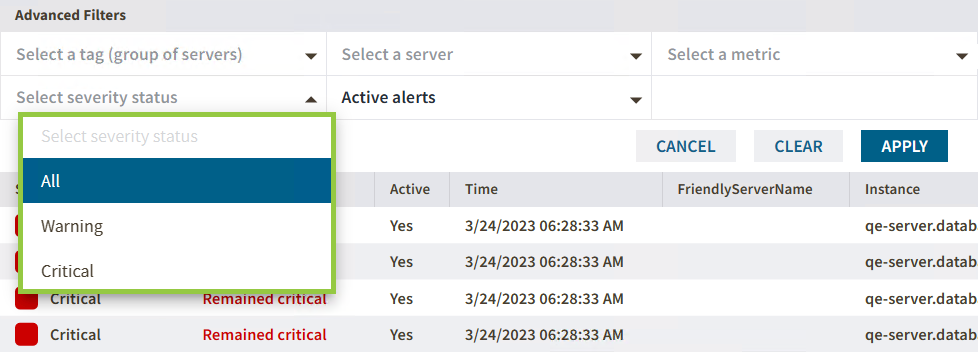
- Select server status - Choose a server status among All, Warning, and Critical statuses.
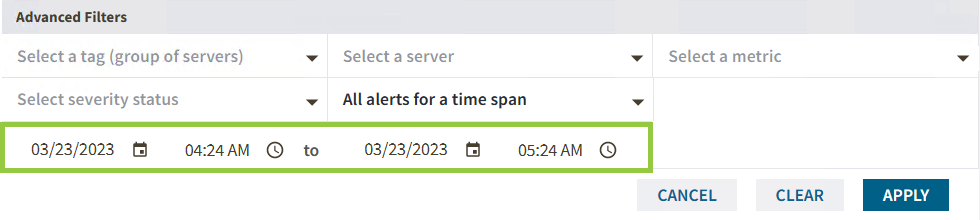
- Active alerts - The Advance Filter allows you to filter your active alerts by Active alerts or Active alerts by time span. When you select Active alerts by time span you can configure the time range by modifying the time and date ranges.
| Info |
|---|
The Advanced Filters fields configuration by default is All. Meaning you will have the entire Alert report of your SQL Diagnostic Manager environment. |
Configure an Advanced Filter
Configure To create an advanced filter follow these instructions:
- Go to the instance view where you want to create a filterAlerts tab.
- Click Advanced Filter and select Create Filter.
3. On the Advanced Filters dialog enter a name for your filter.
...
- Use the drop-down menus to
...
- configure all the fields with your desired criteria
...
- .
...
5. Click Save and Filter.
You can also use conditions to further refine your advanced filters. To add more filtering fields, click Add Filter.
Apply to get the desire alert report.
In case you want to clear all the selection click Clear. Otherwise, if you want to exit the the Advanced Filter feature click CancelTo remove a filter field click .