To Install the IDERA Dashboard on any machine with the repository hosted on a High Availability SQL Server Instance, make sure you have set up a Windows Failover Cluster and a SQL Server Instance .Configure the for High Availability on your machine. Find more information | Newtab2 |
|---|
| alias | here |
|---|
| url | https://blogs.technet.microsoft.com/canitpro/2013/08/19/step-by-step-creating-a-sql-server-2012-alwayson-availability-group/ |
|---|
|
.
Installation Steps for IDERA Dashboard on a High Availability Group
- Install the IDERA Dashboard on any server of your machine following the Installation stepsSteps.
- Go to SQL Server Management Studio and connect to the SQL Server Instance where you installed the IDERA Dashboard.
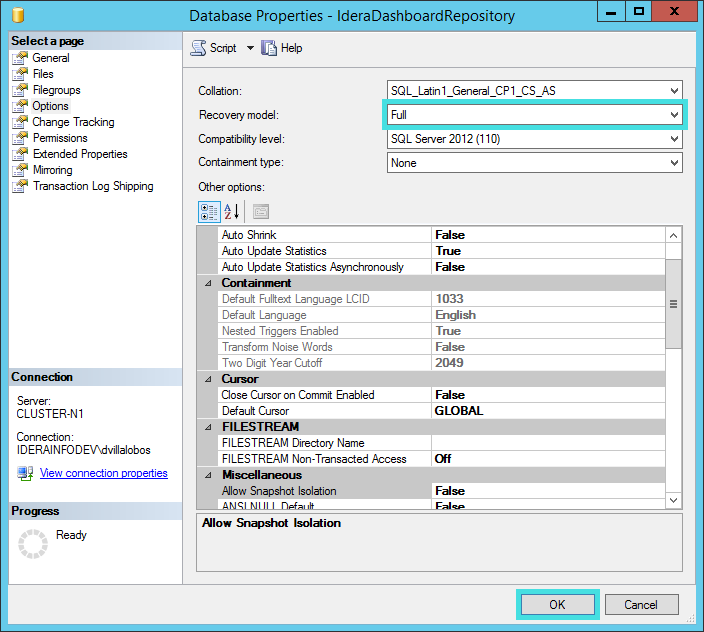
- Under Databases, right-click on the IderaDashboardRepository and click select properties, on . On the wizard, select Options and run a Full Recovery model.
- Right click on IderaDashboardRepository, select Tasks, and run a Full Back up.

Under Databases- To configure your Availability Group, right-click on
the IderaDashboardRepository and click properties.
 Image Removed
Go to the options tab from the left hand side and set the recovery model to full, click Ok to save the changes.
- After the backup is complete go to Always on High Availability, and under Availability Group select Add Database
 Image Removed
- Click Next on the wizard.
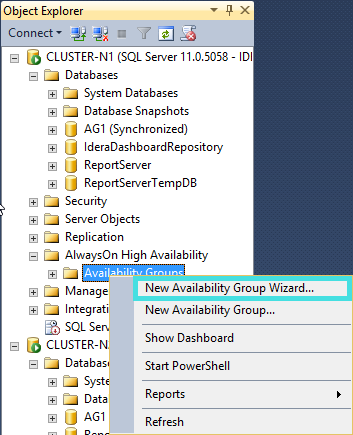 Image Removed
- Select the IDERA Dashboard Repository and Click Next.
 Image Removed
- Select Full data synchronization preference and click Next.
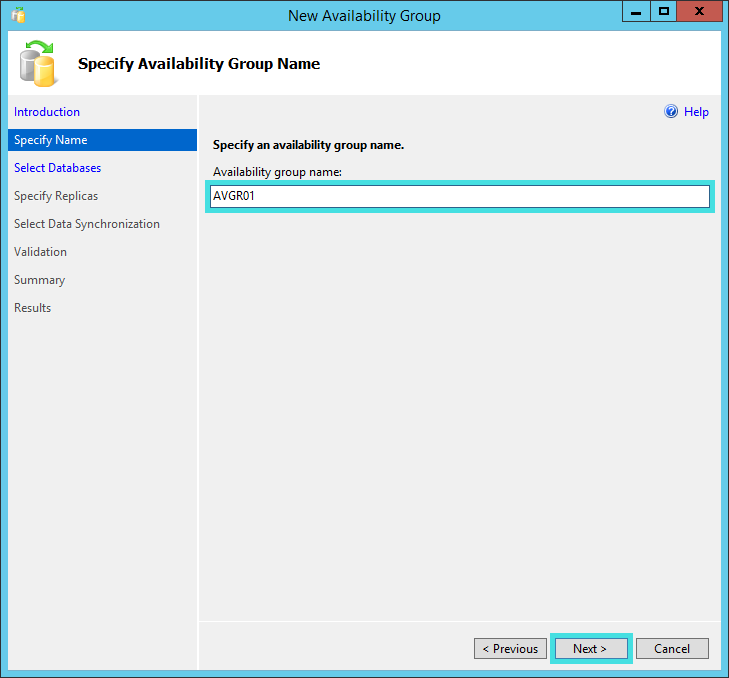 Image Removed
- Connect to all the secondary nodes and click Next.
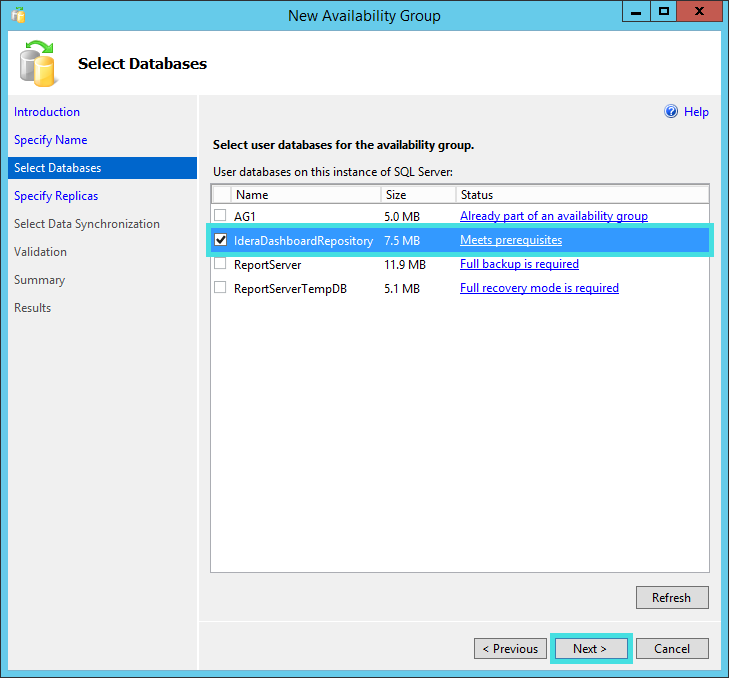 Image Removed
- Let the validation run and click Next.
 Image Removed
- Click Finish
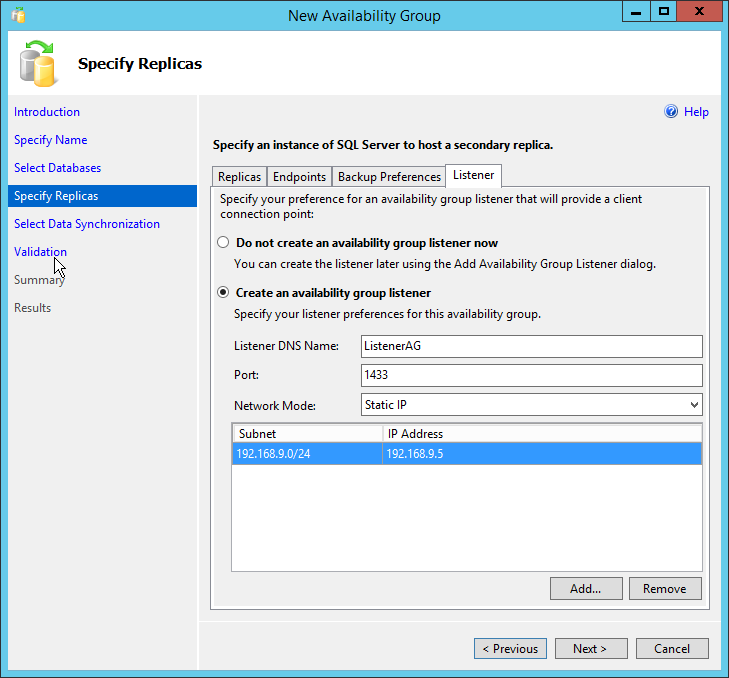 Image Removed
- When the wizard completes click close
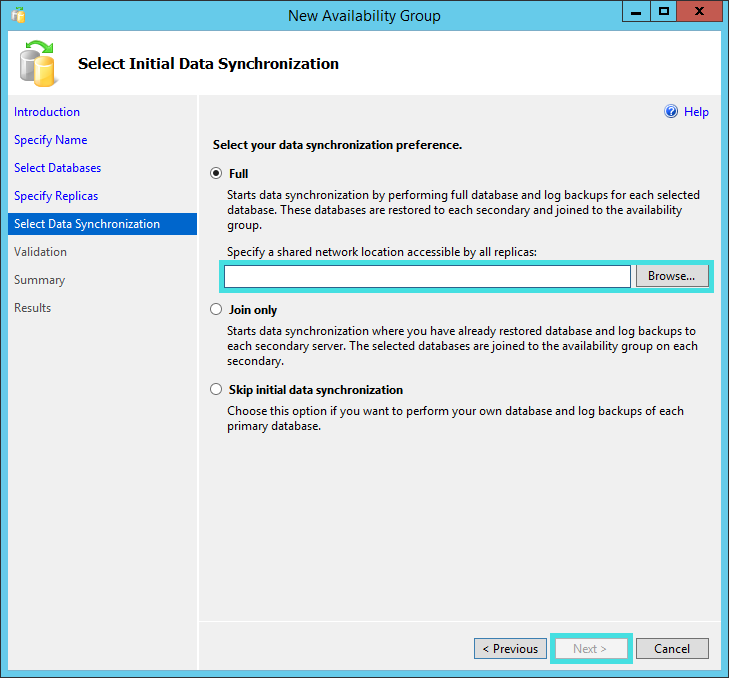 Image Removed
 - sdfkvnpoefv
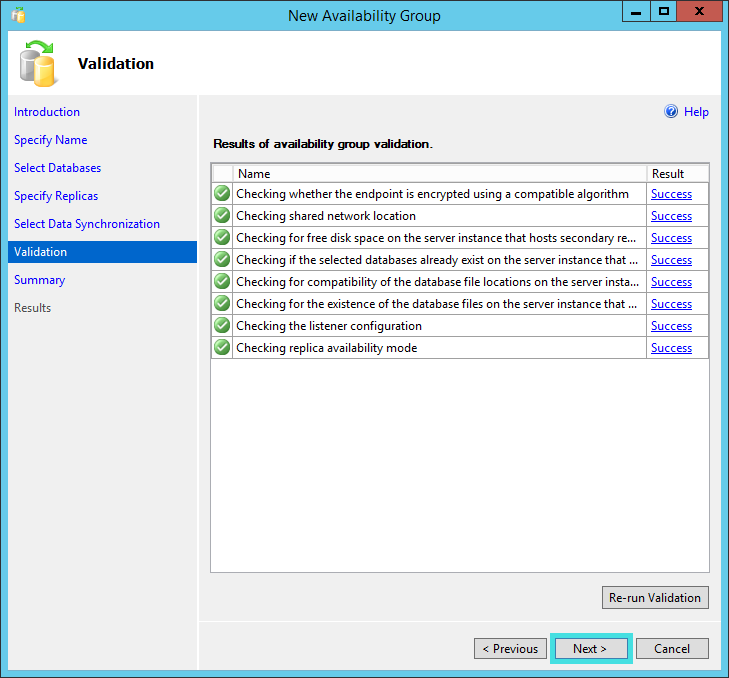 Image Removed
 - asdfvgas
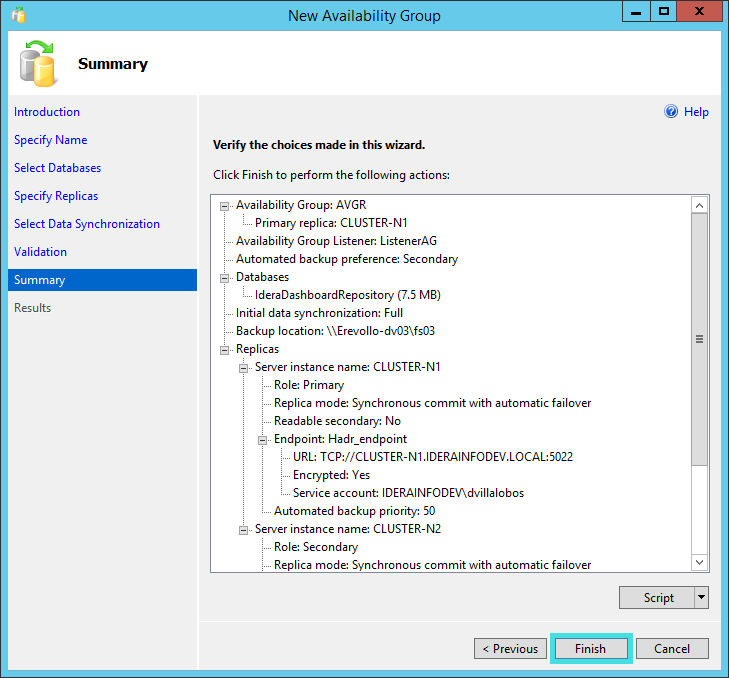 Image Removed
 - afvasv
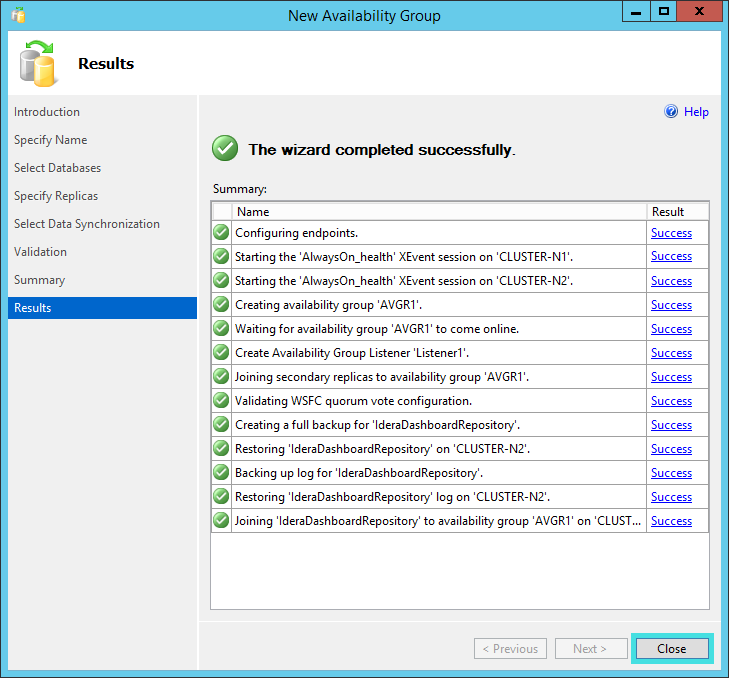 Image Removed
 - Availability Groups and select New Availability Group Wizard...
Image Added
- On the Introduction wizard click Next.
Image Added
- Provide a name to the availability group. Click Next.
Image Added
- On the list of available user databases, check the box of the IderaDashboardRepository database.
Image Added
- The Specify Replicas page, displays as default the server where you are configuring your High Availability Group, click Add Replica..., and browse the servers to be included on the Availability Group.
- Check the boxes of Automatic Failover (Up to 2), Synchronous Commit (up to 3), and select No on the Readable Secondary option, on all your replicas.
- On the Endpoints tab, make sure that the port number value is 5022.
- On the Listener tab, provide a Listener DNS Name with the port number 1433and click Add..., in the Add IP Address dialog box, enter your preferred virtual IP address in the IPv4 Address field. Click OK. Click Next.
Image Added
- Select the Full option, and provide a shared folder location accessible by all replicas.Click Next.
Image Added - Verify that all results return Success. Click Next.
Image Added - The Summary page displays all the actions to be performed. Click Finish when ready.
Image Added - Verify that all results return Success. Click Close.
Image Added aFCWF- On SQL Server Management Studio, you can verify that the IderaDashboardRepository database is Synchronized on the configured Replicas.
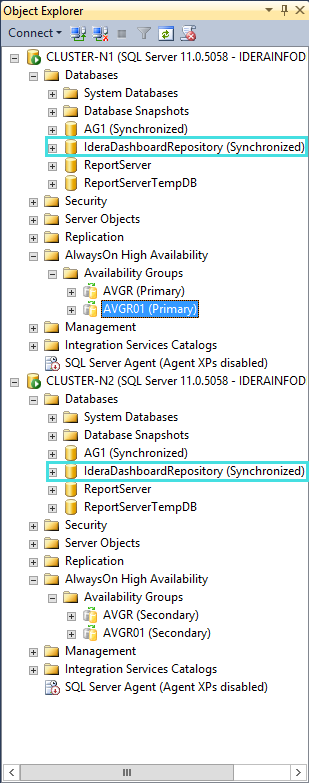 Image Modified