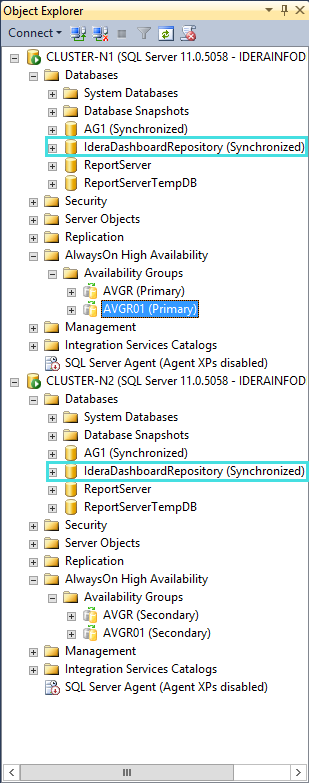
Install IDERA Dashboard on any machine with the repository hosted on a High Availability SQL Server Instance.
Configure the High Availability on your machine. Find more information here.
- Install the IDERA Dashboard on any server of your machine following the Installation steps.
- Go to SQL Server Management Studio and connect to the SQL Server Instance where you installed the IDERA Dashboard.
- Under Databases, right click on the IderaDashboardRepository and click properties, on the wizard select a Full Recovery model.
- Right click on IderaDashboardRepository select Tasks and run a Full Back up.

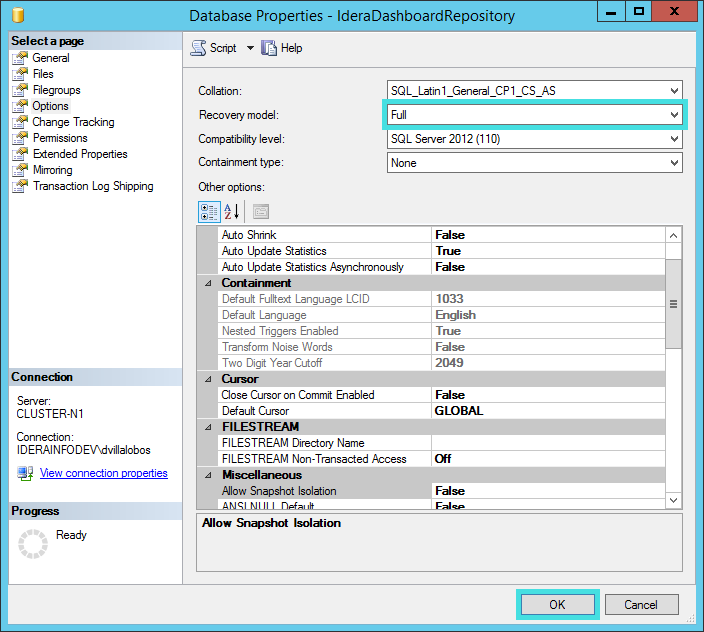
- Under Databases, right click on the IderaDashboardRepository and click properties.

- Go to the options tab from the left hand side and set the recovery model to full, click Ok to save the changes.
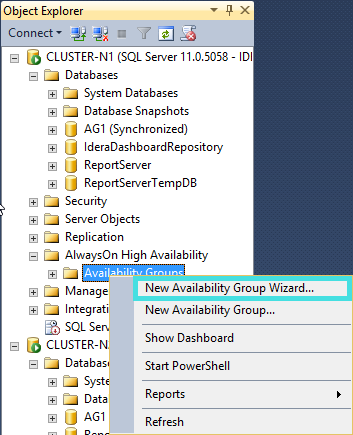
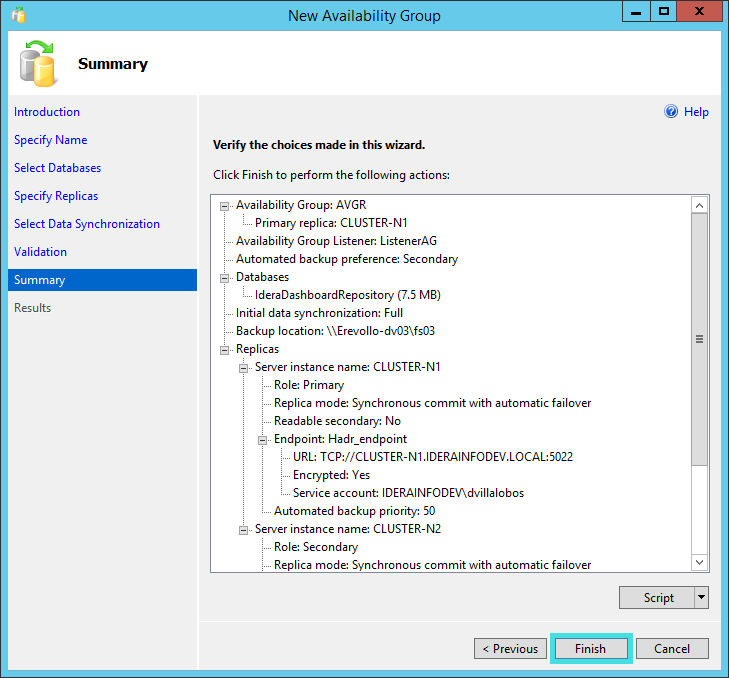
- After the backup is complete go to Always on High Availability, and under Availability Group select Add Database

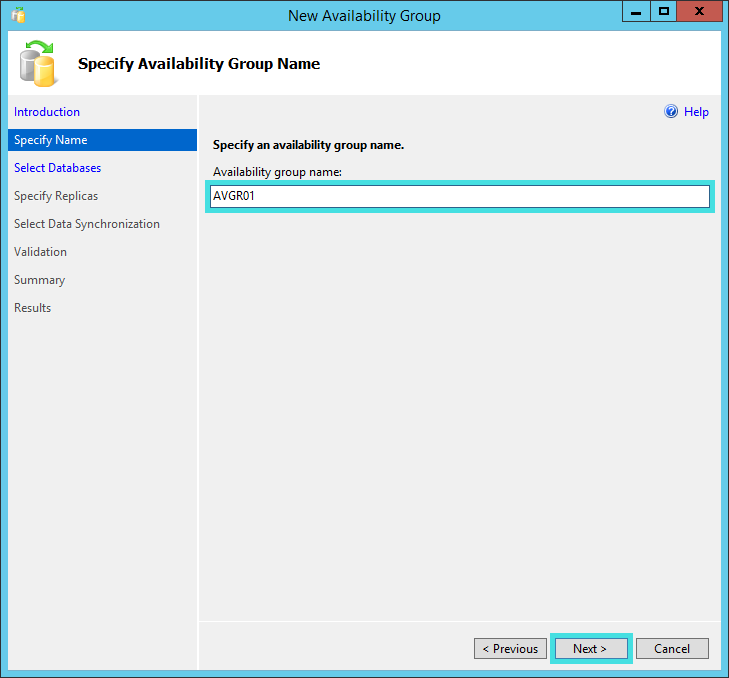
- Click Next on the wizard.
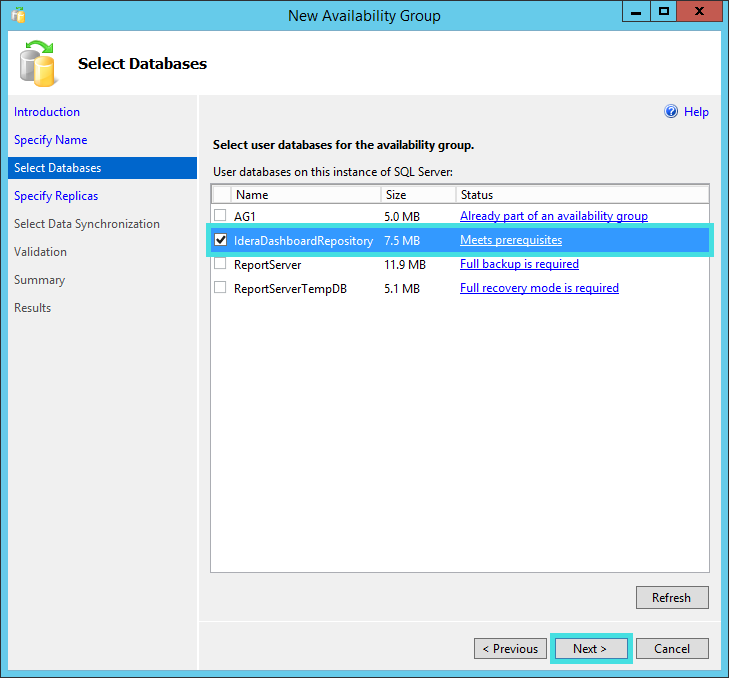
- Select the IDERA Dashboard Repository and Click Next.

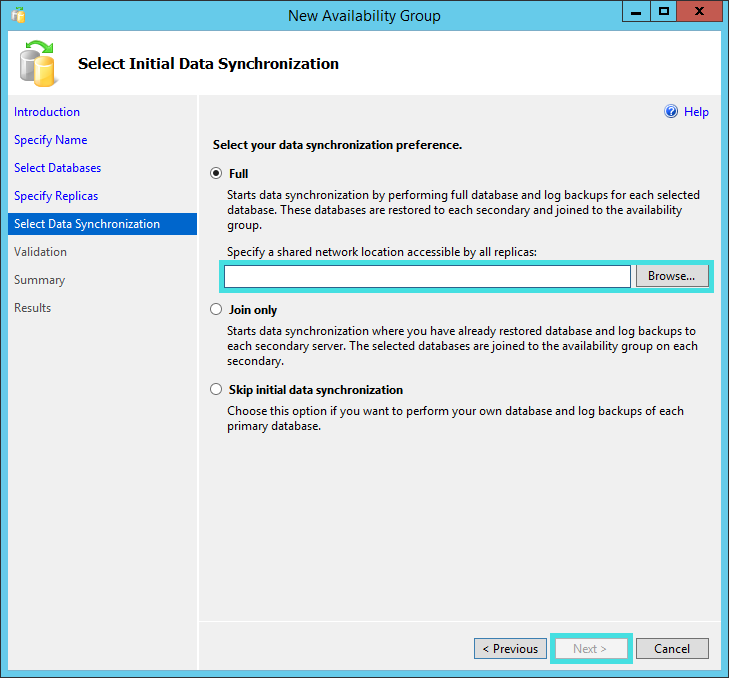
- Select Full data synchronization preference and click Next.
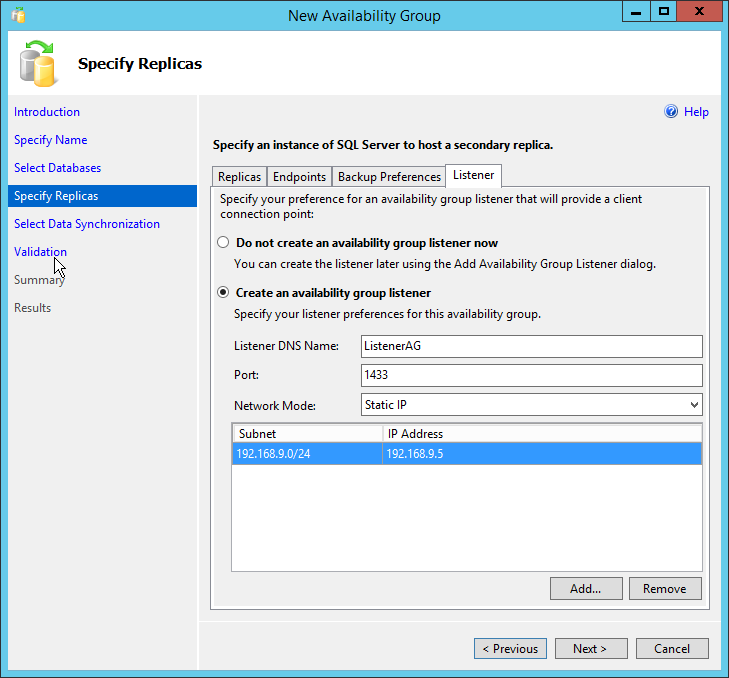
- Connect to all the secondary nodes and click Next.
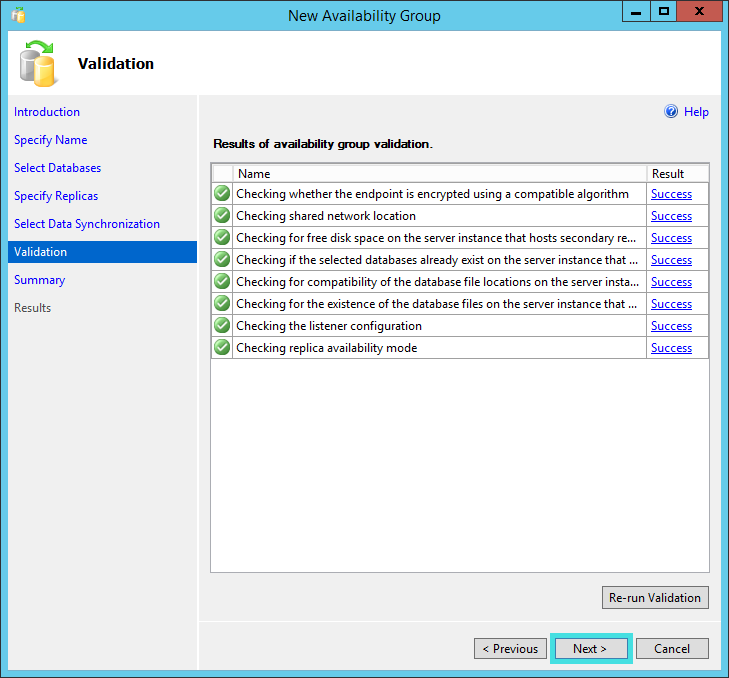
- Let the validation run and click Next.

- Click Finish
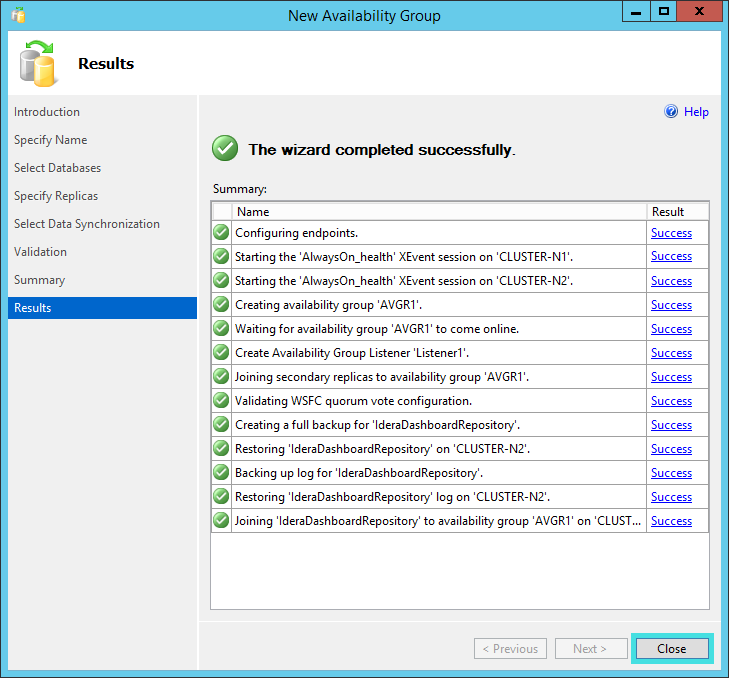
- When the wizard completes click close
- sdfkvnpoefv
- asdfvgas
- afvasv
- aFCWF