Page History
...
| Table of Contents | ||||
|---|---|---|---|---|
|
Welcome
The Welcome screen tab is the first to appear in the installation process and provides the End User License Agreement for you to review and accept.
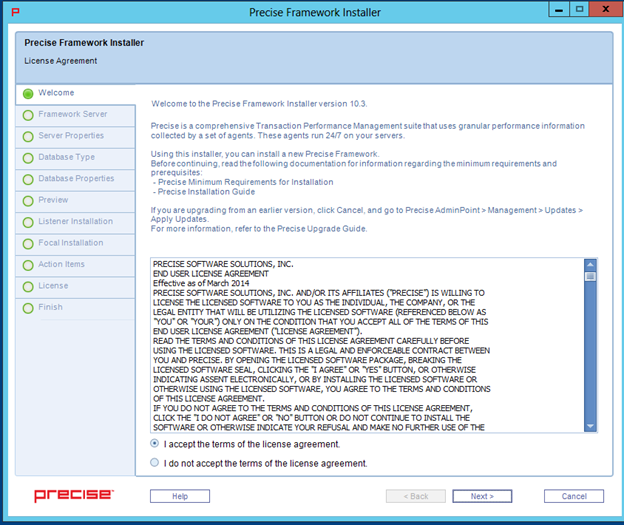
To complete the Welcome screen
...
Framework Server
The Framework Server screen tab allows you to select details about the server on which you want to install the Precise framework.
...
- In Server Name or IP Address, type the name or IP address of the server on which you want to install the Precise framework.
- In Server Type, use the drop-down list to select the operating system type for the server, whether Windows or UNIX.
- Click Next.
Server Properties
The content of the Server Properties screen tab varies based on the server type selected in the previous screen. This example uses a Microsoft Windows server installation.
...
For more information about manually installing the Precise framework on your server, see Adding a Windows server using manual mode.
Database Type
The Database Type tab allows you to select the PMDB for the Precise framework.
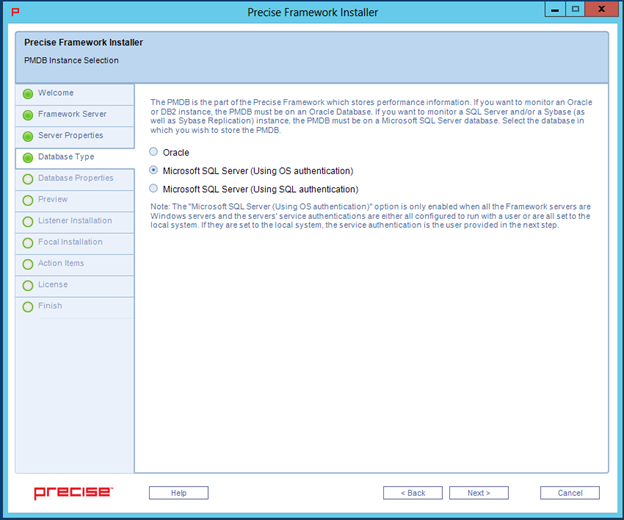
To select a PMDB instance
If you want to monitor an Oracle or Db2 instance, you must select Oracle. If you want to monitor a SQL Server and/or a Sybase instance, select one of the Microsoft SQL Server options.
Info The Microsoft SQL Server (Using OS authentication) option is enabled only when all the Framework servers are Windows servers, and the service authentications are either all configured to run with a user or are all set to the local system. If they are set to the local system, the service authentication is the user provided in the next step.
- Click Next.
To enter Microsoft SQL Server PMDB login information (using OS authentication)
- In the SQL Server instance field, click the drop-down menu, and then select the SQL Server instance from the list, or type in a different instance. The selected Microsoft SQL Server instance is used as the PMDB.
- Type the User Name. The user name is used both for the PMDB installation, as well as for connecting to the SQL server when using the PMDB.
- Type the Password for the user name specified.
- Type the Domain or Server Name.
- Type the name of the database you want the PMDB to use. If a database with that name already exists, it is used. If not, a new database is created. For a new database, complete the data path and log path fields.
- By default, the PMDB schema is automatically installed. To install the schema manually, see Manually installing the SQL Server PMDB schema.
- Click Next.
To enter Microsoft SQL Server PMDB login information (using SQL authentication)
- In the SQL Server instance field, click the drop-down menu, and then select the SQL Server instance from the list, or type in a different instance. The selected Microsoft SQL Server instance is used as the PMDB.
- Type the Login Name. The login name is used both for the PMDB installation, as well as for connecting to the SQL server when using the PMDB.
- Type the Password for the login name specified.
- Type the name of the database you want the PMDB to use. If a database with that name already exists, it is used. If not, a new database is created. For a new database, complete the data path and log path fields.
- By default, the PMDB schema is automatically installed. To install the schema manually, see Manually installing the SQL Server PMDB schema.
- Click Next.