Page History
...
- Click Add User / Group. SQL Inventory Manager displays the Add User/Group dialog, as shown in the following image.
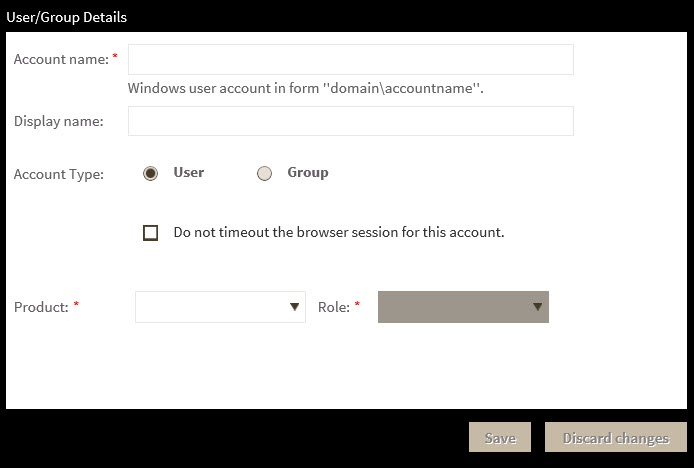
- Type the name of the user to which you want to grant access. Enter a Windows user name in the format <domain\accountname>.
- In the Account Details field, select User or Group.
- Optional. Check Do not timeout the browser session for this account if you want the user to be able to remain logged in to SQL Inventory Manager after a period of inactivity.
- Optional. Check Send welcome email to provide the new user with an email message containing information about the product and URL for the Idera Dashboard console.
- Type the email address where you want the system to send alert email messages to this new user account.
- In the Product field, select the product name to which you want to add this new user account.
If you select Idera Dashboard in the Product field, the Role field allows you to select from the Dashboard Administrator and Dashboard Guest roles.
If you select SQL Inventory Manager in the Product field, the Role field allows you to select from the Product Administrator, Product User, and Product Guest roles. - In the Role field, select the role you want to assign to this new user account.
- Click SAVE.
Editing a user in the Idera Dashboard
This option Clicking the Edit icon for an existing user account allows you to edit the account name, change the email address where user receive alerts, disable his/her enable or disable the user account, and add new permissions. To Use the following steps to edit a user or group follow these steps:
- In the list of users, click the Edit icon for the user account you want to edit, and . SQL Inventory Manager displays the Edit User/Group dialog displays: .
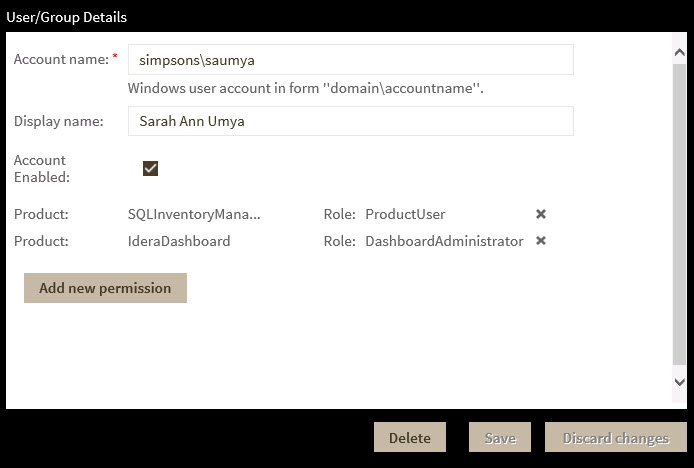
- Change the necessary setting.
- Click SAVE.
...