A view is a Workbench interface component typically used to navigate a hierarchy of information or list, open editors for jobs, or display properties or settings.
Views complement editors and provide alternative presentations or navigations of the information in the Workbench. For example, Data Source Explorer provides a list of all registered data sources in DB Change Manager, organized by group folder.
Views can be active or inactive, but only one view can be active at any one time. The title of an active view is highlighted and the view is the target for common commands such as cut, copy, and paste. Views can be stacked with other views to create tabbed notebooks.
All views have two ways to access command menus:
- Right-click the view tab
- Click the icon in the view toolbar
Here are some of the ways you can interact with views:
- To move a view. Click the tab of the view and drag your mouse. A frame indicates where the view will fit in the Workbench. Release the button to move the view to its new location.
- To toggle a floating view. Right-click the tab of the view and select Detached. The view switches to a floating window format that can be used to position it overtop of embedded views in the Workbench.
- To build a tabbed view. Drag a view over another view and release the mouse button when the frames meet. Both views overlap and create tabs within the same frame. You can combine multiple views in this way.
Job explorer
Job Explorer provides an interface for managing existing jobs in DB Change Manager.
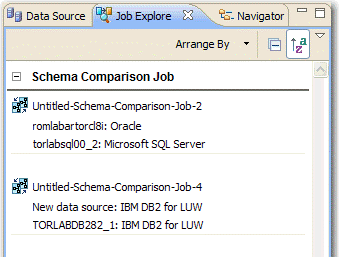
Use Job Explorer when searching for jobs of a specific type or name. You can list jobs according to a wide variety of categories.
To view jobs in Job Explorer
- Navigate to Job Explorer, and then click Arrange By to view a list of categories.
- Select a category. Job Explorer displays all jobs based on your new selection.
To open a job in its editor
- In Job Explorer, double-click a job.
Viewing change history
Each time a job runs, its history is recorded and listed in the Job Explorer. You can see the history of a specific job in the job editor History tab.
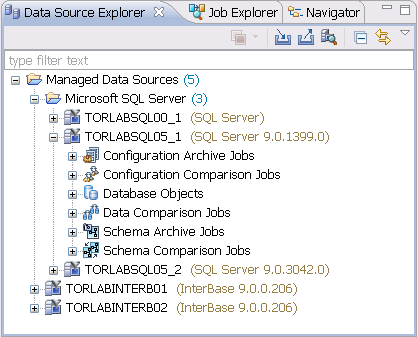
Data Source Explorer
Data Source Explorer lists registered data sources and the comparison jobs and archives associated with them.
When you register a new data source, you specify its connection information. Once registered, it remains stored in a catalog and does not need to be re-registered. It can be archived and used in multiple jobs.
You can organize data sources based on working sets. A working set is a user-defined collection of data sources.
To create a working set
- Click the menu icon in the Data Source Explorer toolbar.
- Click Select Working Set.
- In the Select Working Set dialog, click New to define a new set.
When you select a working set, Data Source Explorer only shows those data sources you specified for the set. To change back to the default view, click the menu icon, and then choose Deselect Working Set.
To add a data source
- Right-click on the Managed Data Sources node in Data Source Explorer, and then select New > Data Source. The Add Data Source dialog appears.
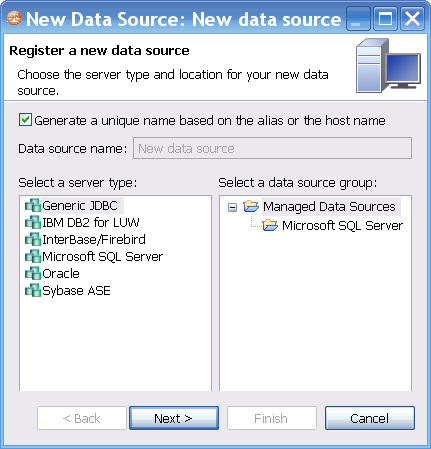
- Follow the steps in the Data Source Wizard by selecting the data source platform and entering the appropriate connectivity parameters in the fields provided.
- Click Finish when you are finished. The new data source appears in Data Source Explorer.
To create Data Source Group folders and organize Data Source Explorer objects
- Right-click the Managed Data Sources node in Data Source Explorer, and then select New > Data Source Group. The Create Data Source Group dialog appears.

- Enter a meaningful name for the new group in the Name field, and then choose a parent folder, if any.
- Click Finish. The Data Source Group folder is added to Data Source Explorer. You can drag and drop data sources in the folder or add new data sources to the folder.
Data Source Properties
After you import a data source, you can view and change its properties.
Basic Data Source Configuration
The name and connection properties you specified when you set up the data source are available in the Configuration pane.
To change data source properties
- In the Data Source Explorer, right-click on the data source, and then select Properties. The properties pane displays the Data Source Configuration tab.
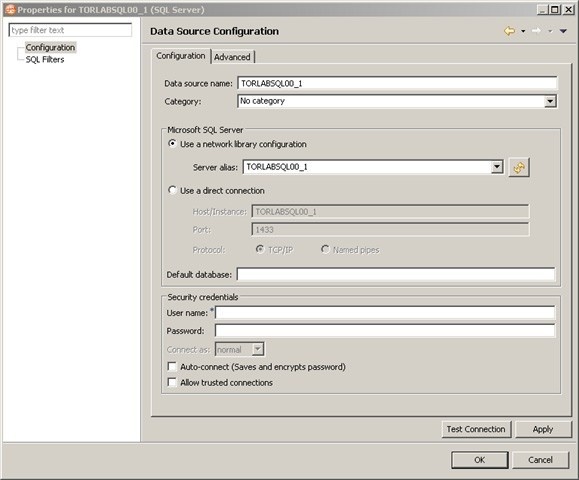
- In the Data Source Configuration pane, you can review and update important details about:
- The name
- The type of database and its network connections
- The default database
- The user name and password for the connection, and whether it is encrypted and trusted
- Click Apply to save the configuration.
- Click Test Connection to validate the configuration.
Lifecycle Categories for Organizing Data Sources
You can categorize data sources into the phases of the database lifecycle: Development, Test, QA, and Production. Use the Category dropdown menu to assign a category to a data source. The color coding of the category, if set, is displayed in the Data Source Explorer so you can easily differentiate the usage of multiple databases.

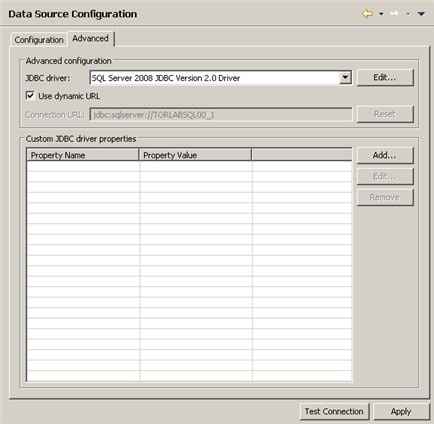
Drivers for Data Source Connections
The Advanced tab of the Data Source Configuration properties lets you specify the JDBC or other driver properties.
Project Explorer
Project Explorer provides a list that organizes jobs, standards, and synchronization scripts into project folders.
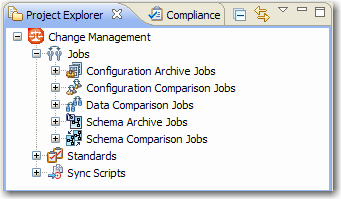
The list is organized by Jobs, Standards, and Sync Scripts. Double-click on the objects to open them in their editors.
A group of administrators can share a set of project files by connecting it to a source code control system and using the Navigator.
You can use the File > New > Project command to create project folders to organize and manage your jobs. When you create a new project, a folder is added to the Project Explorer with the name that you specified. You can add or delete files under this folder by dragging and dropping them from the Change Management branch.
To create a new project
- Select File > New > Project. The New Project wizard appears.
- Expand the General Node, and then select Project.
- Click Next.
- Type a project name into the field provided. The Location field indicates where the project files are stored on your machine. By default, all project data is stored in the location where you installed DB Change Manager. If you want to change this location, deselect the Use Default Location check box and define a new directory location.
- Click Finish. The new project folder appears in Project Explorer.
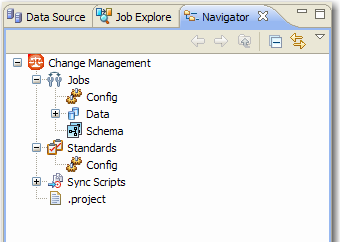
Navigator view
The Navigator view lists all files in each of your projects. You use the Navigator to share files with a source control system for jobs, results, standards, and scripts.
Whenever a job, standard, or synchronization script is generated by the system, its output is saved to a file that is stored in a directory and displayed in the Navigator. These files can then be shared in a team environment using a source control system.
All jobs, synchronization scripts, and archive versions are stored in XML format, so that objects can be merged and differentiated between multiple versions of the same object.
Before you can use source code control, you need to install an Eclipse third-party plug- in and the appropriate client tools.
Compliance Explorer
The Compliance Explorer provides you a quick way to see comparison jobs that may have failed compliance checks.

The Compliance Explorer lists comparison jobs that have been run and specifies:
- The day the job was last run
- The day the job last failed, if applicable
By default, jobs are not listed in the Compliance Explorer. To list a job here, select Track Results in Compliance Editor check box on the Overview tab of the specific job.
SQL Errors view
When comparison jobs run, you can optionally generate a SQL script that can synchronization the data repositories of the data sources. A synchronization script can be saved and retrieved at any time, and executed within the application.
The SQL Errors view logs any errors that may occur when executing SQL scripts.
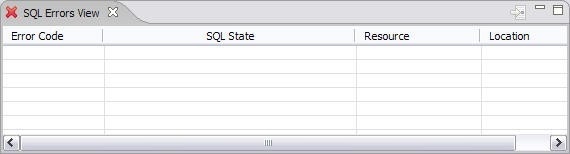
SQL Errors are listed by SQL Error Code, SQL State, Resource, and Location.
Data Diff view
The Data Diff view displays the values of a mismatched row pairs when viewing the results of a data comparison job. The view contains row synchronization icons and the specific data values of a selected pair.
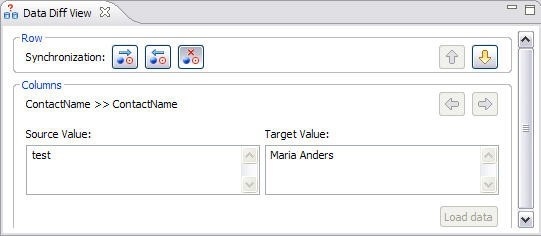
You can specify how data is resolved in the Data Diff view by selecting one of the appropriate icons beside the Synchronization prompt. By row, you can choose to Make Target Match Source for Selected Row, Make Source Match Target for Selected Row, or Do Not Resolve Selected Row, respectively.
You can add the Data Diff View to the Workbench by selecting Window > Show View > Data Diff View.
This view lets you specify changes without resolving the repositories of both data sources with synchronization scripts.
Extract DDL Scripts
To extract the DDL of the archive contents to a file
- Open the Version tab of the archive.
- In the Archive Contents list, right-click the object, and then select Extract DLL Scripts.
The Extract DLL Scripts window opens.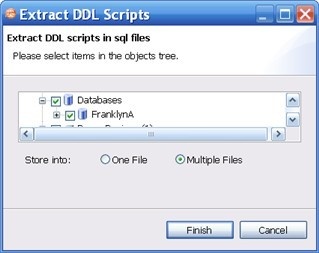
- Select the object for which you want to save scripts.
- Select One File to save the DDL for all selected objects to one file, or select Multiple Files to save the DDL for all selected objects into single files for each object.
SQL Log
The SQL Log captures all SQL commands executed by SQL Editor and the system. SQL Log entries are listed by SQL Statement name, Date issued, Host/Server, Service, User, Source, and the Time (in milliseconds) it took to execute the command.
SQL Errors Log
The SQL Errors log automatically logs all SQL errors encountered when SQL commands are executed through DB Change Manager. Errors are listed by Error Code, SQL State, error Details, Resource, and the Location of the error in the SQL file.
Search view
The Search view displays result values when you issue the Search command from the Main Menu.
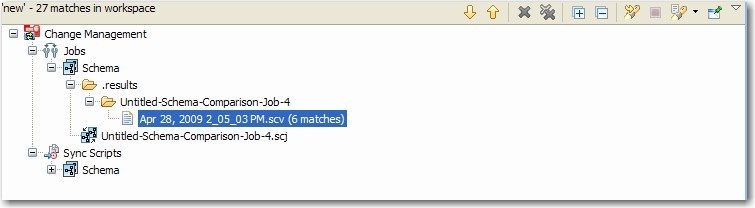
The returned results are organized by the job type where the file resides, or by synchronization script, depending on the scope you specified. Navigate to the file that you want to open and double-click it. The file opens in a separate editor window.
In addition, the Search view toolbar provides shortcuts to preferences, a filter option when viewing results, and history commands to return or review old search results.
For more information about searching for files, see Searching for Database Objects and Synchronization Scripts.
Searching for database objects and synchronization scripts
The Search function provides a means of searching for database objects you have registered, and synchronization scripts generated by DB Change Manager.
To open the Search dialog
- Click the Search icon in the Toolbar, or select Search > Search from the Main Menu.
The Search dialog contains two tabs:
- Database Search
- File Search
To search for databases
- Navigate to the Database Search tab.
- Use the parameter fields provided to search and locate a database:
- In the box on the left-hand side of the window, use the check boxes to select the Data Source Groups you want to search in.
- In the Search String field, type a value to search. Use the * character to indicate wildcard string values, and the ? character to indicate wildcard character values. The \ character indicates an escape character for literals. (* ? and /).
- Select Case Sensitive to take case into account when searching for string matches.
- Select Search Indexed Data to include any information that is retained by DB Change Manager’s indexing function.
- Select Apply SQL Filters to apply any filters you may have associated with the registered data sources in the system.
- Specify whether the search is limited to Declarations, References, or All Occurrences in the Limit Search to section.
- In the box in the lower right-hand corner of the screen, select and de-select the object types you want to include in the search. Only selected objects that match your search criteria are returned.
- Click Search.
DB Change Manager returns a list of all possible script selections based on the variables you entered.
To search for synchronization scripts
- Navigate to the File Search tab.
- Use the parameter fields provided to search and locate a synchronization script:
- Type a value to search in the Containing Text field. Use the * character to indicate wildcard string values, the ? character to indicate wildcard character values, and the \ character to indicate an escape character for literals. (* ? and /).
- Select Case Sensitive to take case into account when searching for string matches.
- Select Regular Expression to identify the string as a regular function in terms of search criteria.
- In the File Name Pattern field, specify the extension name of the files to search for explicitly. If the value in this field is a * character, the search function searches all files regardless of extension. Manually type the extensions to indicate the file type (separate multiple file types with commas), or click Choose and use the Select Types dialog to select the file extensions the process will use to search for the string. For example, selecting *.caj searches for configuration archive job files, exclusively.
- Select Consider Derived Resources to include derived resources in the search.
- Click Search.
DB Change Manager returns a list of all possible script selections based on the variables you entered.