This section guides you through the installation of IDERA SQL Inventory Manager using a remote Dashboard. You can install IDERA SQL Inventory Manager on any computer that meets or exceeds the product requirements.
Before you install IDERA SQL Inventory Manager, be sure to have:
- The path to a remote IDERA Dashboard installation. IDERA SQL Inventory Manager integrates with the IDERA Dashboard.
- A local administrator account on the machine you are installing the product.
- A host machine for SQL Inventory Manager services.
- A host SQL Server for the product databases.
- A service account with permissions to read/write and create databases and update their schemas.
A remote installation registers SQL Inventory Manager with a remote IDERA Dashboard, IDERA SQL Inventory Manager is installed in the local computer.
You can also grant IDERA SQL Inventory Manager Product Administrator permissions in the IDERA Dashboard. For more information, see Managing users in the IDERA Dashboard.
Installing IDERA SQL Inventory Manager
Before you install IDERA SQL Inventory Manager, be sure to meet the requirements mentioned before. Open the installer and follow these steps:
- Open the IDERA SQL Inventory Manager setup, click Proceed.
- Read the License Agreement. If you agree select I accept the Terms and Conditions and click Next to continue.
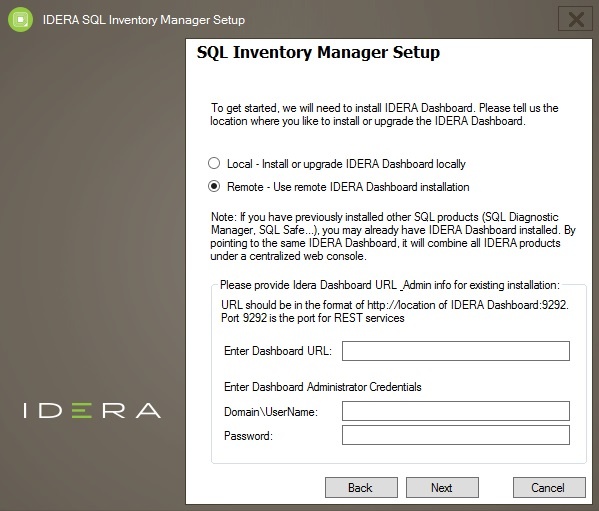
- Select Remote and provide a Dashboard URL using the format http://<location of IDERA Dashboard>:9292. PORT 9292 is the port for REST services.
- Enter administrator credentials for accessing the remote IDERA Dashboard installation.
- Click Next.
- a

