In order to manage an instance, access its details, and add it to your monitored environment, you need to register it with IDERA SQL Inventory Manager. This section helps you register one or more instances with IDERA SQL Inventory Manager.
You can find the Add SQL Server Instance option on the following views:
- Overview. Located in the top-right section of the Instances table.
- Instances. Located in the action items bar in each of the Managed, SQL Licensing, Decommissioned, Discovered, Ignored, and Ignored tabs.
- Administration. Located in the Instances section.
Below you can see the tabs and sections where you can find Add SQL Server instances. Click the image to view full size.
| There are no images attached to this page. |
The Add Instance Wizard contains the following four sections:
1. Instance
To add an instance
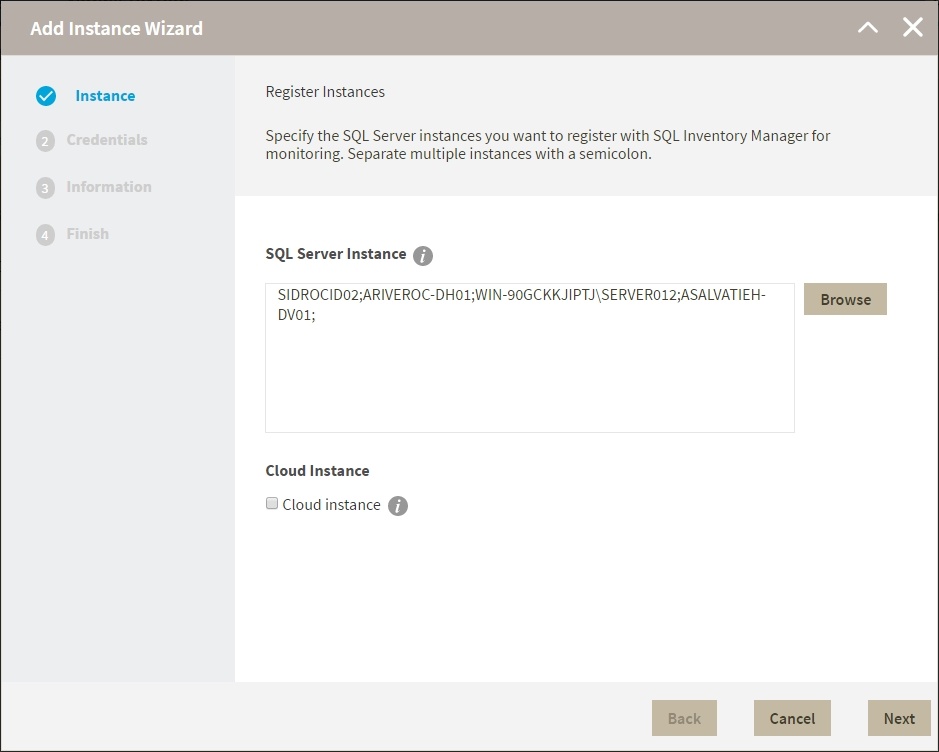
Type the name of instance or instances you want to register in the SQL Server Instance box. Use a semicolon to separate multiple instances. Check Cloud Instance if you want to search for Cloud-based instances.
When you select instances on the Discovered or Ignored Instances views, the wizard already adds them to this box.
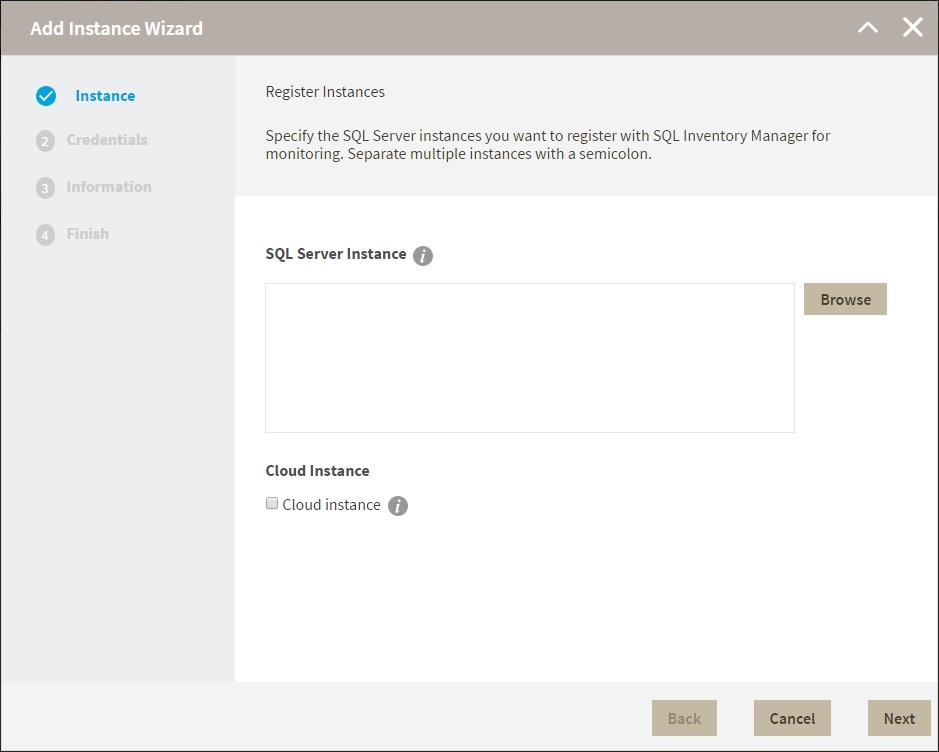
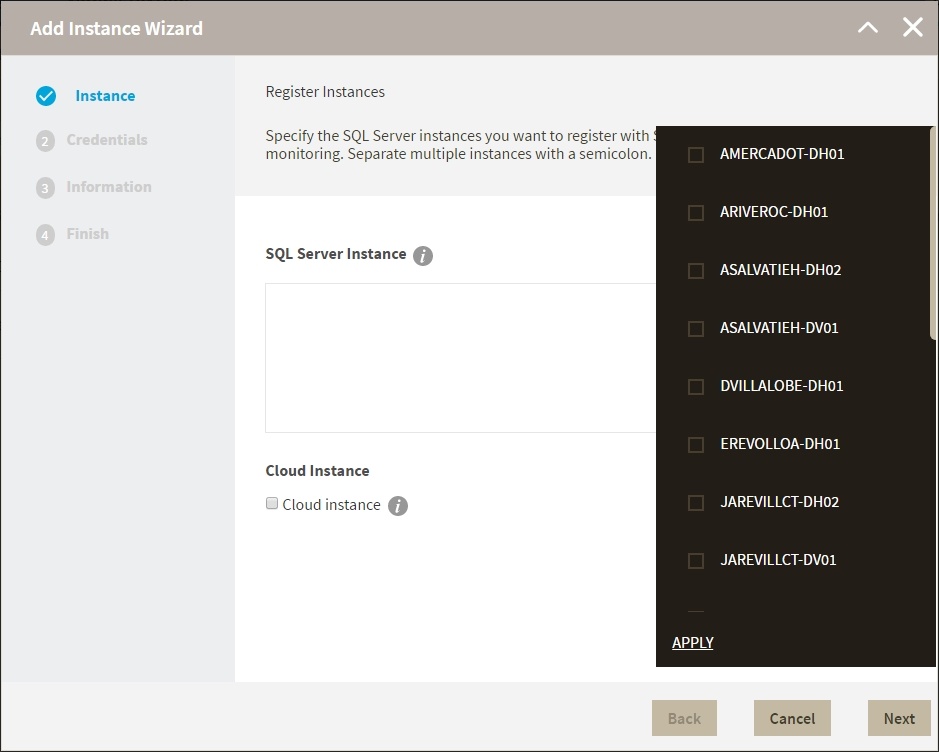
Use the Browse button to access a list of discovered instances that are not yet registered with SQL Inventory Manager. Check the box next to the instances you want to add, and then click Apply.
- Click Next to go to the next section.
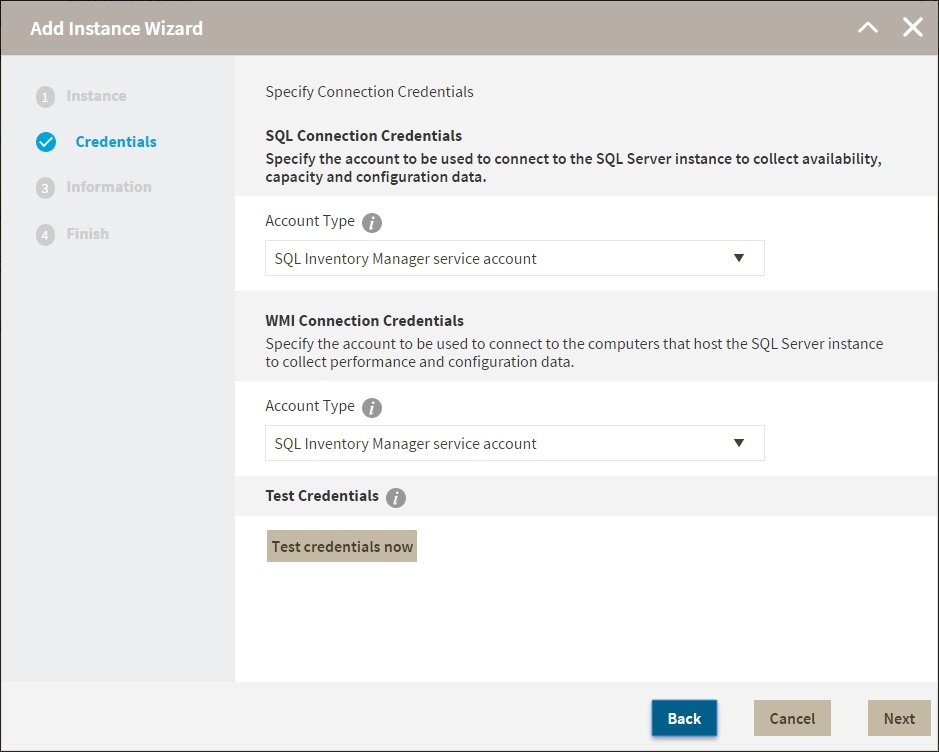
2. Credentials
SQL Inventory Manager connects to registered SQL Server instances and their host computers to collect information. The collection service requires permissions to connect and gather information using the following types of connections:
- SQL connection credentials to perform queries against registered instances
- WMI connection credentials to gather data from the host computers
Tip
For more information about the minimum required permissions for these accounts, see Required accounts and permissions.
Authorize WMI users and set permissions
If you want to know how to authorize WMI users and set permissions, see the Microsoft TechNet article, Authorize WMI users and set permissions.
By default, SQL Inventory Manager connects using the SQL Inventory Manager Service Account. However, if you need to provide alternative credentials for any of these two connections, you can choose from the respective options on each section.
SQL Connection Credentials
- Specify the type of account that you want to use to access your SQL Server instance and collect information. If you do not want to use the SQL Inventory Manager service account, select a Windows user account or SQL Server login account from the Account Type list.
- If you select a Windows user account or SQL Server login account , type the associated user name and password. SQL Inventory Manager uses this account for SQL queries to gather availability and configuration data.
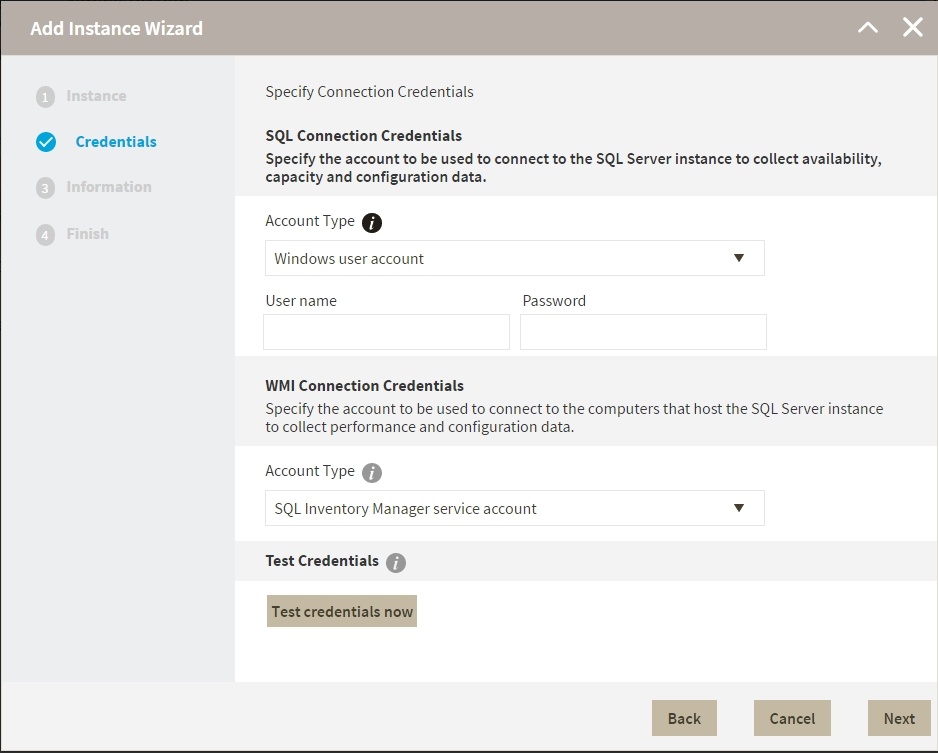
- You can test the correctness of your credentials by clicking Test Credentials.
WMI Connection Credentials
- On this section, you can choose to use the SQL Inventory Manager service account or a Windows user account by selecting either from the Account Type list.
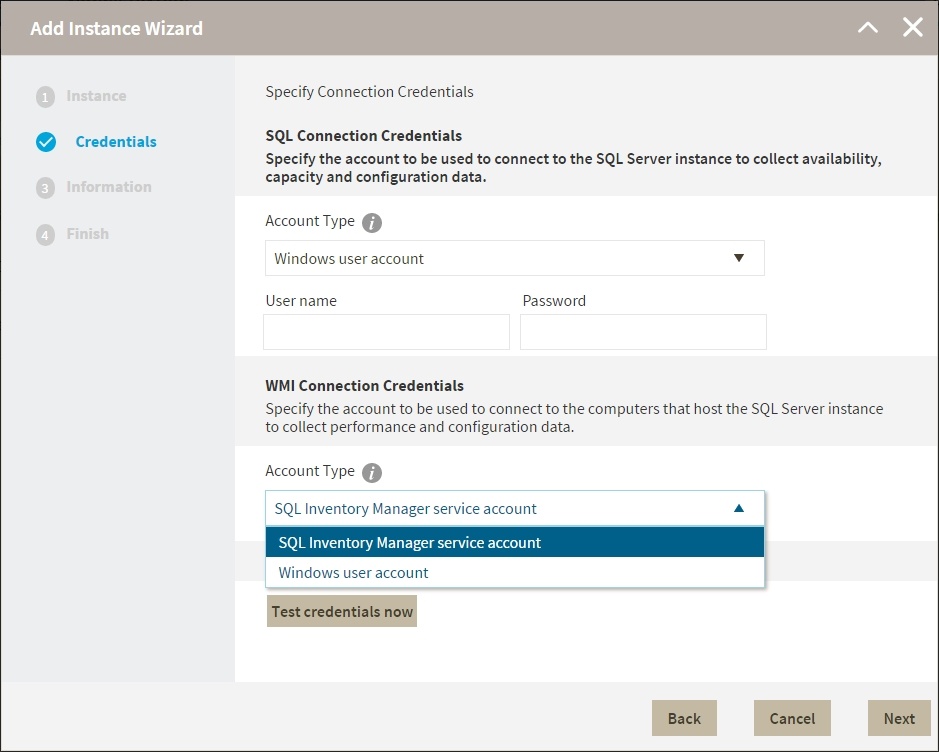
If you choose to use a Windows user account, type the respective user name and password. This account allows you to access Windows configuration data of the computer that hosts the registered instance.
IDERA recommends that you use the Test Credentials option to verify that SQL Inventory Manager can successfully monitor the newly registered instances.
3. Information
On this section you can specify additional information for your instances like Owner, Location, Comments, and Tags.
Although none of these fields are required, Owner, Location, Comments, and Tags provide a powerful method for grouping instances and databases to help you organize your resources. Use these options to view information such as database counts, size, or activity, grouped by these fields.
Use the Owner and Location drop-down lists to access the available options.
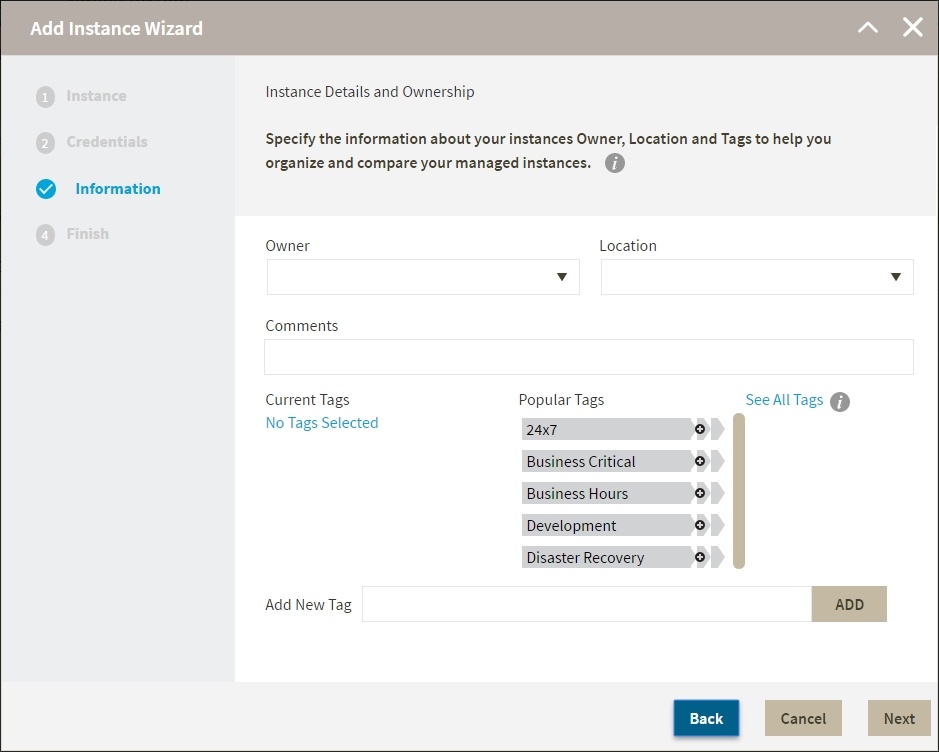
To add tags to an instance, you can do one of the following:
- Click any of the suggested Popular Tags on the right side of the window. The tag appears now on Current Tags on the left.
- You can click See All Tags on the top right section to display all available tags.
If you want to Add a New Tag, type the name in the bottom box, and then click ADD. The new tag is added to the Current Tags list.
- The tag name must begin with an upper or lowercase alphanumerical character.
- Your tag name must have a maximum length of 20 characters.
- Only the following special characters are valid for tags: ! # @ ( ) ' . : - _ and embedded spaces.
Refer to the Managing tags section for more guidance on how to add, view, edit, or delete tags.
4. Finish
On this section, you can review your Instance Registration Details such as: instance name, SQL Connection Credentials, WMI Connection Credentials, Owner, Location, Comments, and Tags.
To change any of these registration details you can do one of the following:
- You can click any of the title sections (INSTANCE, CREDENTIALS or INFORMATION) and go directly to the place where you need to make the changes.
- You can click PREV to go back to the previous sections until you find the place where you need to make changes.
After you review your registration details click FINISH. SQL Inventory Manager begins to collect instances information after a few minutes of their registration and will continuously collect availability, performance, and configuration information from them and their host computers.
Tip
After registration, you can still change credentials, tags, and information settings on the Edit Properties option. Refer to Editing instance properties for more information.
About collection intervals
Collection intervals are predefined. You can see more information about collection frequency on the What Health Checks are available in SQL Inventory Manager? section.
You can also force data collection for an instance by selecting Refresh Data on the Instance details view. For more information, refer to Viewing instance details.
SQL Inventory Manager lets you discover and visualize your SQL Server environment. Learn more > >