Starting with SQL Inventory Manager 2.6 you can now use advanced filtering and sorting options on all the instances views.
Sorting
The different instances views in SQL Inventory Manager allow sorting data by one column data. To sort the listed instances, expand the drop down menu next to the column name you want to use as sorting criteria and select either Sort Ascending or Sort Descending.
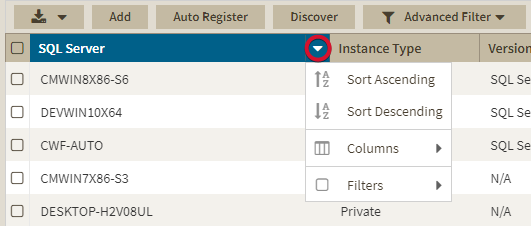
Alternatively click a column name to sort either in ascending or descending order.
Filtering
Quick Filtering
You can find the quick filtering options on the left side of the Instances view. These options will help you get a quick view of your required instances; for example, if you want to see your managed instances filtered by a specific Owner, just choose the respective option from the Owner filter.
Creating a useful filter to "weed out" unnecessary information takes time but is important when managing large environments. As a result, you may want to save that filter for future use. SQL Inventory Manager now allows you to save filters for use in the Explorer and Instances views. Simply create the filter, and then click Save favorite, depending on which view you are in when creating the filter. To use that filter, click Load favorite.
You can enable or disable the option Apply filter as it changes depending if you want to see the changes as you apply the filter, or if you prefer to select your filters first and see the results when you finish.
Advanced Filtering
The Advanced Filter option on the actions bar allows you to create, save, and apply advanced filters. The advanced filtering options use both the criteria on the quick filters and all the available data column to create custom filters.
To create an advanced filter click Advanced Filter and select Create Filter.
Use the following fields to create your custom filters. Custom filters on IDERA SQL Inventory Manager have the following structure:
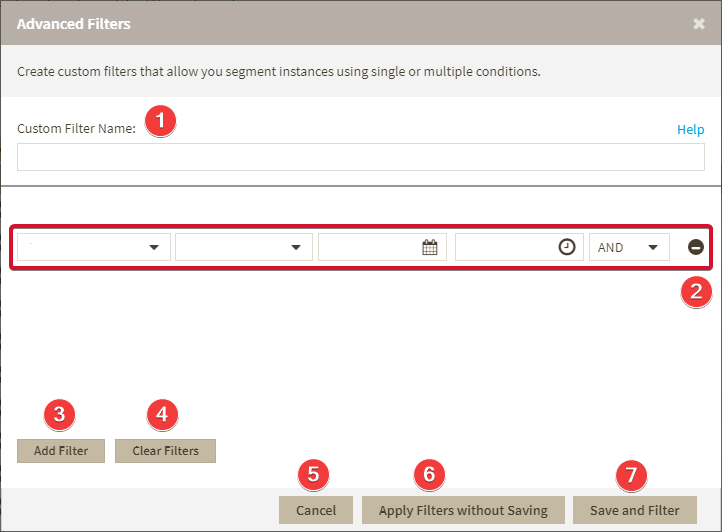
- Custom Filter Name - Enter a name for your custom filter.
- Filters Field - Allow you to setup filtering criteria.
- Add Filter - Allow you to add an additional filter.
- Clear Filters - Clears the value of filter creation fields.
- Cancel - Cancels the creation of the filter.
- Apply Filters without Saving - Applies the current advanced filter without saving it.
- Save and Filter - Saves and applies the filter.
Creating an Advanced Filter
To create an advanced filter follow these instructions: