Snowflake enables OAuth for clients through integrations. An integration is a Snowflake object that provides an interface between Snowflake and third-party services. Administrators configure OAuth using a Security integration, which enables clients that support OAuth to redirect users to an authorization page and generate access tokens (and optionally, refresh tokens) for accessing Snowflake.
Snowflake supports the OAuth 2.0 protocol for authentication and authorization using one of the options below:
- Snowflake OAuth:
Partner applications
Custom client integration
Managing user consent
Single-use tokens
- External OAuth:
Microsoft Entra ID integration
Okta integration
PingFederate integration
Power BI integration
Custom authorization server
Partner applications
Refer Snowflake documentation for more details https://docs.snowflake.com/en/user-guide/oauth-intro
Here we outline the configuration of Snowflake as an OAuth resource with okta serving as the external OAuth authorization server.
Note
okta must be configured in your environment as a prerequisite to Snowflake integration.
Once done, please follow the steps below to integrate with Snowflake.
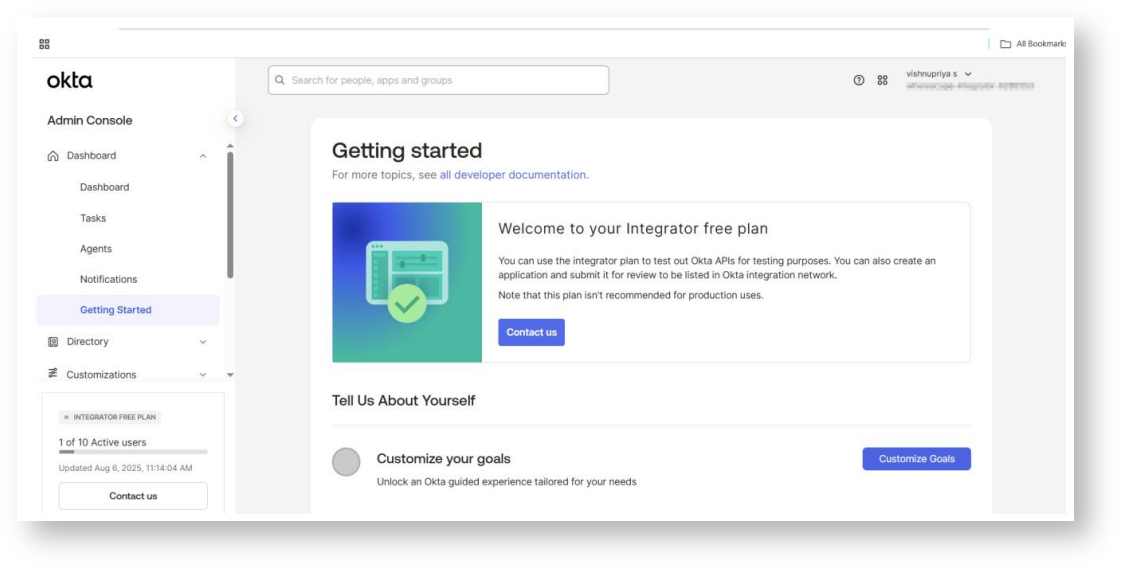
Login to okta console
Create an OAuth compatible client to use with Snowflake
- Navigate to the Okta Admin Console.
- Click Applications.
- Click Create App Integration

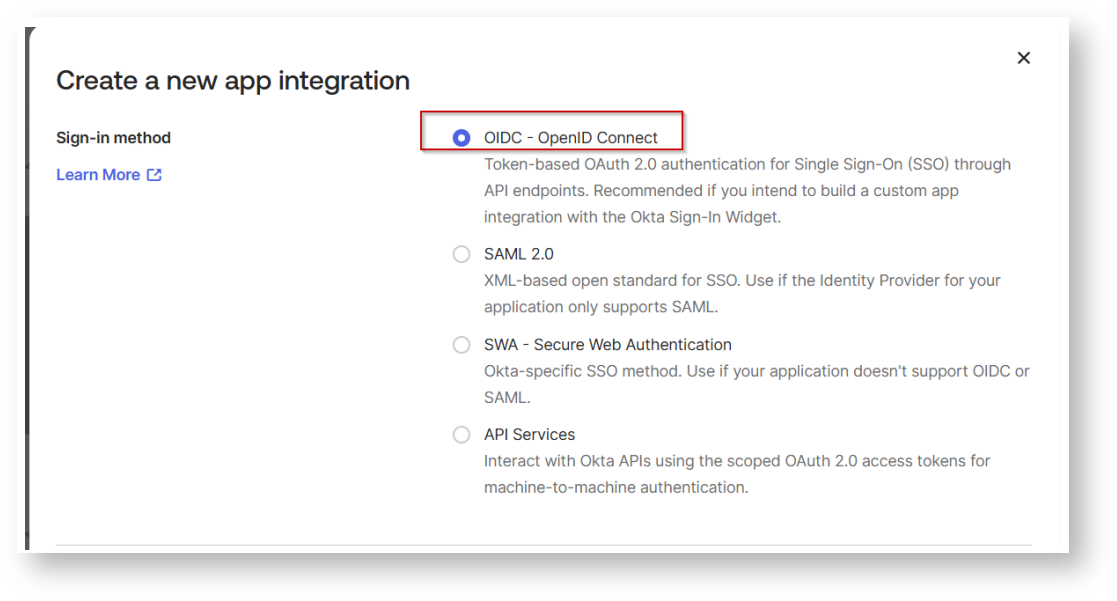
- For Platform, select Native Application

You can also edit the name of the application

- From New Applications in the General interface, click Edit.
- Check Refresh Token and Resource Owner Password.
- Click Save.

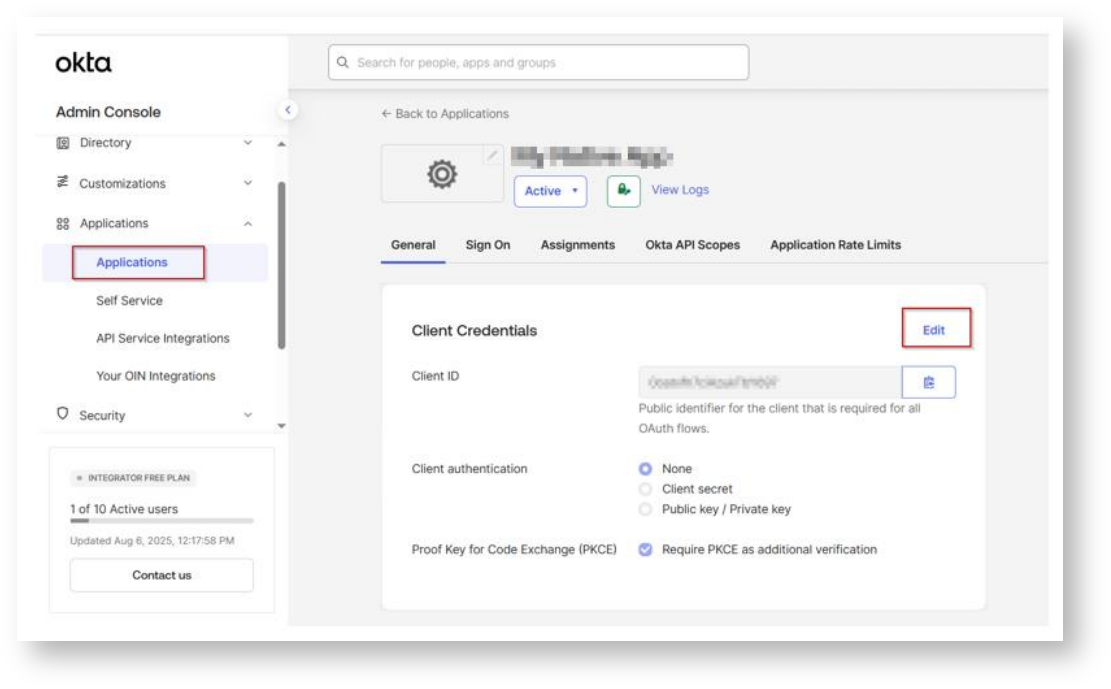
- Click the Edit button next to Client Credentials
- Select the Use Client Authentication option.
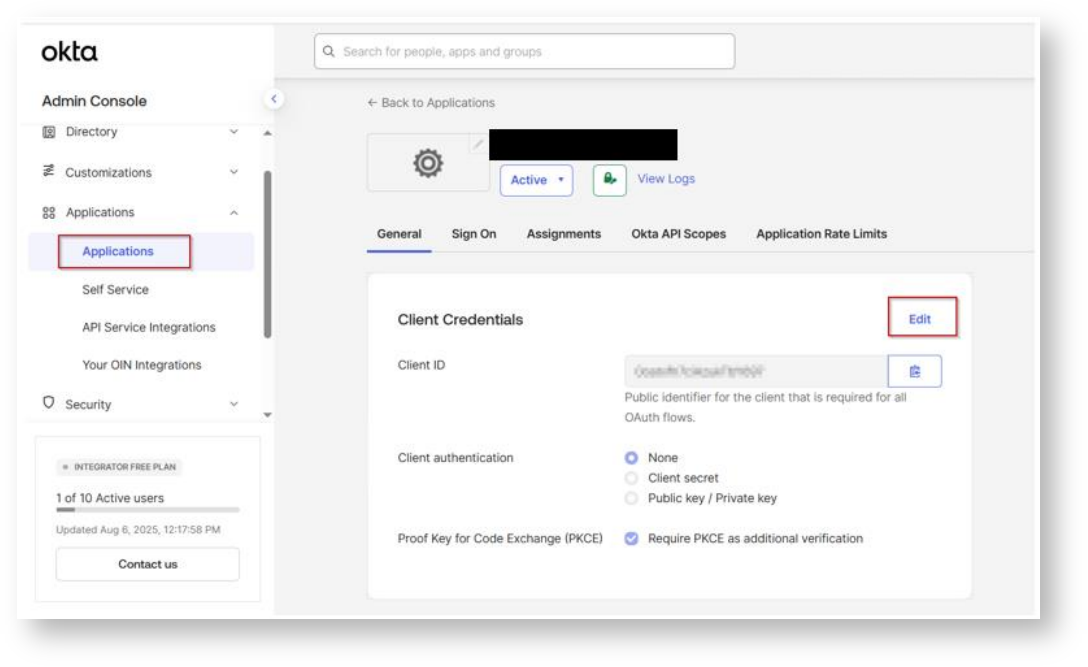
- Click Save.
In the Client Credentials container, save the ClientID and Secret. These two values will be known as the <OAUTH_CLIENT_ID> and <OAUTH_CLIENT_SECRET>, respectively in the following
steps.


Create an OAuth authorization server
- Navigate to the Okta Admin Console.
- In the Security menu, click API.
- Click Authorization Servers.
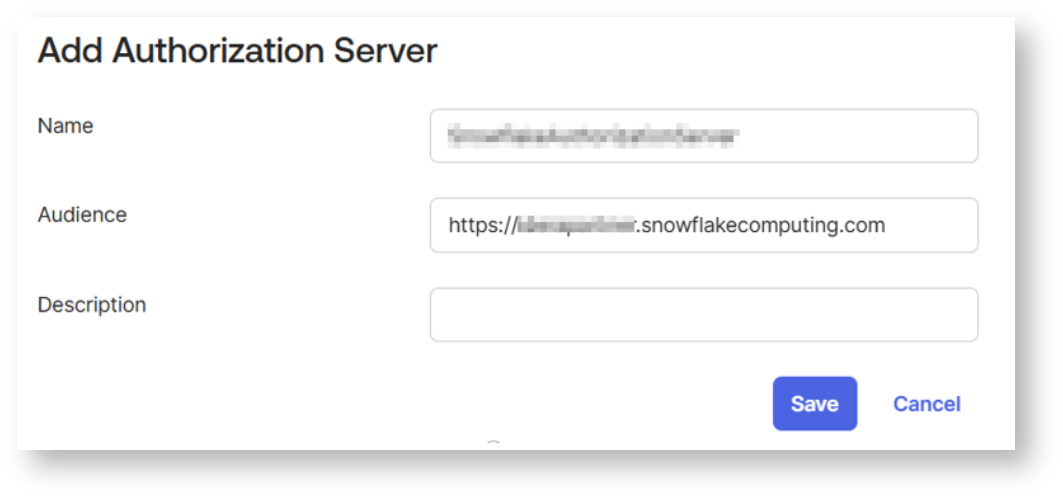
- Click Add Authorization Server.

- Enter a name.
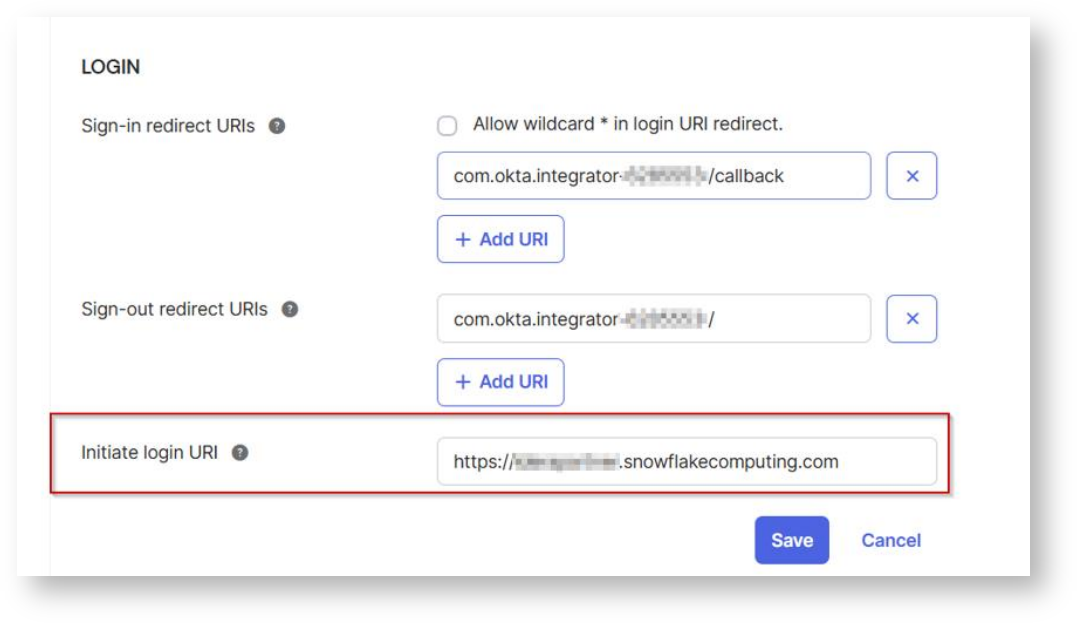
- Enter the Snowflake account URL as the Audience value.
- Click Save

Complete the following steps for the newly added Authorization Server.
- Copy the Issuer value


- Click on Scopes.
- Click on Add Scope.

- To add a Snowflake Role as a scope, enter the scope by having the name of the of Snowflake role with the session:role: prefix (e.g.: for the Snowflake Analyst role, enter session:role:analyst).
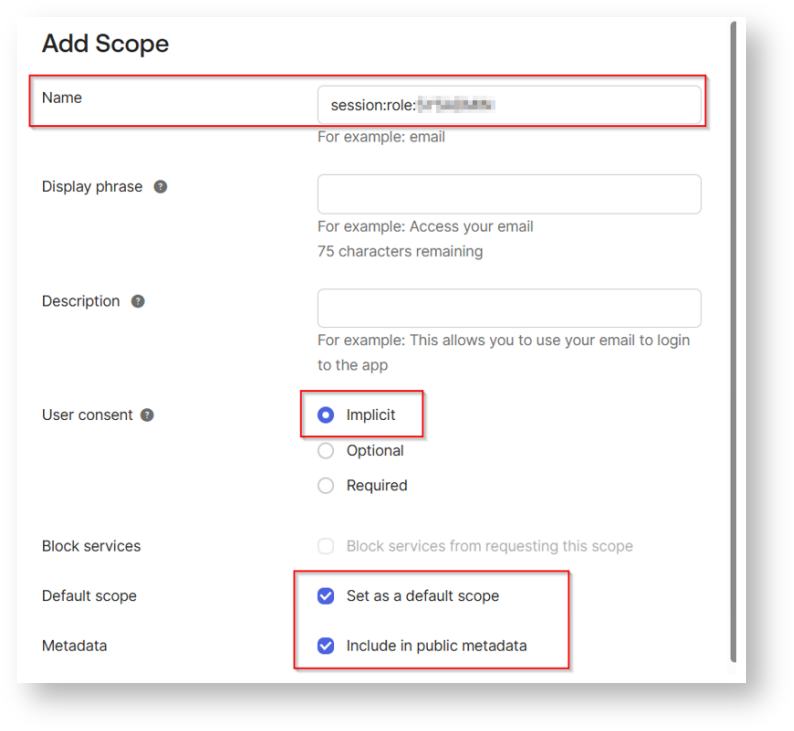
- Click on Create.
- Click on Access Policies.
- Click Add Policy.

- Enter a name and a description for the policy. Assign it to the client created earlier and click Create Policy.

You can also update the policy by selecting your own client.
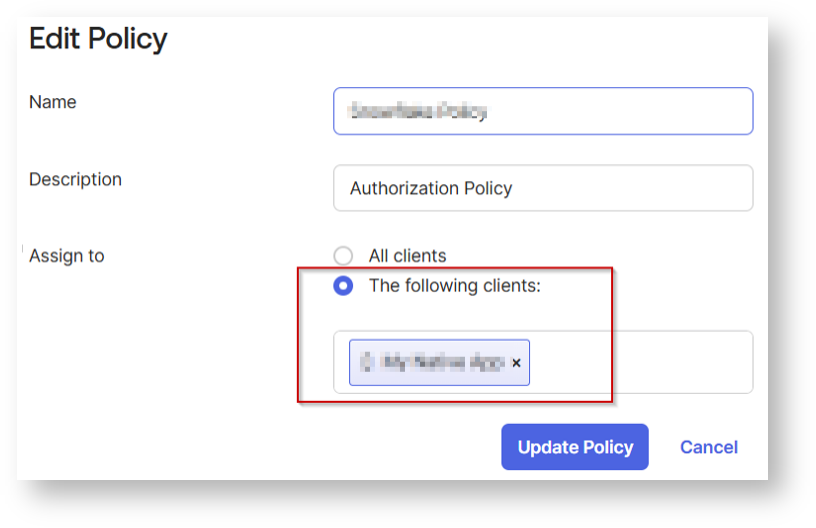
- In the newly added Access Policy, click Add Rule.
- Enter a rule name.
- Select the authorized Grant Types. You should select Resource Owner Password and Client Credentials along with any others that match your organization’s policies.


For scopes, you can select any of the scopes or select the desired scopes created earlier that clients assigned to this policy will be able to request (including offline_access for refresh tokens if needed). Configure any additional settings as needed.

Click Create Rule.
To Verify:
Collect Okta information
- Go to the Okta Admin Console.
- In the Security menu, click API.
- Click Authorization Servers.
- Click on the Authorization Server for the Snowflake Resource.
- In the Settings tab, copy the Issuer value. This value will be known as the <OKTA_ISSUER> in the following steps. Its format should resemble https://dev-111111.oktapreview.com/oauth2/auslh9j9vf9ej7NfT0h7.
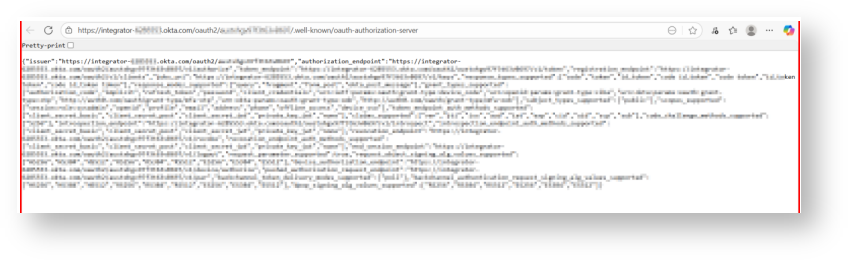
In the Metadata document:
- Copy the Metadata URI value, open a browser tab, and paste the URL in the address bar.
- You should see JSON text in the browser. You can work with this text in a text editor or in the browser itself.
- Locate the "jwks_uri" parameter and copy its value. Its format should resemble https://dev-111111.oktapreview.com/oauth2/auslh9j9vf9ej7NfT0h7/v1/keys. This endpoint will be known as the <OKTA_JWS_KEY_ENDPOINT> in the following steps.
- Locate the "token_endpoint" parameter and copy its value. Its format should resemble https://dev-111111.oktapreview.com/oauth2/auslh9j9vf9ej7NfT0h7/v1/token. This endpoint will be known as the <OKTA_OAUTH_TOKEN_ENDPOINT> in the following steps
Create a Security Integration for Okta
This step creates a security integration in Snowflake. The security integration ensures that Snowflake can communicate with Okta securely, validates the tokens from Okta, and provides the appropriate Snowflake data access to users based on the user role associated with the OAuth token.
The external_oauth_audience_list parameter of the security integration must match the Audience that you specified while configuring Okta.
create security integration <external_oauth_okta_2>
type = external_oauth
enabled = true
external_oauth_type = okta
external_oauth_issuer = '<OKTA_ISSUER>'
external_oauth_jws_keys_url = '<OKTA_JWS_KEY_ENDPOINT>'
external_oauth_audience_list = ('<snowflake_account_url')
external_oauth_token_user_mapping_claim = 'sub'
external_oauth_snowflake_user_mapping_attribute = 'login_name'

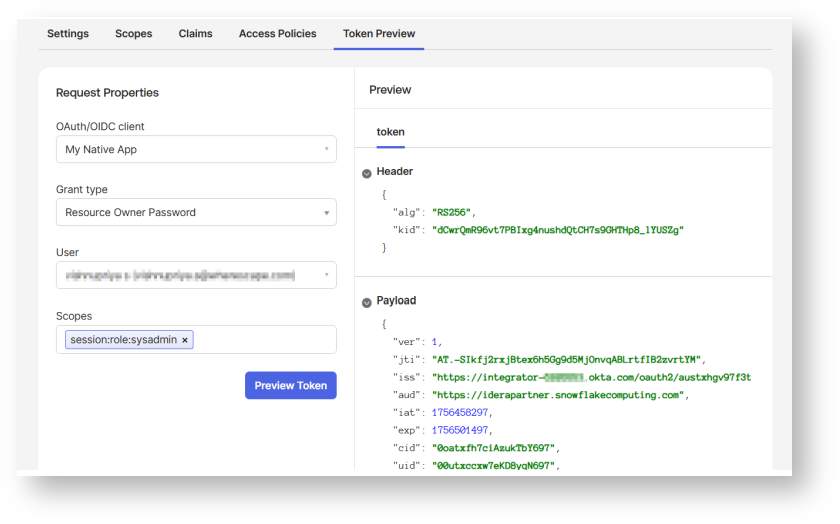
Generate Access Token:
Here is an example for getting an access token using cURL
curl -X POST -H "Content-Type: application/x-www-form-urlencoded;charset=UTF-8" \ --user <OAUTH_CLIENT_ID>:<OAUTH_CLIENT_SECRET> \ --data-urlencode "username=<OKTA_USER_USERNAME>" \ --data-urlencode "password=<OKTA_USER_PASSWORD>" \ --data-urlencode "grant_type=password" \ --data-urlencode "scope=session:role:analyst" \ <OKTA_OAUTH_TOKEN_ENDPOINT>
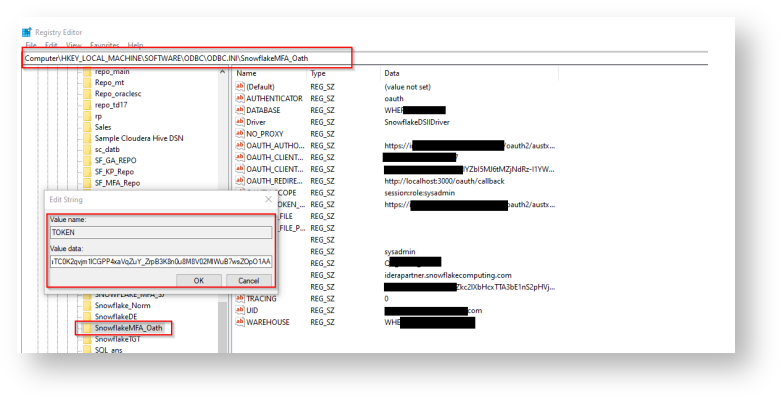
Configure the ODBC DSN:

Add access token Registry Editor by following the below steps:
- Press Win + R, type regedit, and press Enter.
- Navigate to:
Computer\HKEY_LOCAL_MACHINE\SOFTWARE\ODBC\ODBC.INI\ - Locate and select your DSN (Data Source Name).
- Right-click in the right pane and select New > String Value.
- Enter the appropriate field name and value, ensuring they match the required
configuration.
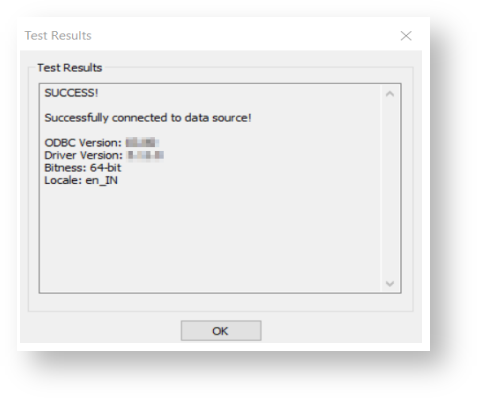
Test the ODBC DSN: