Microsoft SQL SERVER licensing information provided within IDERA SQL Inventory Manager is based on your system information and is only for guidance.
IDERA SQL Inventory Manager gathers information that allows you to determine your SQL Server licensing requirements. The SQL Licensing by Instance view shows information like the instance version, edition, host computer name, CPU name, number of logical and physical processors, and whether the server is virtual. If your instance is using core licensing, this area also displays the number of sockets and cores, the core factor, and possible number of core licenses (number of cores multiplied by the core factor), whether this instance is fully licensed with SA, and a timestamp of the most recent change to the displayed information. To access this view, go to the Instances tab, and then select SQL Licensing by Instance.
To find more information on how to determine Microsoft SQL Server licenses, refer to Microsoft Documentation.
Decommissioned instances do not count against your license. For more information about decommissioning, see Decommissioned instances.
Core Factor is not relevant for SQL Server 2016 and above.
Available options
On the SQL Licensing view, there are multiple options available on the action items bar:
- Add SQL Server instances . Click this option to go to the respective wizard and add new SQL Server instances.
- Export. You can choose any of the following formats: PDF, XLS, or XML for exporting the information displayed on the SQL Licensing view.
- Core Factor Table . Click this option to open the Core Factor Table for viewing SQL Server core-specific information for your instances.

You can type on the bottom section of this view the number of instances you want IDERA SQL Inventory Manager to display per page. Click Refresh to apply the changes.
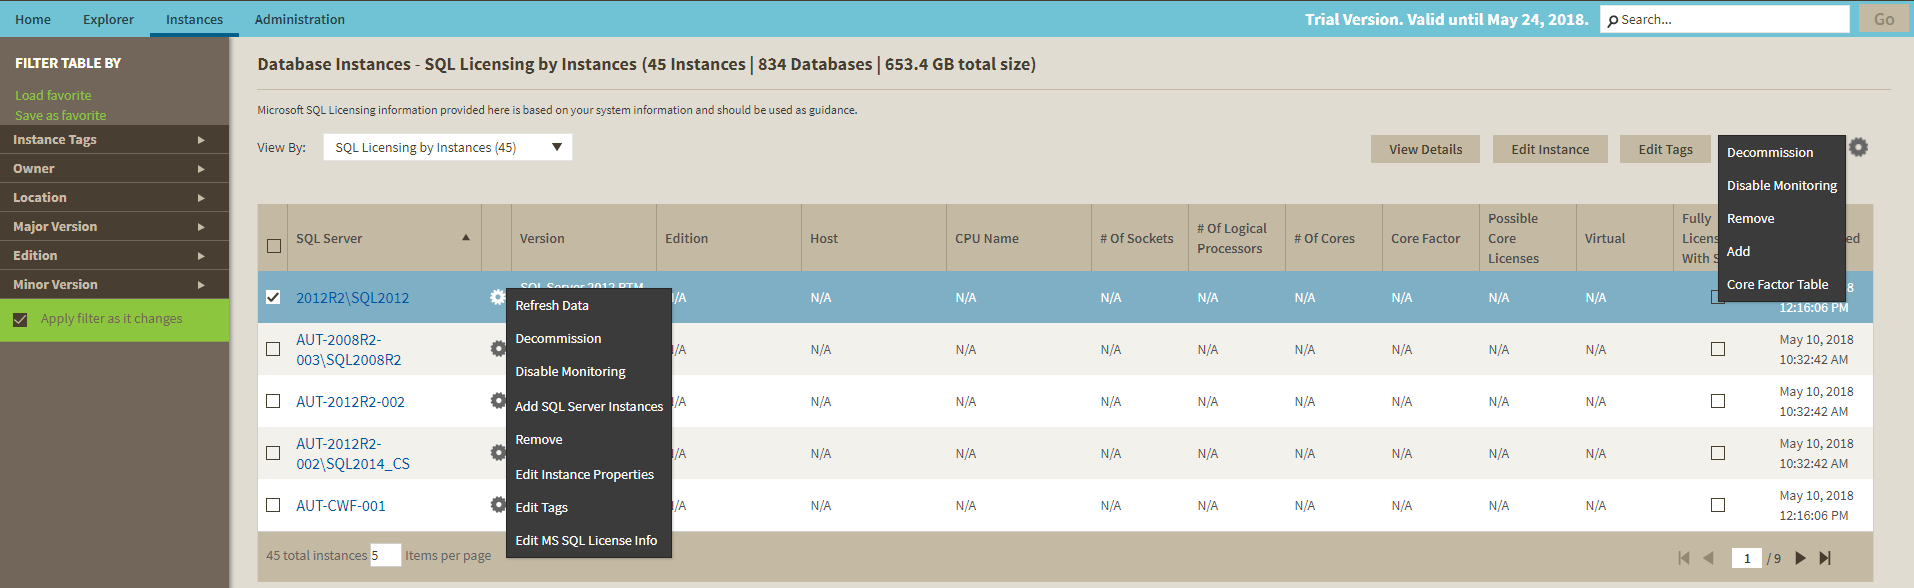
Options available for a single instance
On the SQL Licensing view, IDERA SQL Inventory Manager allows you to perform several actions on a single instance as well as bulk actions on several selected instances.
If you select one instance you can perform the following actions:
- View details
- Refresh data
- Edit instance properties (Owner, Location, Comments and Credentials)
- Edit Tags
- Export
- More actions: Decommission, Disable Monitoring, Remove, Add SQL Server instance, Core Factor Table, and Edit MS SQL license info.
- Advanced Filters
- Clear Filters
You can also access most of these options from the gear icon next to the selected instance. To access the instance details view, you can click directly on the instance name.
Viewing instance details
You can access an instance details view by selecting the instance and clicking View Details on the action items bar or by clicking directly on the instance name. For more information about what information is available on the instance details view, refer to Viewing instance details.
Refresh Data
If you want to refresh the collected data for an instance, select the instance and click Refresh Data  on the action items bar. You can also find this option by clicking the gear icon next to the respective instance. You can only perform this action for one instance at a time.
Edit instance properties
Select an instance and click Edit Properties on the action items bar. You can also find this option by clicking the gear icon next to the respective instance. On the properties dialog window you can change the owner, location, comments, and credentials. For more information go to Editing instances properties.
Edit Tags
By selecting an instance and clicking Edit Tags on the action items bar, IDERA SQL Inventory Manager opens a new dialog window where you can add new tags or change the currently assigned tags of the selected instance. You can also find this option by clicking the gear icon next to the respective instance. For more information about editing tags for a specific instance, go to Manage tags for a single instance.
Export
The export option ![]() allows you to export the information displayed in this view as a PDF, XLS, or XML format.
allows you to export the information displayed in this view as a PDF, XLS, or XML format.
More Actions
You can find additional options under the More Actions button  on the actions items bar. The following options are available under More Actions: Decommission, Disable Monitoring, Remove, Add SQL Server instance, and Core Factor Table.
Decommission
Select an instance and click Decommission under More Actions to stop monitoring and alerting on that instance. You can also find this option by clicking the gear icon next to the respective instance. For more information about decommissioning an instance or database, see Decommissioned instances.
Disable Monitoring
If you want to disable the monitoring of an instance, select the instance, go to More Actions, and select Disable Monitoring. You can also find this option by clicking the gear icon next to the respective instance. For more information about disabling instances, click here.
Add SQL Server instance
If you want to access the Add SQL Server instance wizard, go to More actions and select this option. The wizard opens and allows you to browse and register SQL Server instances.
Remove
If you no longer want to manage an instance, you can remove it by selecting the respective instance, going to More Actions on the action items bar, and selecting Remove. You can also find this option by clicking the gear icon next to the instance. IDERA QL Inventory Manager displays all removed instances on the Ignored instances view. For more information about removing instances, click here.
Core Factor Table
If your instance is using SQL Server core licensing, you can view the current Core Factor Table values by selecting the appropriate instance, clicking More Actions, and selecting Core Factor Table. These values are set by Microsoft and can help you calculate the number of possible core licenses for your physical servers. for more information about this feature, see Using the Core Factor Table.
The SQL Server Licensing view displays the following columns specific to core licensing:
- # of Sockets. Displays the number of cores per processor, whether physical or virtual.
- # of Cores. Displays the sum of all the cores on a system. For example, if a system includes six cores per processor and contains two processors, then the total # of cores is 12. note that the sum does not mix physical and virtual cores but displays each type as a separate line. Check the Virtual column for each row to determine if the core is virtual (displays "Yes") or physical (displays "No").
- Core Factor. Displays a numerical value that determines the number of core licenses necessary. While an administrator can change this value in the Core Factor Table, this number is provided by Microsoft based on the CPU in use.
- Possible Core Licenses. Displays the product of the total number of cores on a system multiplied by the Core Factor.
- Fully Licensed with SA. Check this box to remove the license count for the instance. You can also manage this setting in the Edit MS SQL Server License Information dialog box.
- Last Changed. Displays a timestamp of the most recent change to this record. Changed values include SQL Server major version, CPU name, number of processors, and total number of cores.
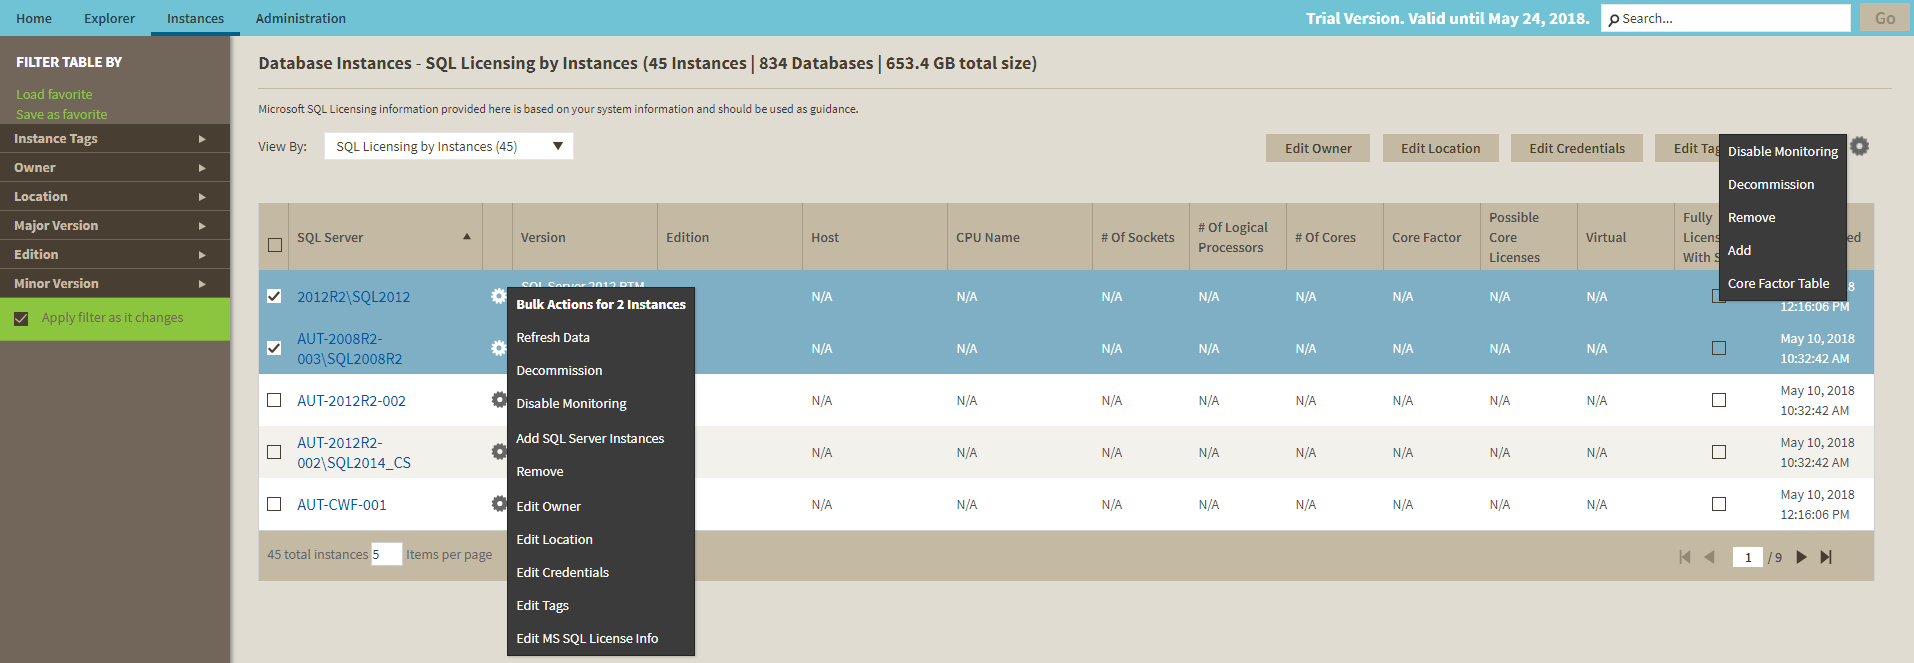
If you select several instances, IDERA SQL Inventory Manager allows you to perform the following bulk actions on the selected instances:
- Edit Owner
- Edit Location
- Edit Credentials
- Edit Tags
- Export
- More Actions (Disable Monitoring, Enable Monitoring, Decommission, Remove, Add SQL Server instances, and Core Factor Table)
For example, if you have a new DBA, you can select all instances on this tab and click Edit Owner to change all instance's owners at once.
Advanced Filter
Apply advanced filters to your instances view, for more information, refer to Filtering and Sorting.
Clear Filters
Clears any applied advanced filters.
Options available for multiple instances
To bulk edit several instances, select the instances you want to change and follow any of these paths:
- Click the option you want to perform on the action items bar: Edit Owner, Edit Location, Edit Credentials, Edit Tags, Export, Disable Monitoring, Decommission, Remove, Add SQL Server Instance, and Core Factor Table.
- Or click the gear icon next to one of the selected instances. IDERA SQL Inventory Manager opens a dialog window that shows you on how many instances you are performing the changes.
Exporting from the SQL Licensing view
On the action items bar of the SQL Licensing view, you can find the Export option, which allows you to choose your preferred format for exporting the information available on this view. You can export it as a PDF, XLS, or XML file. The filters you choose on this view will be taken into account for your exported reports.
Filtering and Sorting
SQL Inventory Manager offers different ways of sorting and filtering the listed instances/servers, for further information, refer to Filtering and Sorting
Tip