Page History
IDERA users in environments that have not yet added a certificate signed by a Certification Authority (CA) receive a warning message in their browser each time they attempt to open the SSL version of SQLDM Web Console or Idera Dashboard. To access SQL Diagnostic Manager over HTTPS with a self-signed certificate you may need to enable SSL on SQL on the SQL Diagnostic Manager Rest service , and add a certificate.
...
Create a self-signed certificate
Before binding a certificate to To access SQL Diagnostic Manager over HTTPS, you should add a certificate for SQLDM Web Console following the steps below:
- Launch Windows Powershell as administrator.
Create your certificate
...
by running the following command. Leave the PowerShell console session open.
Code Block language powershell $certName = "{certificateName}" ## Replace {certificateName}Tip Replace
{certificateName}with the name that you will use to access the SQLDM Web Console. For example, if you are using thehttps://ComputerName:9295link to access SQLDM Web Console, then useComputerName. In case, you are using thehttps://ComputerName.Domain.com:9295address then useComputername.Domain.com.Run the following command to configure your certificate settings.
Code Block language powershell $Params = @{ "DnsName" = @($certName,"{Param1}", "{Param2}") ## If you want to include other addresses or servers, you must separate each with a comma "CertStoreLocation" = "Cert:LocalMachine\My" "KeyExportPolicy" = "Exportable" "KeySpec" = "Signature" "KeyUsage" = @("KeyEncipherment","DigitalSignature") "KeyAlgorithm" = "RSA" "KeyLength" = "2048" "HashAlgorithm" = "SHA256" "NotAfter" = (Get-Date).AddYears(10) } ## Checks for asterisks in the $certName and replaces it with the underscore character If ($certName.Contains("*")) { $certName = $certName -replace '\*','_' }Note Replace
{Param1}and{Param2}with the servers o addresses of your preference. For examplewww.mywebsite.com,mywebsite, ormywebsite.comIt is not mandatory to add more than one parameter for theDnsName.Tip Change the
NotAfterparameter value to make your certificate valid for a more extended period.Run the command below to create your certificate defined with the parameters above.
Code Block language powershell $cert = New-SelfSignedCertificate @Params
| Anchor | ||||
|---|---|---|---|---|
|
Once the certificate is created, you need to export the certificate's private key. To do so, follow the steps below:
Export your certificate in .cer format by running the following command.
Code Block language powershell Export-Certificate -Cert $cert -FilePath "{DesiredPath}\$certname.cer" ## Replace {DesiredPath} with the desired location e.g. C:\Users\Public\DocumentsOnce the certificate is created, you should be able to check the certificate specifications.
Create a password for your certificate private key and save it in a variable. Replace
{myPassword}with the password that you wish to use to protect your certificate's private key.Code Block language powershell $mypwd = ConvertTo-SecureString -String "{myPassword}" -Force -AsPlainText ## Replace {myPassword}Run the next command to export your private key, use the password you store in the
$mypwdvariable.Code Block language powershell Export-PfxCertificate -Cert $cert -FilePath "{DesiredPath}\$certname.pfx" -Password $mypwd ## Replace {DesiredPath} with your desired location e.g. C:\Users\Public\DocumentsWhen the private key is exported in a .pfx file, you should be able to check the certificate specifications.
Import your certificate private key into the Trusted Root Certification Authorities
Complete your certificate configuration by adding the .cer file to the Trusted Root Certification Authorities folder in the Console Root. To do so, follow the steps below.
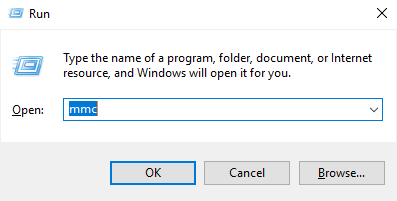
- Open the Microsoft Management Console (MMC) by selecting Run from the Start menu, type "mmc", and click OK.
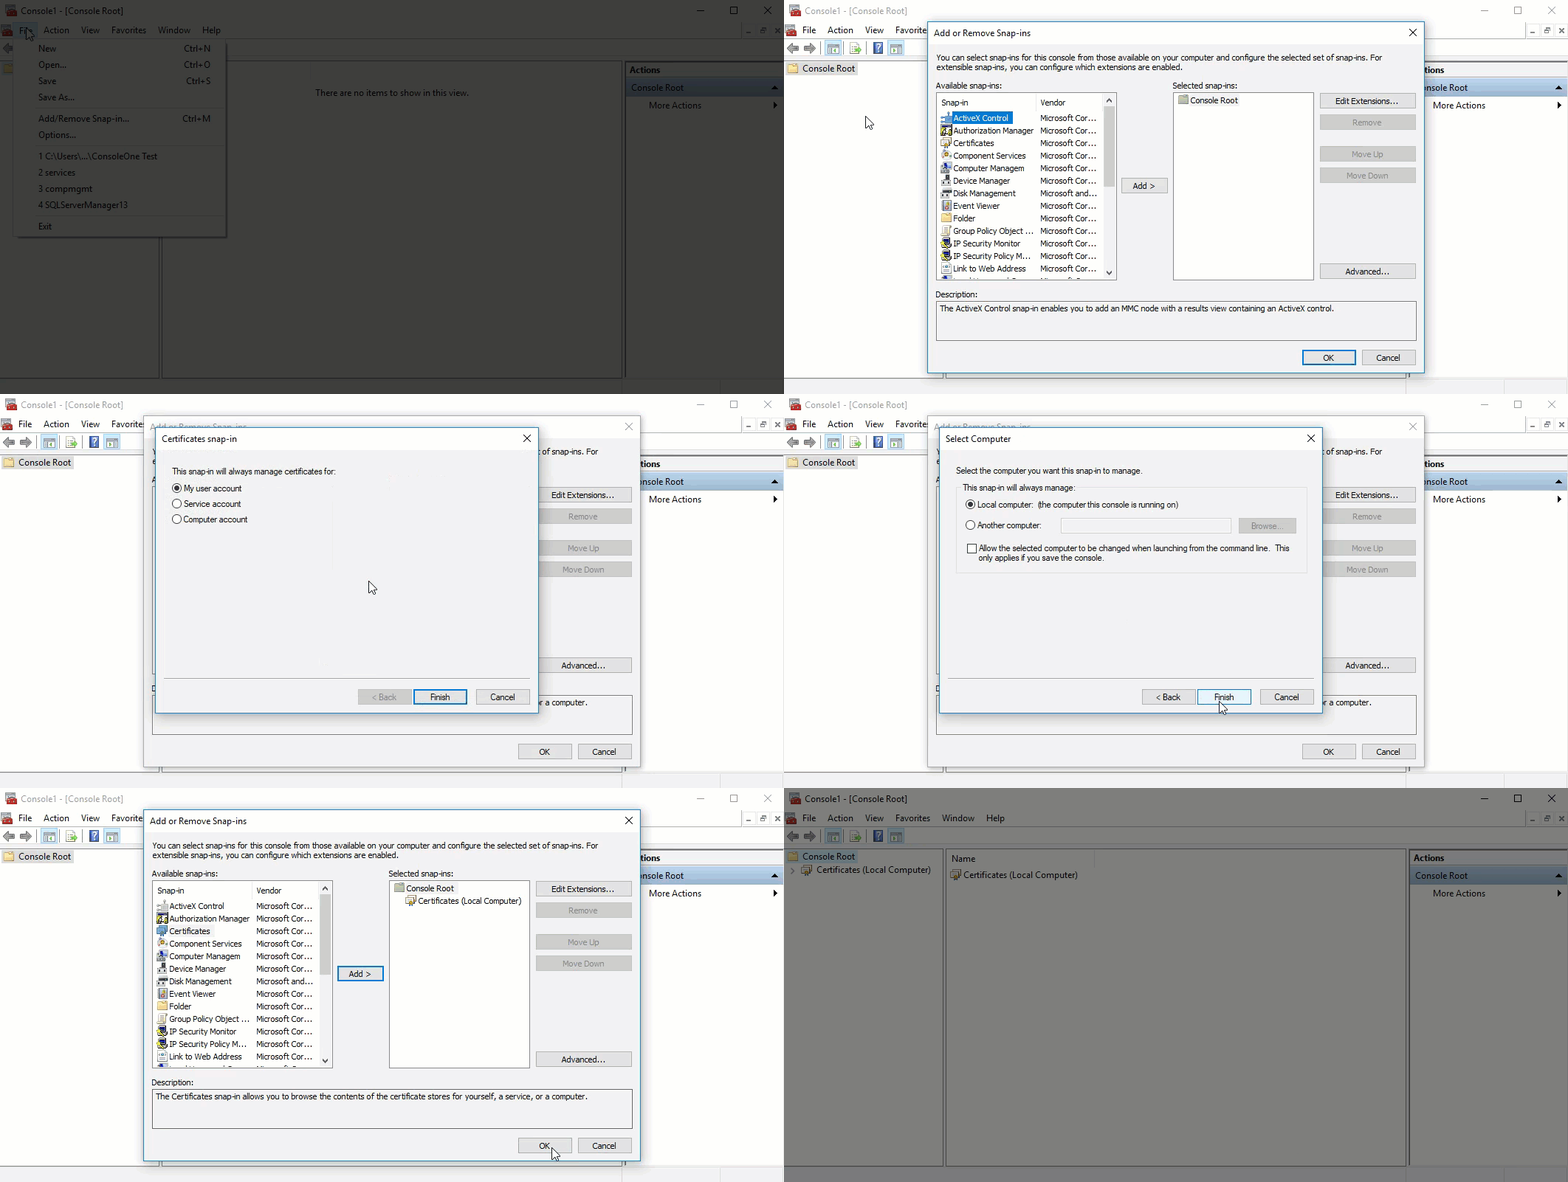
- When the MMC window opens, click File from the menu toolbar, and select Add/Remove Snap-in...
- The Add or Remove Snap-ins window opens, select Certificates from the Available snap-ins options and click Add >.
- In the Certificates snap-in window, selectComputer Account, and click Next.
- In the Select Computer window, verify that the Local computeris set as the computer you want the snap-in to manage. Click Finish.
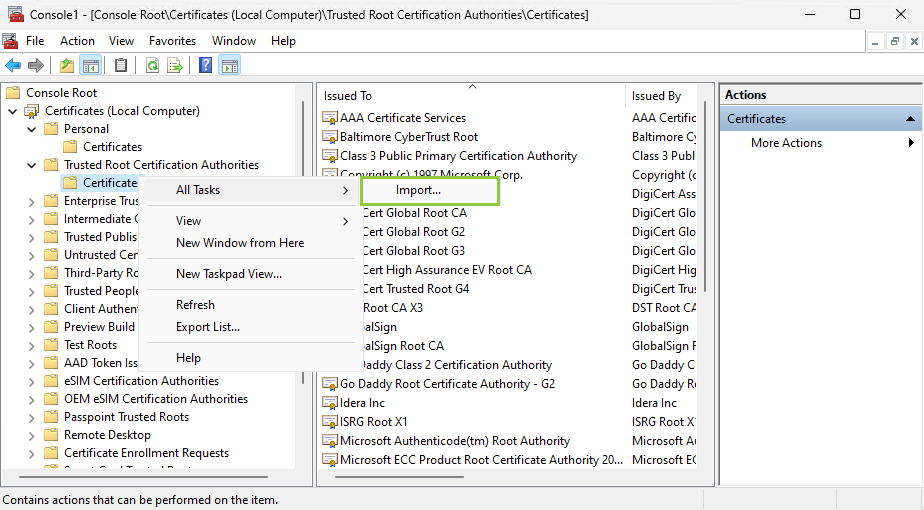
- Once done, import your certificate (
.cerfile) into theTrusted Root Certification Authorities folder. To do so, expand the Certificates node, from the Console Root tree and right-click the Trusted Root Certification Authorities folder, select All Tasks, and click Import...
When theCertificate Import Wizard opens, follow the instructions to import the
.cerfile previously created.Info When adding your certificate private key using the Certificate Import Wizard, use the password you previously defined in the Export your certificate private key section.
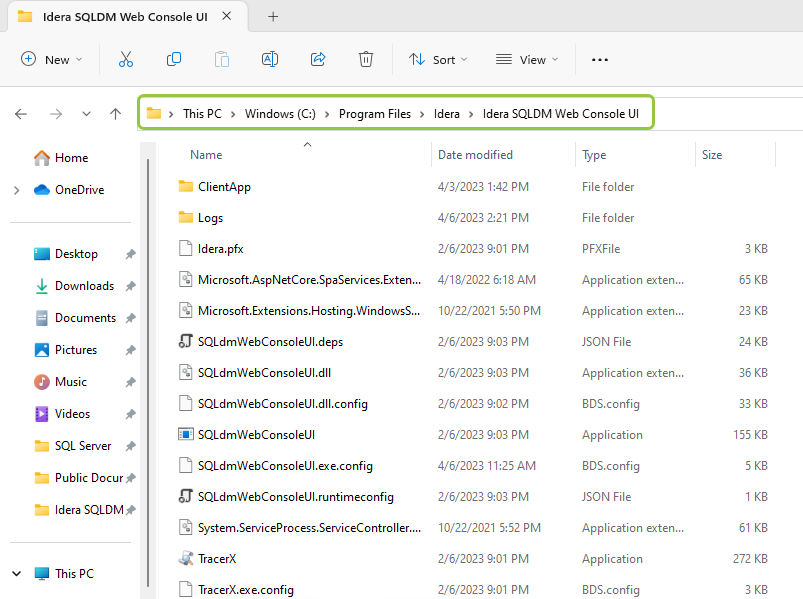
Once the steps above are completed, copy the
.pfxfile into the Idera SQLDM Web Console UI directory.
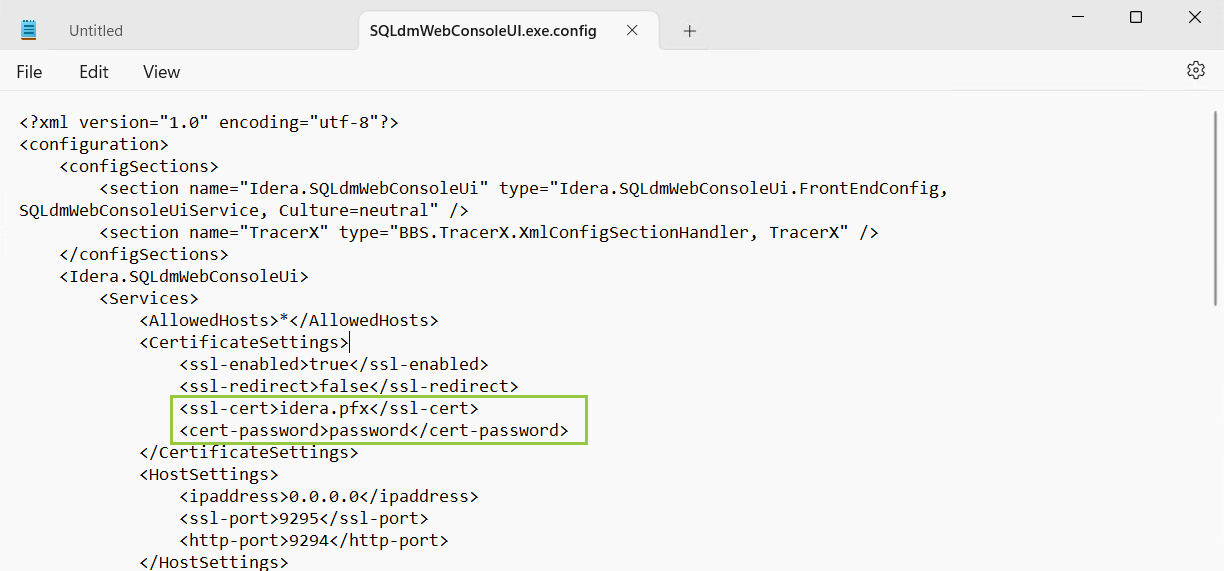
Open the SQLdmWebConsoleUI.exe.config file using any text editor, which should be launched using the Run as administrator.
- Look for the
ssl-certand thecert-passwordtags and update them with the name and password of the certificate previously created. - Close all the opened browsers.
- Restart the Idera SQLDM Web Console UI Service and you are ready to access your SQLDM Web Console through the following address
https://<certificateName>:9295/
| Info |
|---|
In case you are working with Idera Dashboard, add a self-signed certificate as you have already completed the steps above, you only have to import the certificate key pair with Key Store Explorer. For more information about it, refer to Resolving the certificate error message. |
Binding a certificate to SQL Diagnostic Manager
| Note | ||
|---|---|---|
| ||
This section is only for users who use the Idera Dashboard Web Console. |
After creating a self-signed certificate for the Dashboard found in the Resolving the certificate error message pageIdera Dashboard, follow these instructions to bind a certificate to SQLDM:
...


