The Users section of the Idera Dashboard Administration view allows users to grant access to other team members or groups, and manage their roles. For more information about user roles, see Understanding user roles. Users with administrative privileges are divided into two groups:
- Dashboard administrators - capability to manage access over Dashboard functions as well as individual product functions.
- Product administrators - capability to grant access to individual products for which they have administrative rights.
Users must be existing Active Directory users. Newly-added users should use their Windows user account with their respective passwords to log in to the SQL Inventory Manager.
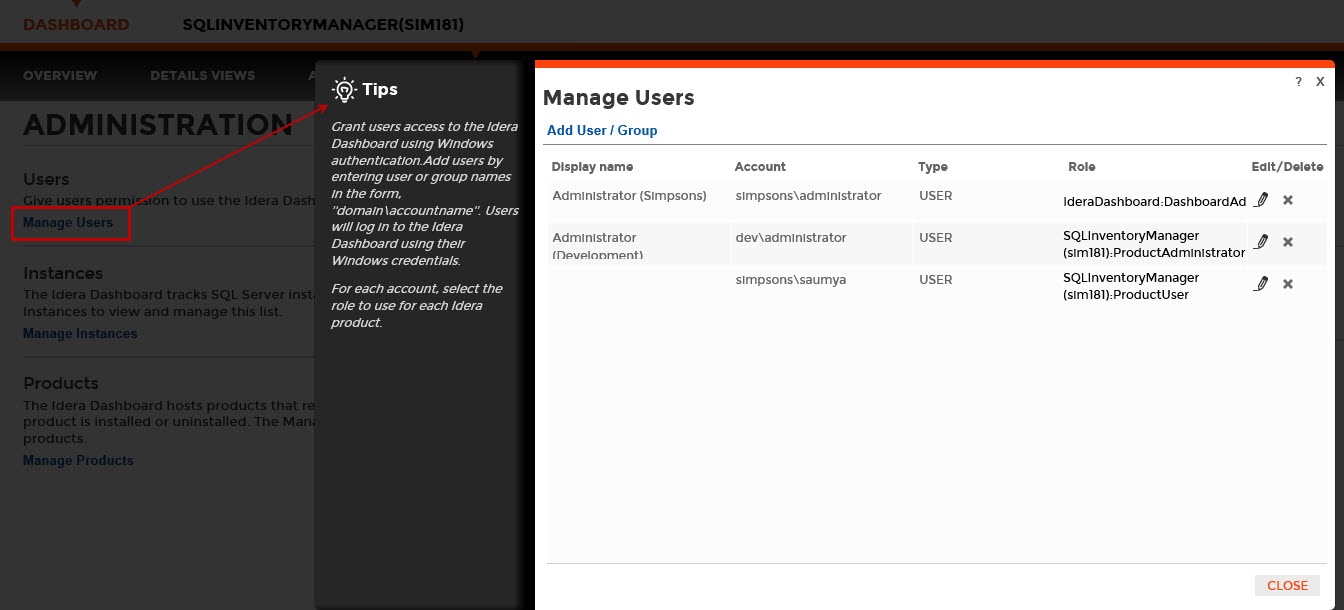
To add new users, edit their details (name, subscription, or email address), or remove them, select Manage Users in the Administration view, and the Manage Users window displays:
Adding a user in the Idera Dashboard
In the Idera Dashboard, access is granted to Windows users or groups. Use the following steps to add a user account:
- Click Add User / Group. Idera Dashboard displays the Add User/Group dialog.
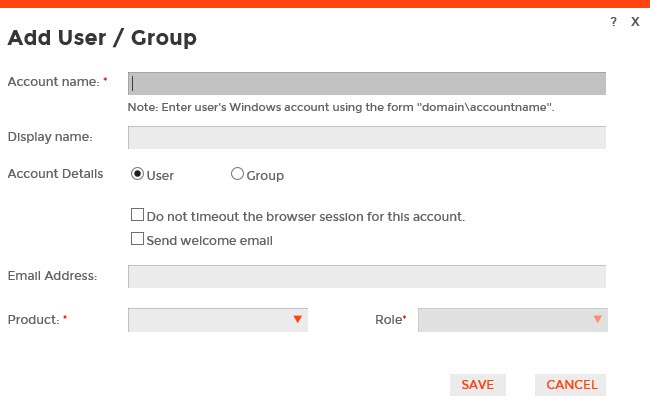
- Type the name of the user to which you want to grant access. Enter a Windows user name in the format <domain\accountname>.
- Optional. In the Display name field, type the common name you want SQL Inventory Manager to display when in use.
- In the Account Details field, select User or Group.
- Optional. Check Do not timeout the browser session for this account if you want the user to be able to remain logged in to SQL Inventory Manager after a period of inactivity.
- Optional. Check Send welcome email to provide the new user with an email message containing information about the product and URL for the Idera Dashboard console.
- Type the email address where you want the system to send alert email messages to this new user account.
- In the Product field, select the product name to which you want to add this new user account.
If you select Idera Dashboard in the Product field, the Role field allows you to select from the Dashboard Administrator and Dashboard Guest roles.
If you select SQL Inventory Manager in the Product field, the Role field allows you to select from the Product Administrator, Product User, and Product Guest roles. - In the Role field, select the role you want to assign to this new user account. For more information about the permissions available to each user role, see User role permissions.
If you want to add more roles to this user account or group , click ADD MORE. Idera Dashboard displays additional Product and Role fields for you to add another role. - Click SAVE.
Editing a user in the Idera Dashboard
Clicking the Edit icon for an existing user account allows you to edit the account name, enable or disable the user account, and add new permissions. Use the following steps to edit a user or group:
- In the list of users, click the Edit icon for the user account you want to edit. Idera Dashboard displays the Edit User/Group dialog.
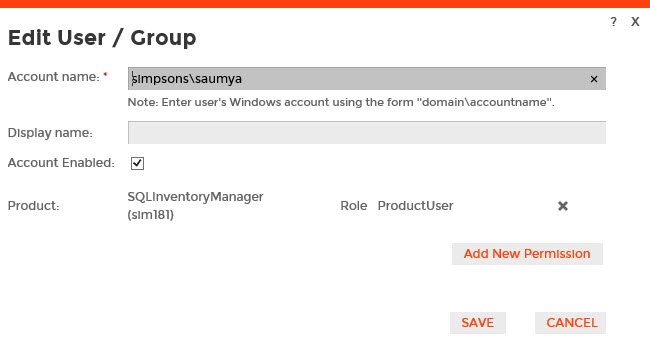
- Make the necessary changes. If you want to add more roles to this user account or group , click Add New Permission. Idera Dashboard displays additional Product and Role fields for you to add another role.
- Click SAVE.
Removing a user from the Idera Dashboard
Clicking the Delete icon for an existing user account or group allows you to remove that account from access to the Idera Dashboard. Use the following steps to delete a user or group.
- In the list of users, click the Delete icon for the user account or group that you want to delete. Idera Dashboard displays a warning message that requires a confirmation whether you want to delete that selection.
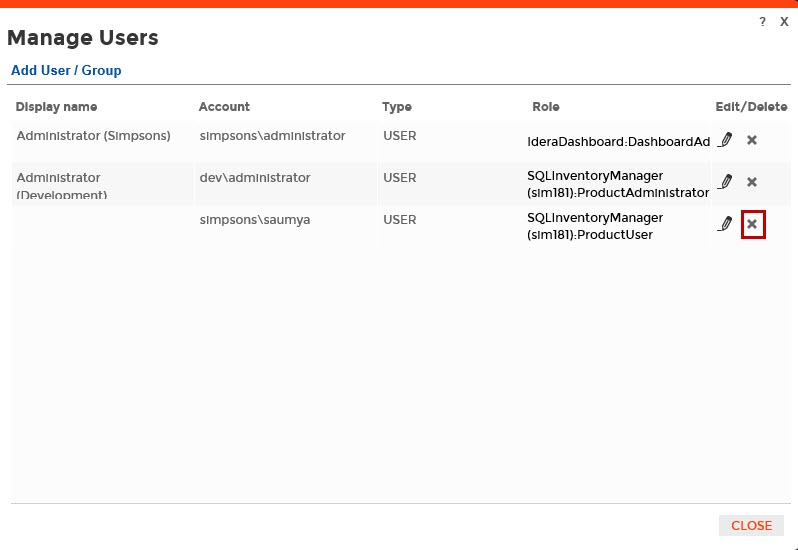
- Click Yes. Idera Dashboard removes the user account or group and they can no longer access the Idera Dashboard using the account. If you did not mean to delete the selected account, click No.
Need more help? Search the Idera Customer Support Portal.